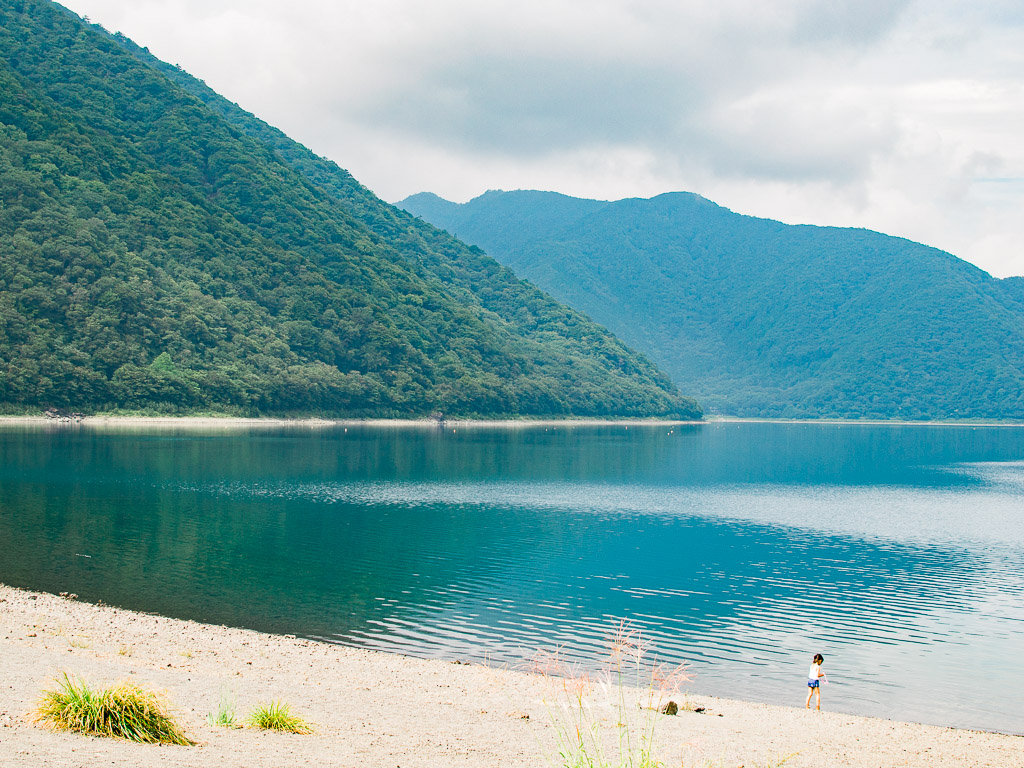
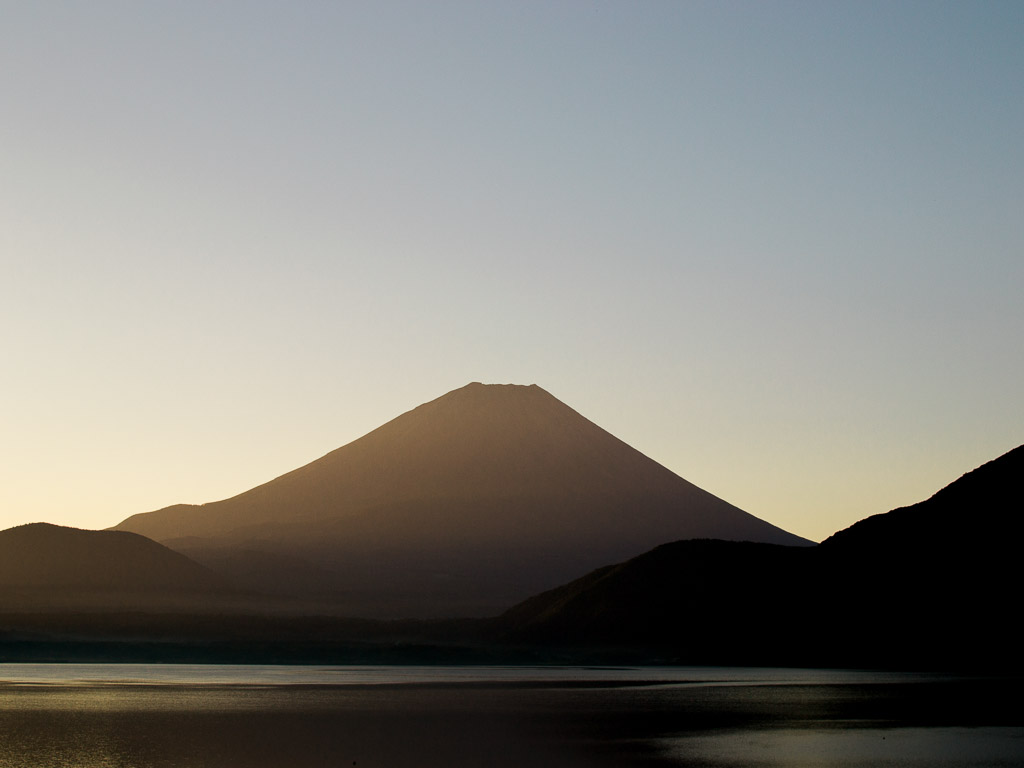
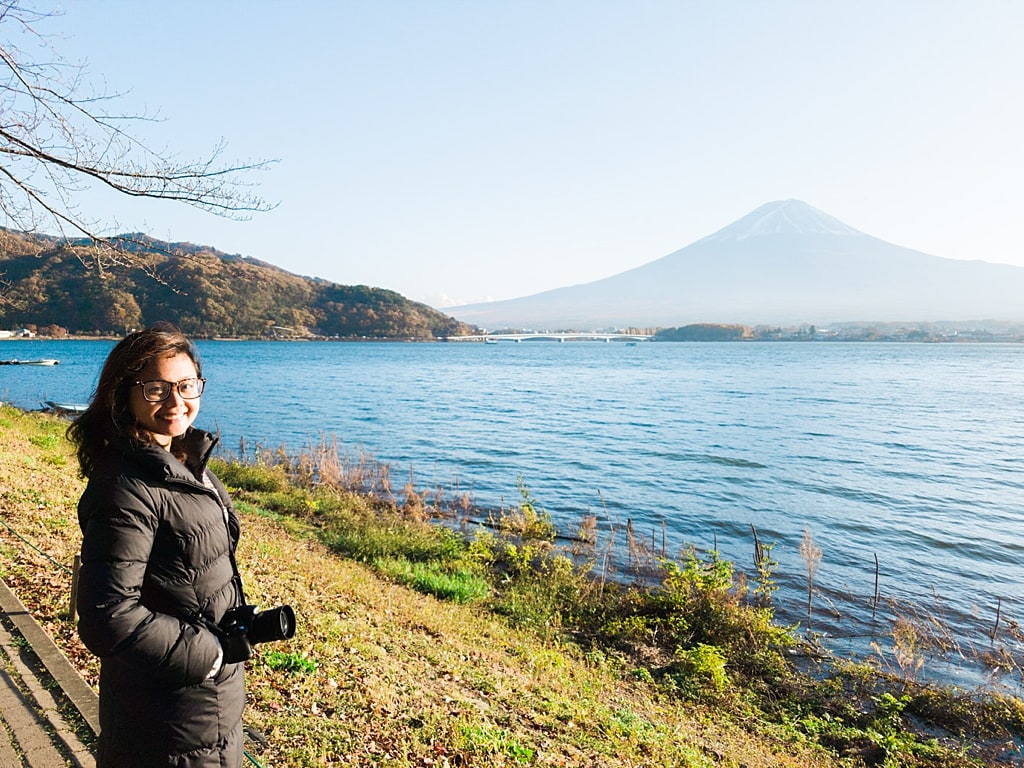
Lake Motosu is the deepest and third largest lake of the Fuji Five Lakes. Lake Motosu, Lake Sai, and Lake Shoji are actually connected underground. If you’re interested in sightseeing Fuji Five Lakes, we recommend that you read our guide to Lake Kawaguchi with detailed itineraries.
Lake Motosu, as we found out pretty quickly, is surrounded by various campgrounds each offering most of the same services. Most of the camps were filled with large groups of folks escaping the hustle and bustle of busy Tokyo life and families wanting to be a bit closer to nature.
One very difficult thing about camping in Japan as a foreigner is the distinct lack of information about campgrounds online and a complete lack of English-speaking bloggers as well.
Because of this and our unfortunate lack of Japanese language skills, we were forced to rely completely on Google maps for reviews and information. We were lucky enough to find a few English reviews about the two most popular campgrounds around lake Motosu — the Motosuko Camp-Jo and Koan Camping Grounds.
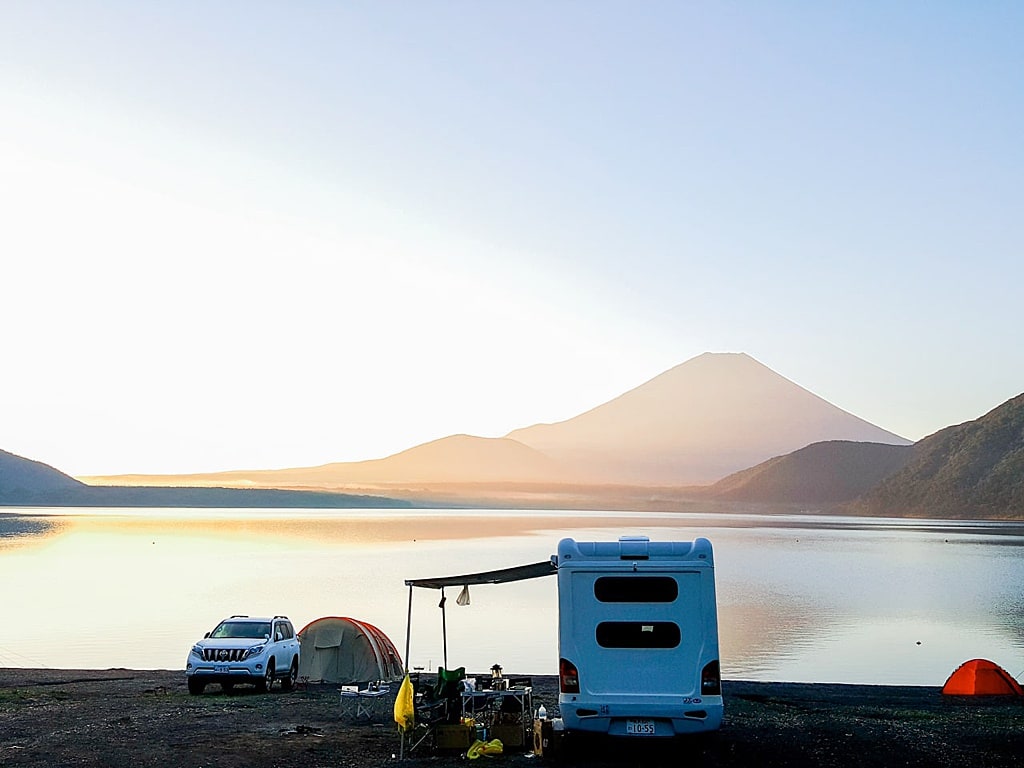
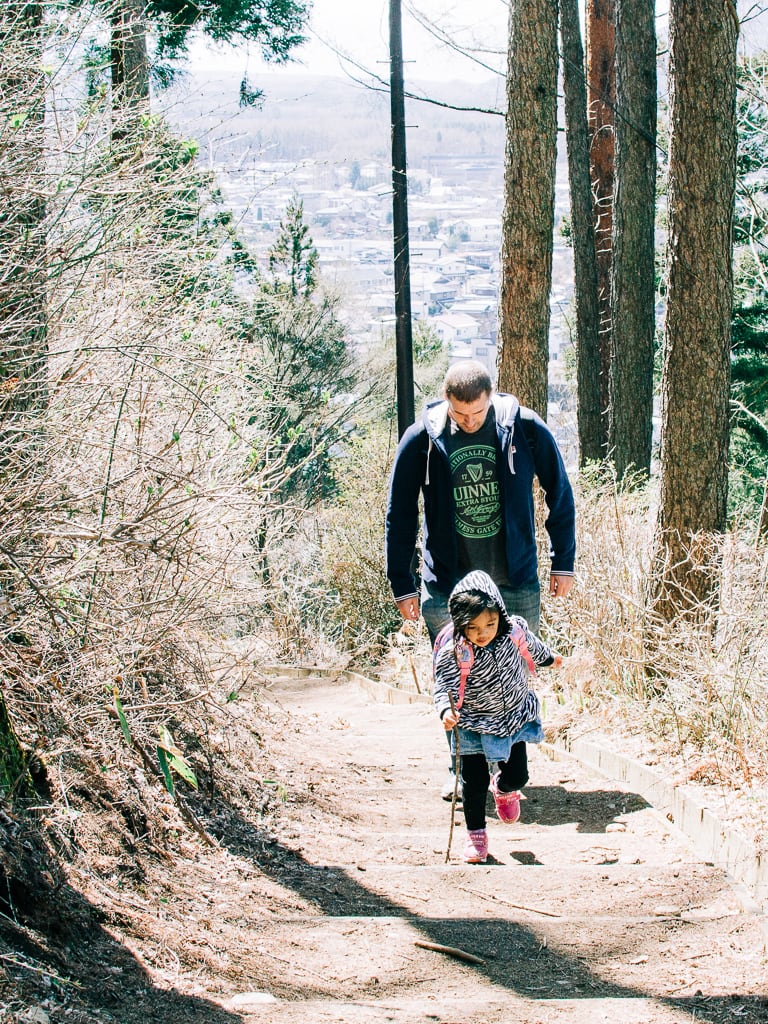
We decided to set out and see the two campgrounds for ourselves and here’s our experience. We spent our first night at Motosuko Camping Ground also known as Motosu Camp-Jo and the second night at Koan camping ground.
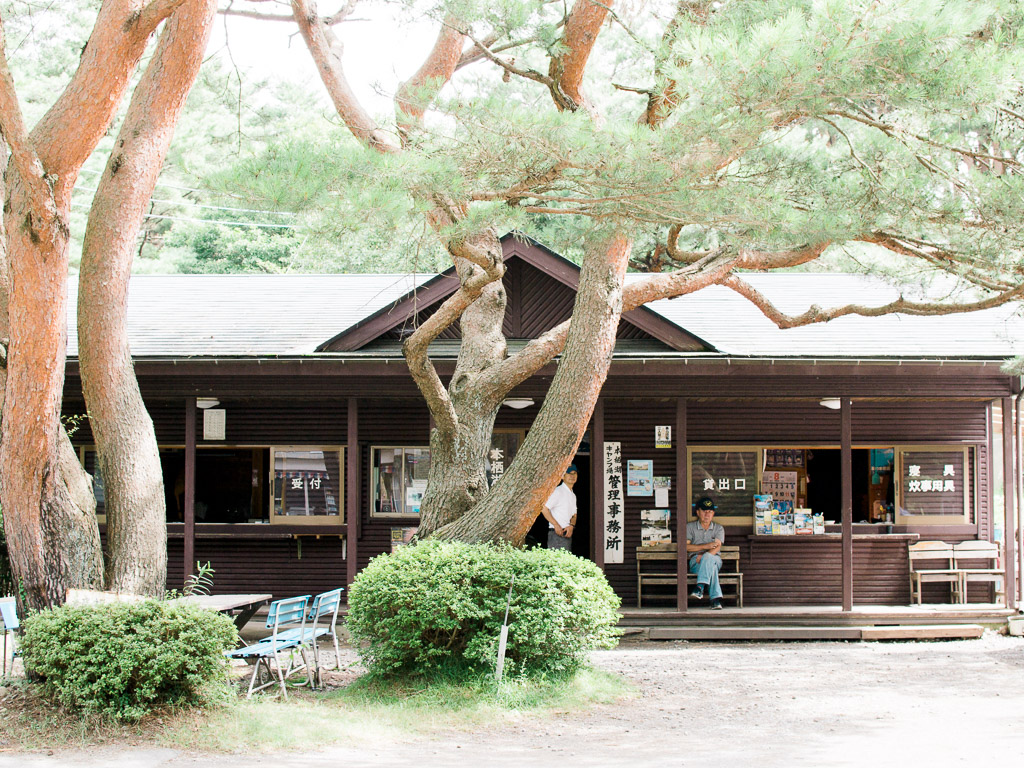
Motosu Camp-Jo
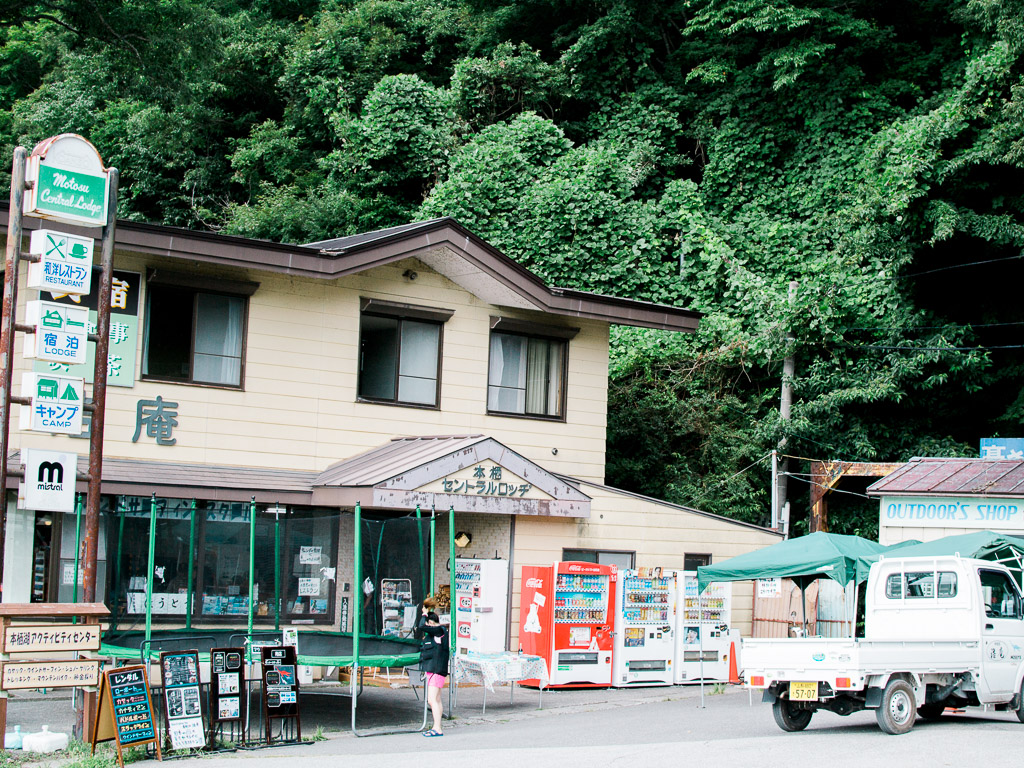
We picked Motosu Camp-Jo for our first night because you can camp anywhere, park anywhere, and show up anytime you want (and also because Koan was closed by the time we arrived). The ground itself was much larger than Koan and nestled in the woods near the lake.
According to their website (website no longer exists), a tent site is ¥3,000 per 2 persons, and the parking fee is ¥1,000 for overnight camping use. If only staying for a day camp, it’s ¥500 per person, plus ¥500 for the tent site.
However, when we showed up to the main office lodge to pay, no one showed up or offered us any assistance. We were instead greeted with strange looks which is very abnormal for the Five Lakes area, as it seems to have a pretty pronounced European influence.
So, feeling completely out of place and unwanted, we decided to simply leave and moved to Koan Camping Ground.
Koan Camping Ground
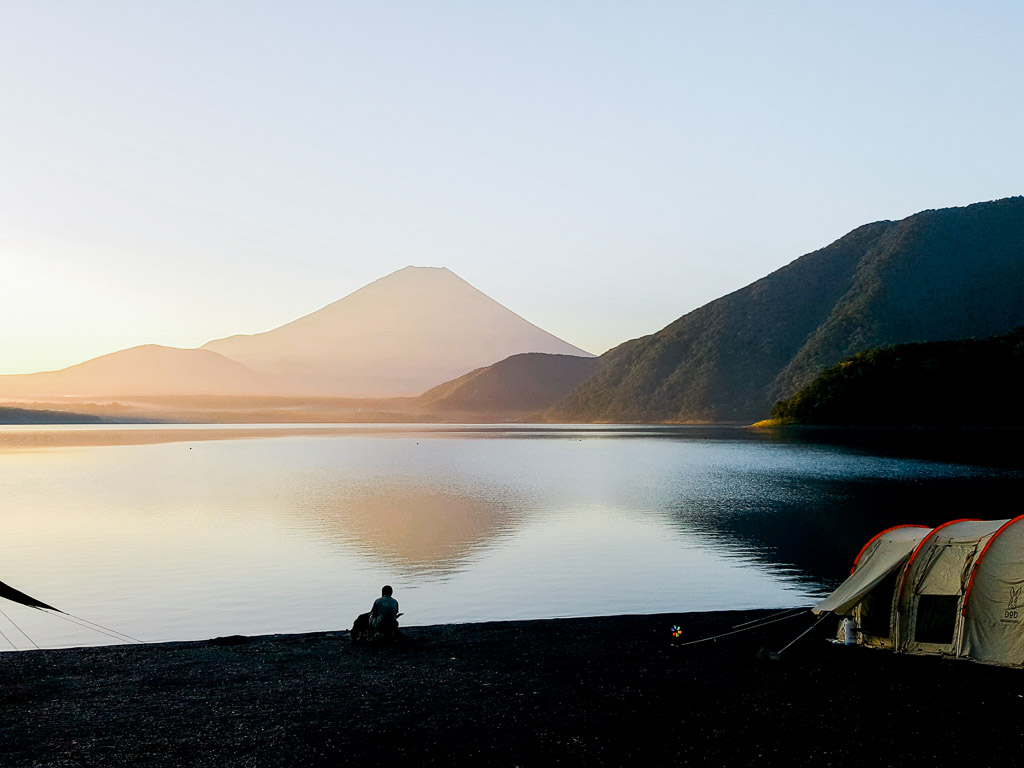
The Koan campground itself offers a much more beautiful view, as it directly faces Mt. Fuji and has lakeside access. A base fee of ¥1,000 yen each, an entrance fee of ¥600 yen each, and a parking fee of ¥1,000 yen.
So for two people, we paid a total of ¥3,600 per night. The camping fee overall at Koan is a little bit cheaper than Motosu Camp-Jo, however, the Koan campground is also very restrictive. For more information, click here to visit their website.
For example, the vehicle gate closes at 8 p.m. So make sure you have everything you need for food before the gate closed because you can’t leave after that point.
There were also a number of rules which didn’t make a lot of sense at this site and seemed to be universally ignored by all campers. Some of these WEIRD rules included, “absolutely NO swimming” at a lakeside campsite, no entering the water without a lifejacket — did they forget the previous rule?
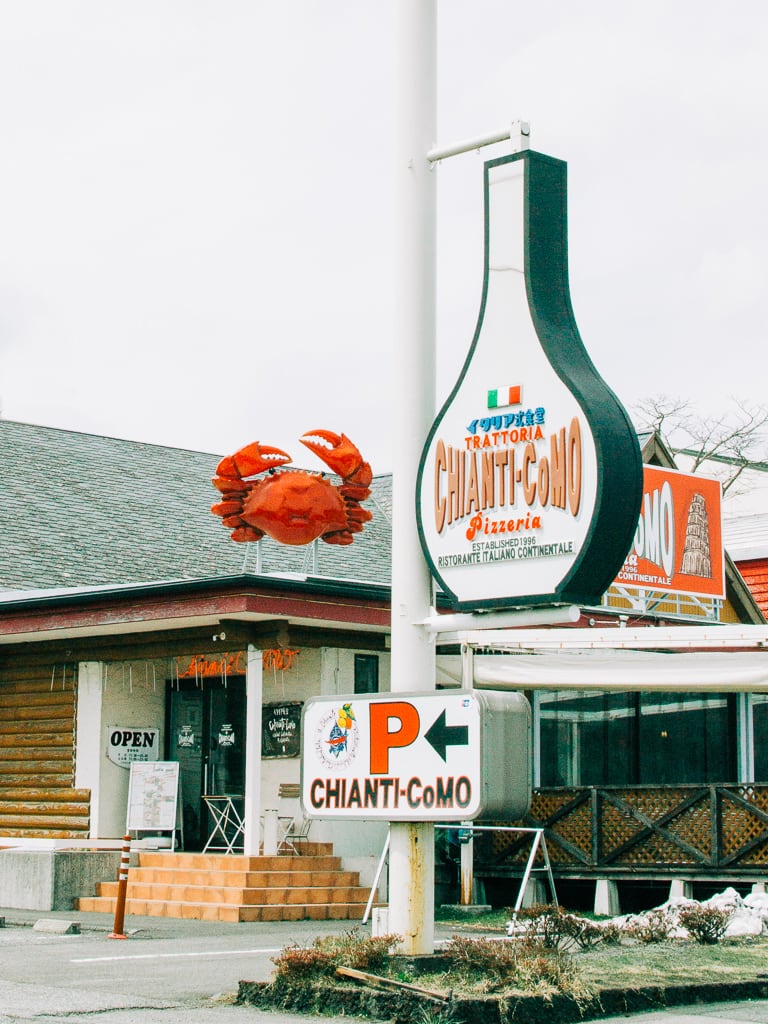
No motorboats, no privately owned boats, kayaks, canoes, or watercraft can be used, and a few more ridiculous rules which were also completely ignored. Another important piece to remember is that unlike camping around Kawaguchiko or Yamanakako when camping at Motosuko, there are NO nearby grocery or convenience stores.
The closest convenience store we found was located next to Shojiko and we didn’t find any nearby grocery stores. So make sure you have ALL your food and toiletries before arriving. Otherwise, be prepared for a minimum 20-minute drive one-way and eating a whole lot of cup noodles as we did.
Things to do besides camping
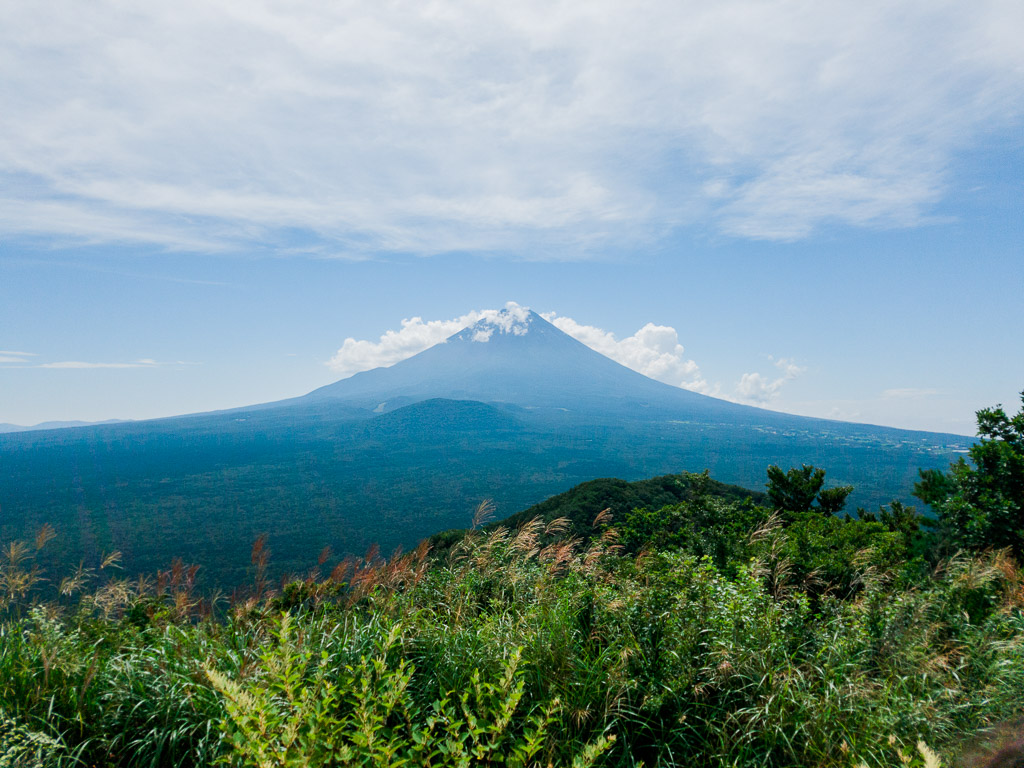
As for activities, Motosuko is almost exclusively camping, kayaking, and hiking experience. And since Lake Sai and Lake Shoji were nearby, we decided to check them out.
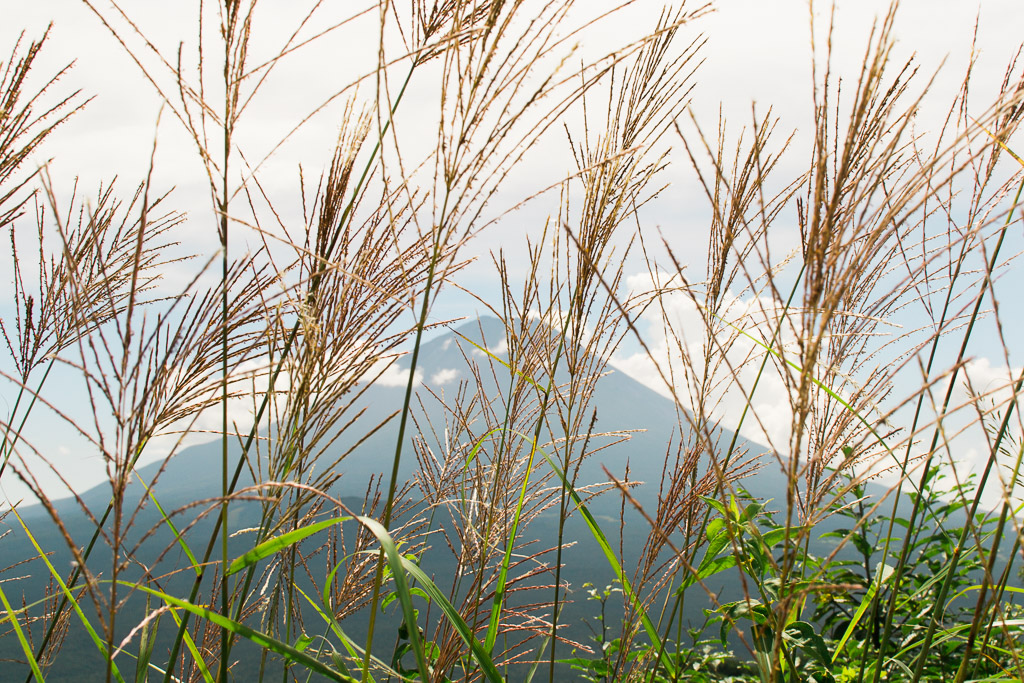
1. Aokigahara Forest or “Sea of Trees” in Lake Saiko
Do you see what I see?
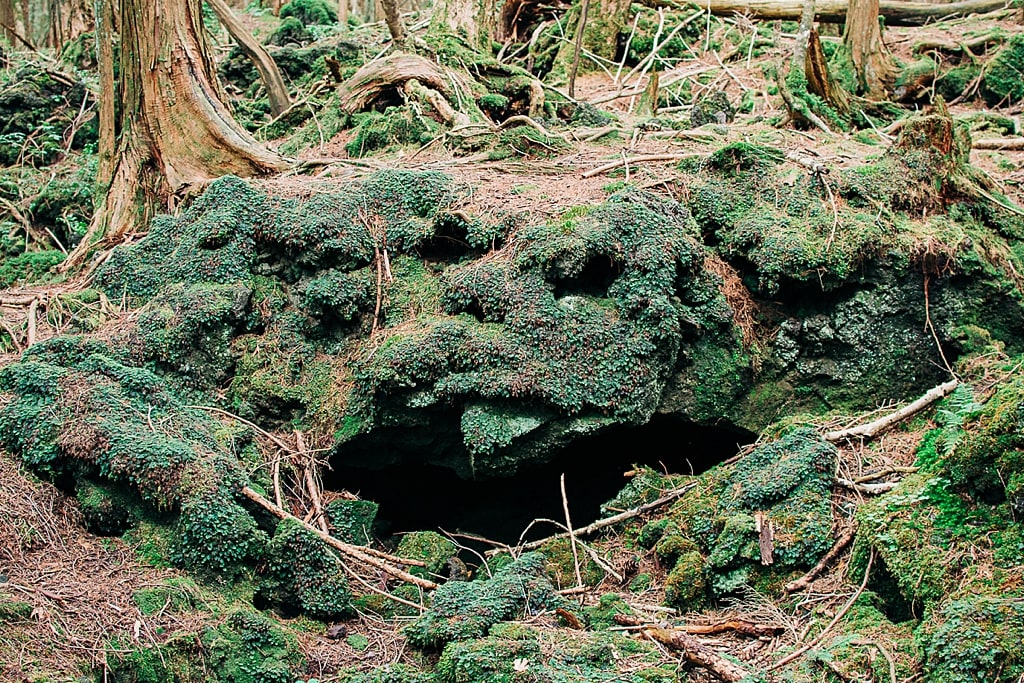
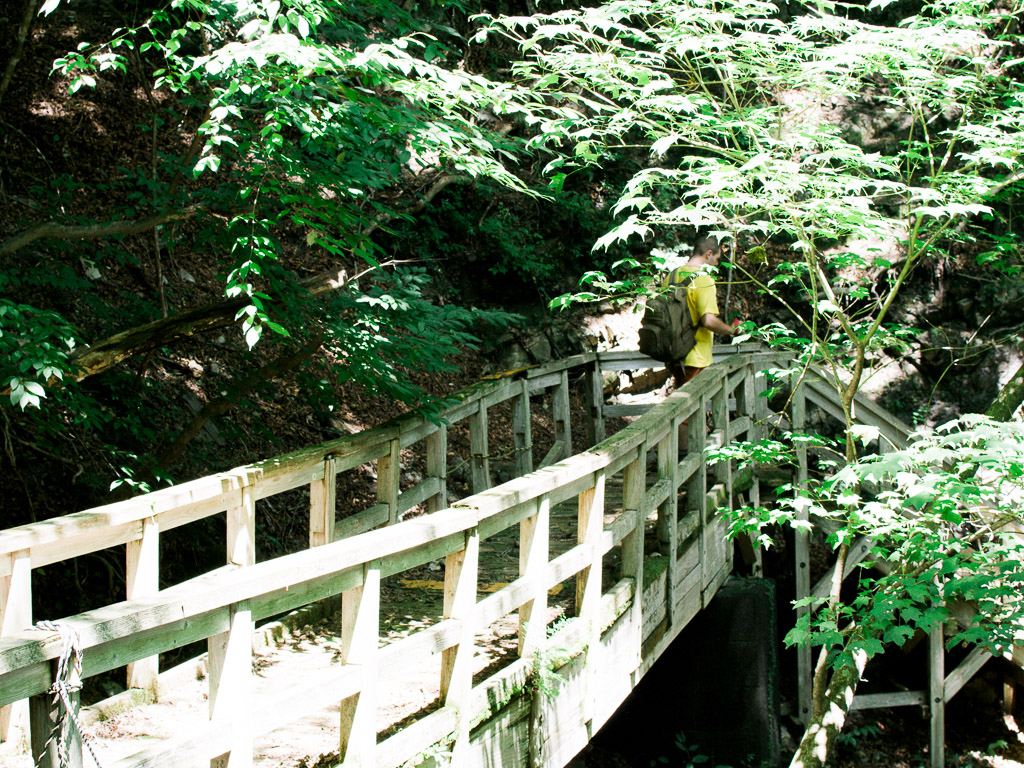
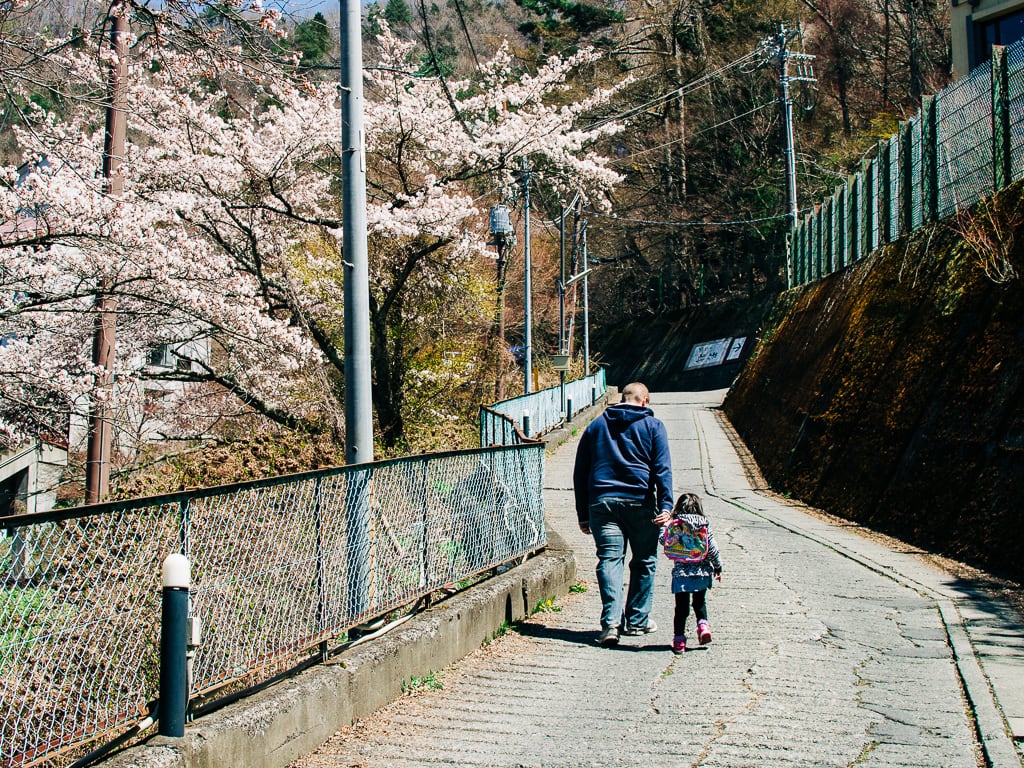
We packed up and left the Koan campground just before our check-out time and decided to set off to Lake Sai for the infamous Aokigahara Forest, better known as “Sea of Trees.” There are two safe entrances to begin your forest adventure — the Narusawa Ice Cave and Fugaku Wind Cave.
The two are in different locations, so just choose one. For us, we chose the ice cave because of the plentiful parking. Basically, the trails of the Aokigahara forest connect the ice and wind caves. So if you don’t have a car, you can start at the wind cave, walk through the Aokigahara forest, and exit at the ice cave.
The walk from the ice cave to the wind cave through the Aokigahara forest is about 20 minutes. But for us, since we had our car parked, instead turned around and went back to the ice cave.
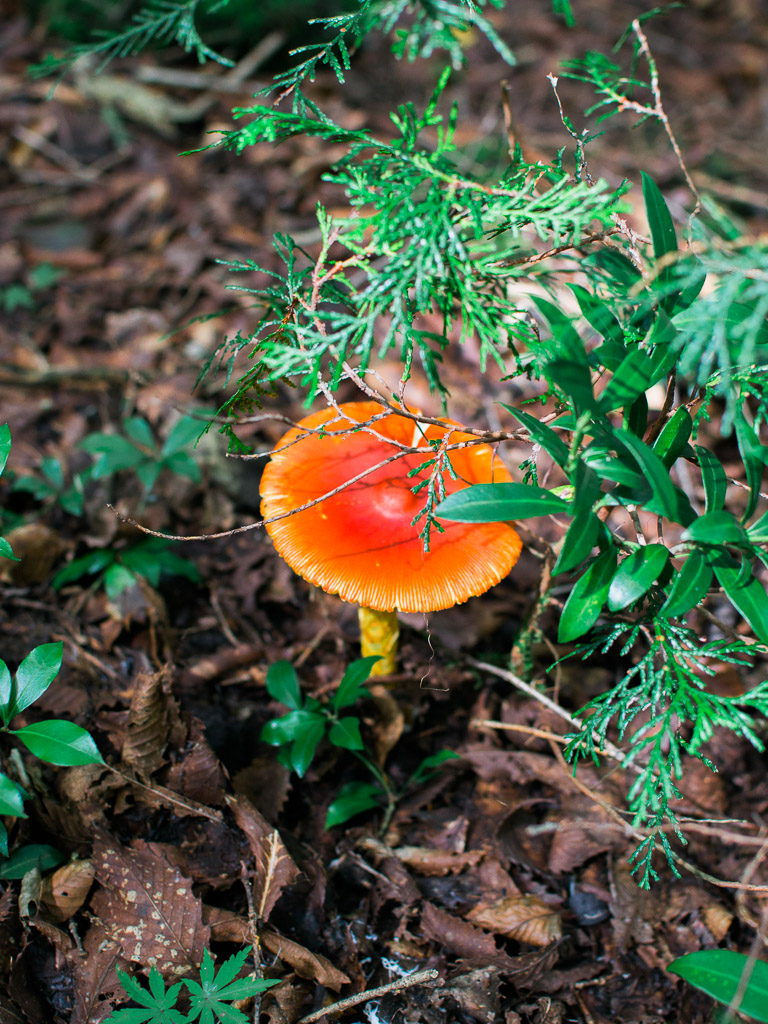
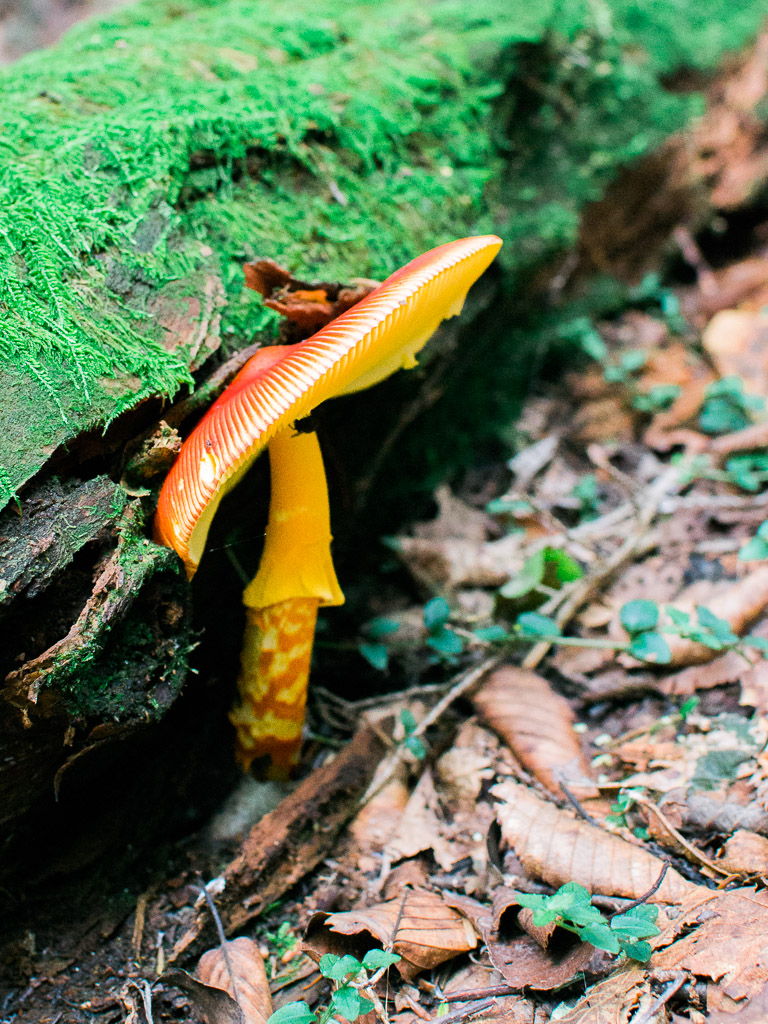
All in all, we were in Aokigahara Forest for 50 minutes because my husband was also trying to decrypt the names and side effects of mushrooms we saw along the walk. Aokigahara is both beautiful and creepy, and if you’re interested in seeing it for yourself, you should definitely join a nature local guide.
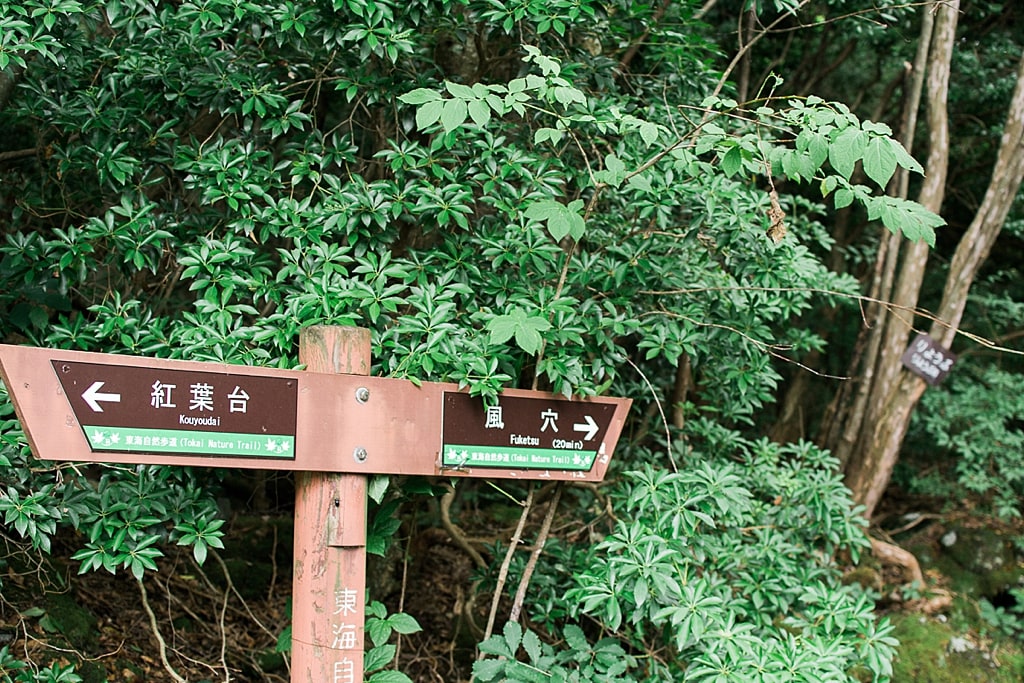
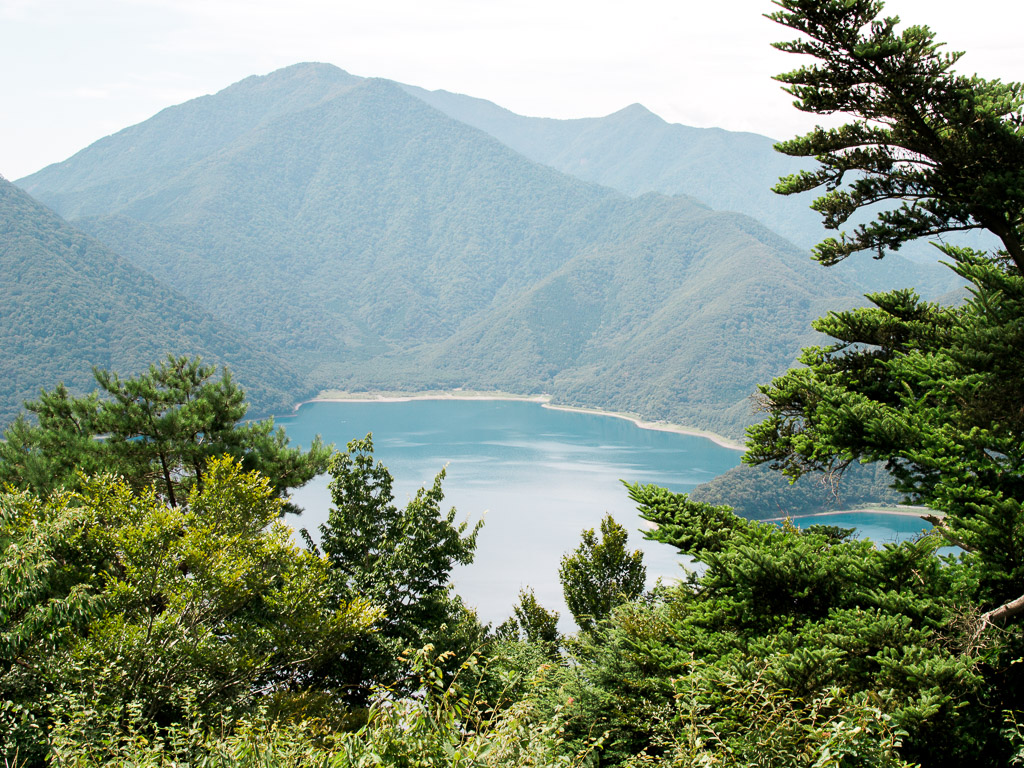
2. Panorama Dai in Lake Shoji
Panorama Dai is an observation deck that can be reached by hiking from Lake Shoji.
If commuting, one must ride the Blue Line bus from Kawaguchiko Station to Lake Shoji and stop at Panorama-dai Shita bus stop (about 40 minutes bus ride). However, I don’t really recommend going there by bus, as the bus only frequents the area every 2-3 hours.
From what I saw of the bus schedule, the bus only goes to Panorama Dai bus stop 4-5 times a day. So you really need to drive or rent a car when going to Lake Shoji for Panorama Dai, in order to avoid the hassle of waiting and worrying about the time you should get back to ride the bus back to Kawaguchiko.
That said, there’s a small parking area just in front of the Panorama-dai Shita bus stop.
Do not search for ‘Panorama Dai’ on Google maps because it will take you nowhere, use this Google maps pin to get to Panorama Dai (now you don’t need to drive around for an hour looking for it like us!)
I imagine in peak seasons like spring or autumn, that the parking area will be full. If this is the case, you’ll have to park your car somewhere around the lake, then walk for 15-20 minutes just to get to the starting point of the hike.
The signboard says that to reach the Panorama Dai takes about 50-minutes, but it took us more than an hour to reach the top as I took a lot of rest stops. My body really seems to have trouble handling long hikes since having a baby.
I figured that I may not be able to climb Mt. Fuji this year. (Update, I actually did manage to climb Fuji this year… never again, lol). For more information, read our article about climbing Mt. Fuji with a tour guide.
The hike to the top reminded me of other mountains I’ve hiked nearer to where we live (Takatori-yama near Miyagase Lake). Mountains in Japan look so alike after all. Since they look so much alike, I became concerned that land-leeches (yes, those exist, I was surprised too) were also present in the area.
Thankfully, there didn’t seem to be any leeches on this particular mountain, so we avoided this fear of mine. After more than an hour hike, we finally reached the top–the Panorama Dai observation deck. The view was absolutely AMAZING and is only beaten by the summit of Fuji itself.
Although, you could easily argue that it’s even better since you’re actually looking at Fuji. We really need to return here sometime in autumn, as the orange and reds of the leaves would be absolutely stunning.
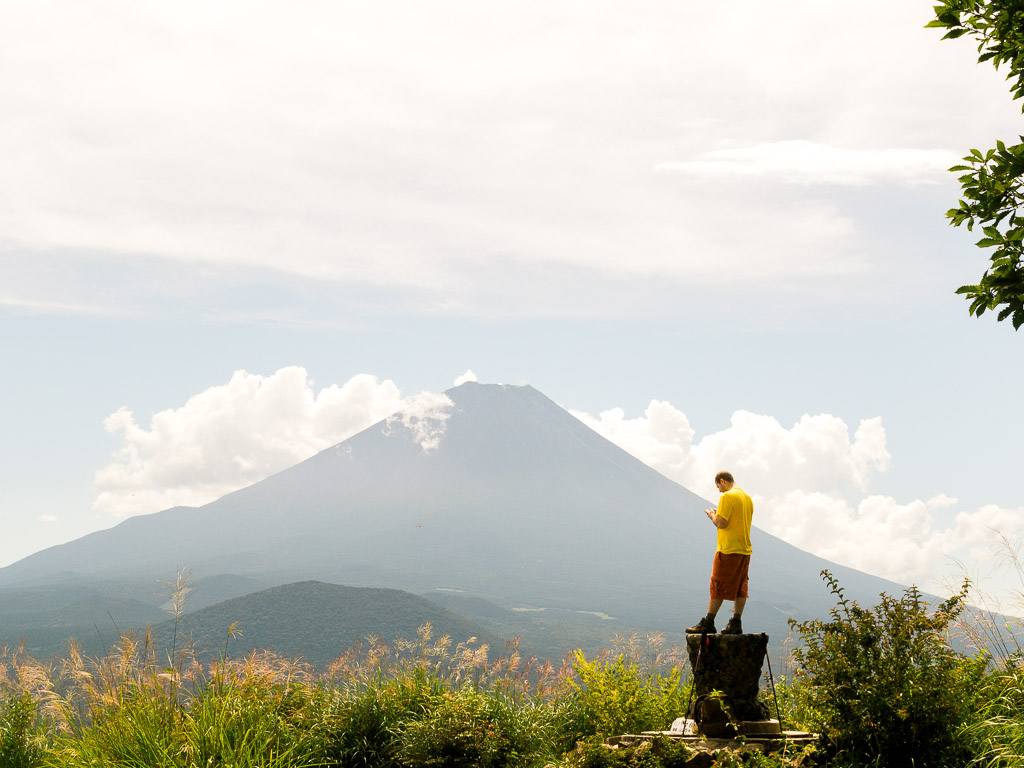
We met an older Japanese couple who were really nice and explained which lake was which and what was in each direction. The lady showed us the back of the 1,000 yen bill and told us that if we want to see the exact photo of Mt. Fuji on the back of the 1,000 yen bill, that we should go the right side of the mountain. Or at least, this is what we decided that she said, as she was speaking in Japanese, and Josh could only understand parts of the conversation.
The man, on the other hand, said that if we want to see the Diamond Fuji, a phenomenon every New Year where the sunrise or set aligns with the peak of Mt. Fuji, causing the top of Mt. Fuji to shine, we should hike the other mountain near Lake Motosu.
I have heard of this Diamond Fuji before from a fellow photographer I met during a photo walk in Ueno. I remember that the Diamond Fuji can also be seen from Mt. Takao and other parts of Tokyo. So we will be fitting this into a future hike.
We stayed atop Panorama-Dai for quite a while, mainly because the view of Mt Fuji was just too beautiful. I wanted to enjoy more time on top but my bladder was telling me that it will explode anytime. I was able to hold out, but it made the hike going down far more difficult.
All-in-all, our time in Lake Motosu, Lake Sai, and Lake Shoji was worth the trip. Most importantly, we learned a lot about camping in Lake Motosu (or camping in Japan in general) and what is needed to improve our experience in the future.
Fuji Five Lakes has become a wildly popular day trip destination from Tokyo over the past few years. And it’s no wonder — serene beauty coupled with the best views of Mt. Fuji; it’s just a winning combination.
What is Fuji Five Lakes
The Fuji Five Lakes was formed when Mt. Fuji erupted during the ancient times. From the (literal) ashes of such an awesome destructive force, these lakes have all become fantastic tourist attractions, an inspiration for artists, poets, and philosophers alike, and some top-notch fishing spots.
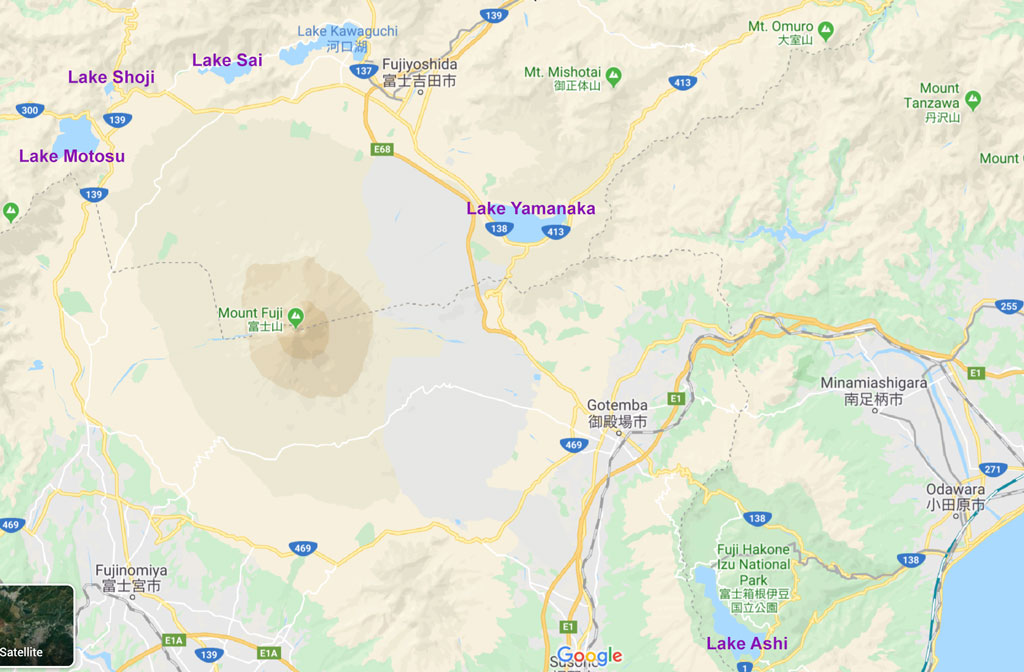
The lakes of the Fuji Five Lakes are as follows:
Lake Kawaguchi (Kawaguchiko)
Lake Sai (Saiko)
Lake Shoji (Shojiko)
Lake Motosu (Motosuko)
Lake Yamanaka (Yamanakako)
-ko means lake in Japanese.
For more information, the Japan National Tourism Organization (JTNO) also has a quick overview of the Fuji Five Lakes.
Kawaguchiko
Kawaguchiko is the second largest lake in Fuji Five Lakes. It’s the most developed destination in Fuji Five Lakes making it the most popular destination due to its easy accessibility from Tokyo. Lake Kawaguchi or Kawaguchiko is the best lake near Mt. Fuji in our opinion. It offers the best view of Mt. Fuji, tons of places to see, and there’s always new in the area. We absolutely recommend spending overnight in Kawaguchiko.
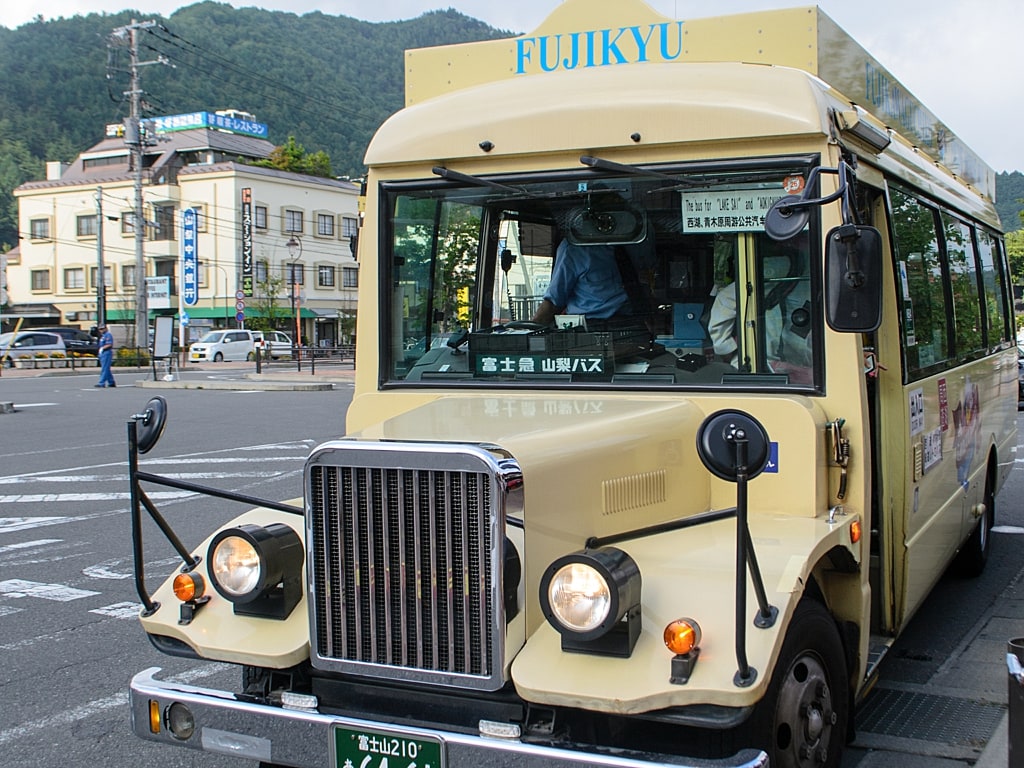
These retro-style bus lines take you around lakes Kawaguchiko and Saiko and to many of the popular tourist spots along the way. The buses themselves are actually a bit of a tourist attraction as well, so be sure to get a picture with it!
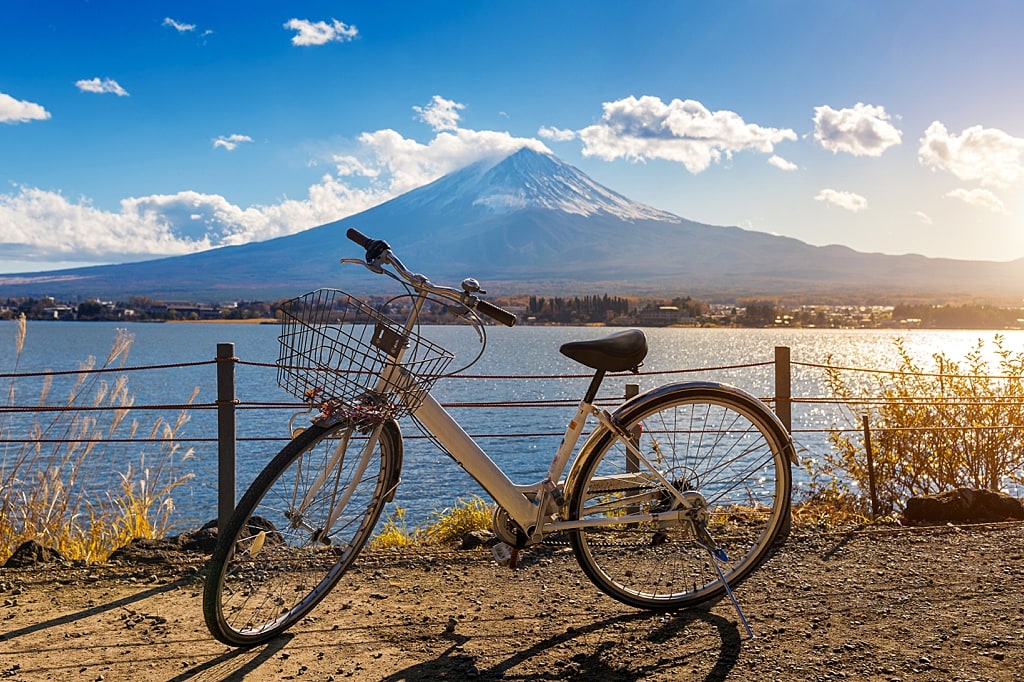
2. bike around Lake Kawaguchi.
One of the most efficient and fun ways to explore Kawaguchiko is to rent a bicycle and sightsee. With many rental locations within a short walk from Kawaguchiko Station, finding one won’t be difficult, and the roads and trails surrounding the lake and town are perfect for riding. This also has the added benefit of removing your reliance on the buses, so why not give it a go?
3. Ride the Mount Fuji Panoramic Ropeway (Kachi Kachi Ropeway).
There are few places with views of Fuji and the surrounding lakes quite as good as the one you’ll find at the top of Mt. Tenjo, and getting to the top is as easy as sitting in a cable car. The top of the ropeway has a small souvenir and snack shop, an overlook, and trails to other views and mountains. The cars run very regularly and offer some nice views themselves, so adding this to your itinerary is a must.
How to get there: Red-Line Bus stop no. 9 (Sightseeing Boat / Ropeway Entrance).
4. Hike up to the Nakabadaira Panoramic View of Fuji.
To go along with the ropeway there is a hiking route which is also super popular and is personally, our favorite way to reach the top of Mt. Tenjo, then riding a cable car down. The route is lined with Hydrangeas which bloom from July to August and make the hike far more enjoyable. The Nakabadaira Panoramic View is located at about the halfway mark and is completely worth the burning legs to get there.
How to get there: From Red-Line Bus stop no. 8 (Funatsu-hama Onsen Town), follow this pin, then follow the directions to Tenjoyama Park. The Nakabaira Panoramic View is about a 15-minute hike from the entrance.
5. Visit the Kawaguchiko Music Forest Museum.
The buildings inside the Music Forest Museum remind me of a European fairy tale setting, with somewhat exaggerated buildings, and lots of pink paint. The museum has a particularly interesting building filled with enormous music “boxes” which are essentially self-playing banjos, pianos, and organs. There are also a number of special music shows throughout the day which often feature historic instruments.
How to get there: Red-Line Bus stop no. 15 (Kawaguchiko Music Forest Museum).
6. Visit the Konohana Museum.
Home of Dayan the Cat, the Konohana museum has fantastical stylized architecture, reminiscent of the Ghibli Museum. Containing the works of Akiko Ikeda, it was built to look like the Tachiel Enit Museum in the fictional Tachiel City, and is as much a part of the artwork as the pieces it houses. Wander the halls and admire all the pictures, sculptures, and dynamic dioramas found inside.
How to get there: Red-Line Bus stop no. 16 or you can walk from Kawaguchiko Music Forest Museum.
7. Take a stroll in Kawaguchiko North Coast and admire the view of Mt. Fuji.
The North Coast Walking Trail is just a 7-minute walk from the Kawaguchiko Music Forest Museum and located behind the Konohana Museum. This short trail offers a 180-degree view of Mt. Fuji and is a place that many tourists are unaware of.
8. Be inspired by Itchiku Kubota Art Museum.
Tucked away inside a tranquil forest this Art Museum is made up of Okinawan coral and limestone, and the main gallery foundation is made of 1,000 year-old Hiba trees. Inside you’ll learn about the life of Itchiku Kubota, and how he rediscovered the incredible art of Tsujigahana or the art of dying kimonos with incredible illustrations. In my opinion, the art of Tsujigahana one of the greatest forms of art you can find in Japan, so find some room on your trip for this.
How to get there: Red-Line Bus stop no. 17 (Itchiku Kubota Art Museum).
9. Visit the Kawaguchiko Natural Living Center.
Located within Oishi park the Natural Living Center acts as a sort of a gift shop and rest area within the park. You can buy various herbs inside the center, but it’s best known for its blueberries and various blueberry related souvenirs. In fact, depending on the season, you can even pick your own blueberries and take a jam-making class!
How to get there: Red-Line Bus stop no. 20 (Kawaguchiko Natural Living Center).
10. Admire the panoramic view of Mt. Fuji in Oishi Park.
Take a walk down Oishi Parks “Flower Road” and take in the splendid views of Mt. Fuji while surrounded by colorful herbs and flowers. The park has many benches to view Fuji from and is nearby many popular cafes. Each year between June and July the park, along with Yagisaki Park, holds its annual Herb Festival, where the plants are in full bloom and there’s plenty of food stalls to be visited!
How to get there: Red-Line Bus stop no. 20 (Kawaguchiko Natural Living Center).
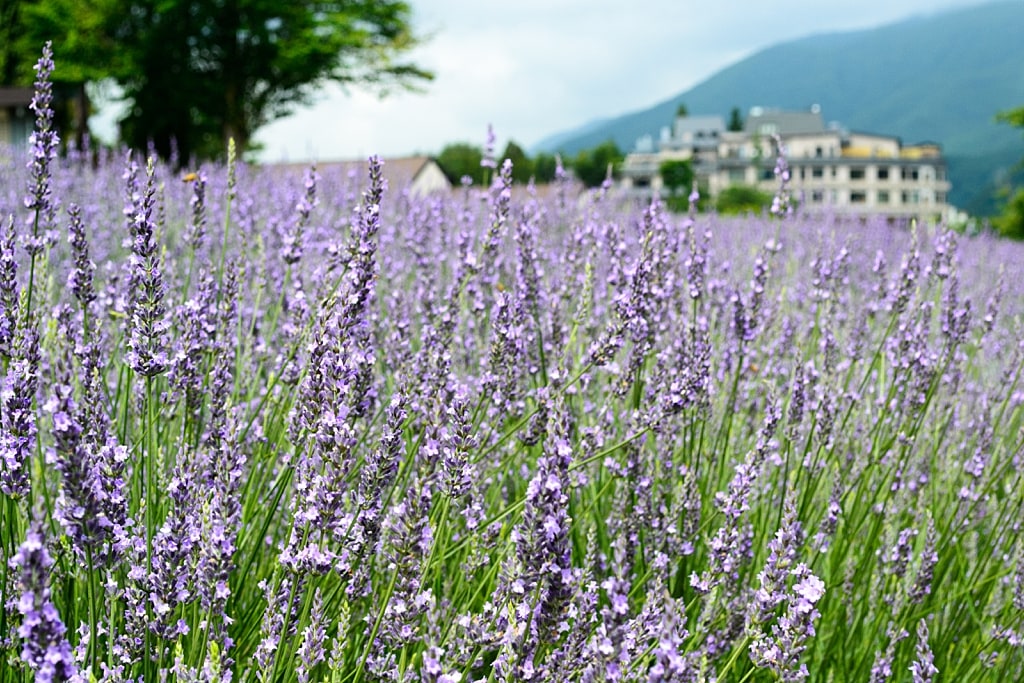
11. Visit Yagisaki Park in summer for the beautiful lavender fields.
As stated above, Yagisaki park also takes part in the annual Kawaguchi Herb Festival and is best known for its lavender fields. Located on the southern shore of the lake Kawaguchiko, the park is also home to a popular art museum, Muse-kan. Inside is the work of Yuki Atae, a famous Japanese doll-maker, as well as a cafe and gift shop.
How to get there: Green-Line Bus stop no. 24 (Yagisaki Park).
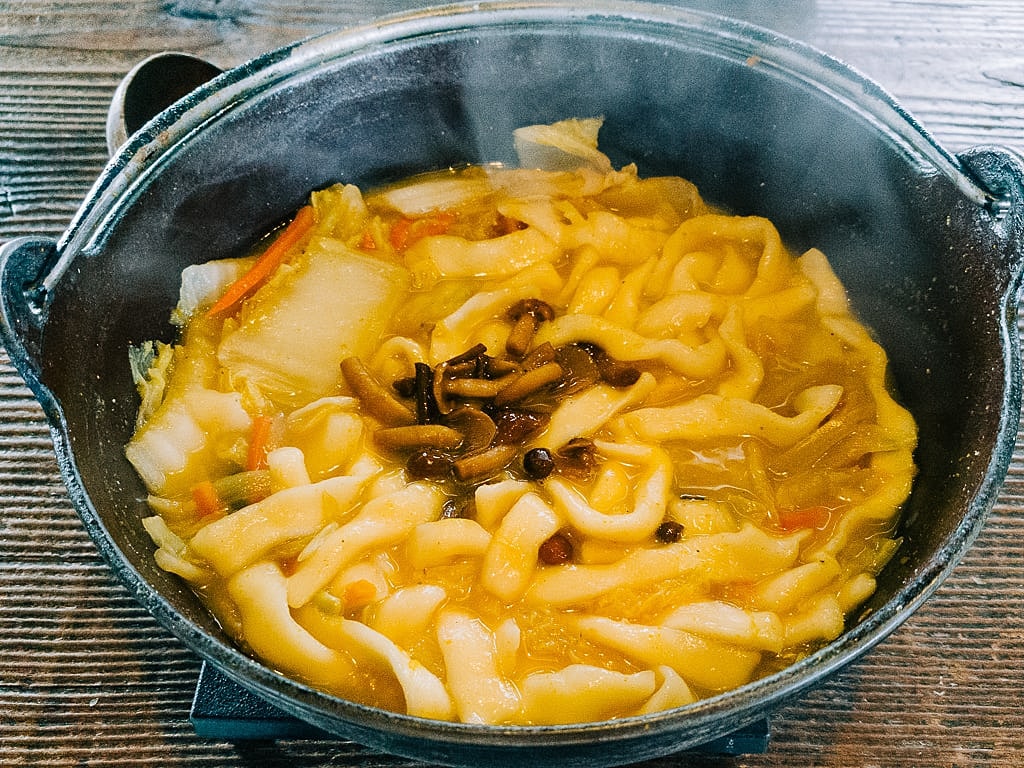
12. Eat a delicious big bowl of hoto noodles.
Yamanashi prefecture’s local specialty, hoto, is a hearty udon noodle, made of especially thick cut and long noodles, a generous amount of local vegetables, sometimes a bit of meat, and a thick soup. You’ll find plenty of restaurants specializing in this dish, but we recommend either Momijitei restaurant (7-min walk from Itchiku Kubota Art museum), as they offer incredible food AND great service.
13. Try the delicious tempura in Tempura Restaurant Ninja.
This restaurant honestly took me by surprise (the fact that it’s a “Ninja” restaurant makes this a coincidental joke) because Japan has a bad habit with themed restaurants. Almost every one of them is an overpriced tourist trap. That is thankfully not the case here. This is honestly my absolute favorite tempura restaurant in Japan, and it’s not even close. Seriously, just try it for yourself and see. Oh, and the staff is incredibly friendly as well!
How to get there: 5-minute walk from Kawaguchiko Station.
14. Get the signature delicious dessert in Milky Way restaurant.
I have a soft spot for small Mom & Pop like restaurants, and this one is owned and operated by two friends who clearly run the place as a labor of love. The interior makes you feel right at home and the desserts are all fantastic. For those traveling with kids, there are toys and books for them to occupy them while you relax with a cup of coffee and a crepe.
How to get there: Walk from Green-Line Bus stop no. 24 (Yagisaki Park).
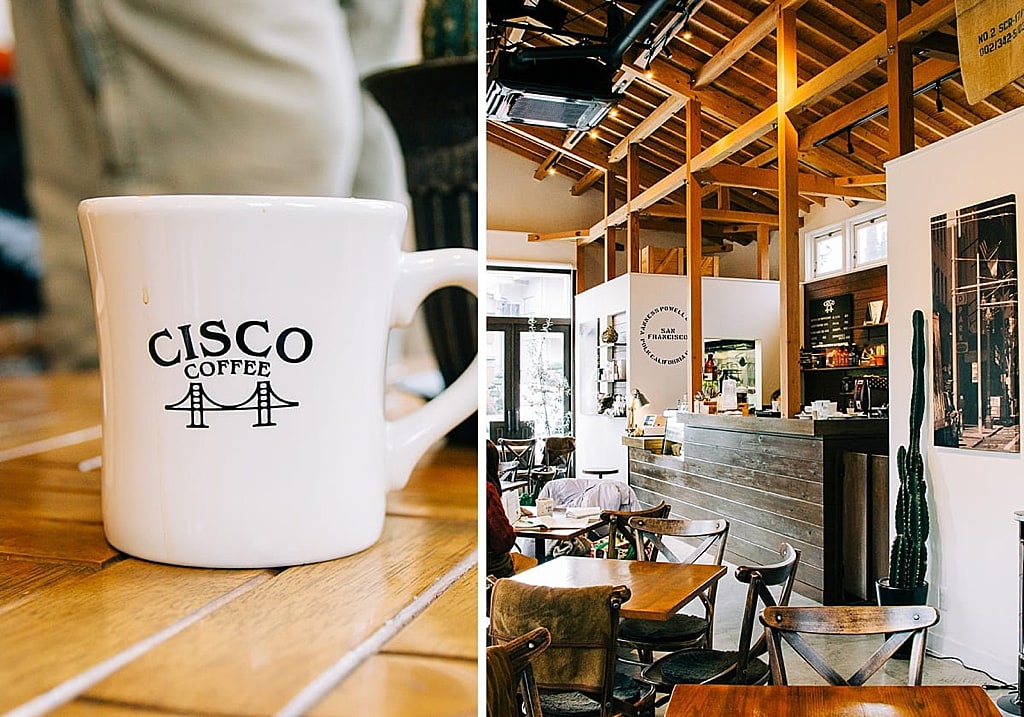
15. Have a break at Cisco Coffee.
This cozy coffee shop is located near Yagisaki Park is a San Francisco style coffee shop in a relaxing shop to sit and relax with a good book. The menu is pretty simplistic, but the coffee is top-notch and really helps warm you up on a chilly morning by the lake.
How to get there: Walk from Green-Line Bus stop no. 24 (Yagisaki Park).
16. Try the delicious burger in Moose Hills Burger.
If you’re looking for a taste of America while you’re traveling the lakes, stop into Moose Hills Burger for fantastic made to order burgers. While a bit pricey (as is the norm for burgers in Japan) they don’t skimp on the ingredients and offer a wide selection of toppings. Unfortunately, this burger stop is not accessible by public transport, it’s recommended to drive.
17. Visit the Yamanashi Gem Museum.
Located in a rather unassuming building is an impressive collection of incredible jewels fit for royalty. If gemstones or jewelry are your things then you’ll be drooling over the pieces on display within. And while I’m not much of a fan of either, even I had to admit to the beauty of the works on display from both nature and artisan. After you’ve finished admiring the works on display, perhaps you’ll find yourself in a spending mood and purchase some jewelry yourself.
How to get there: Walk from Green-Line Bus stop no. 6 (Yamanashi Gem Museum).
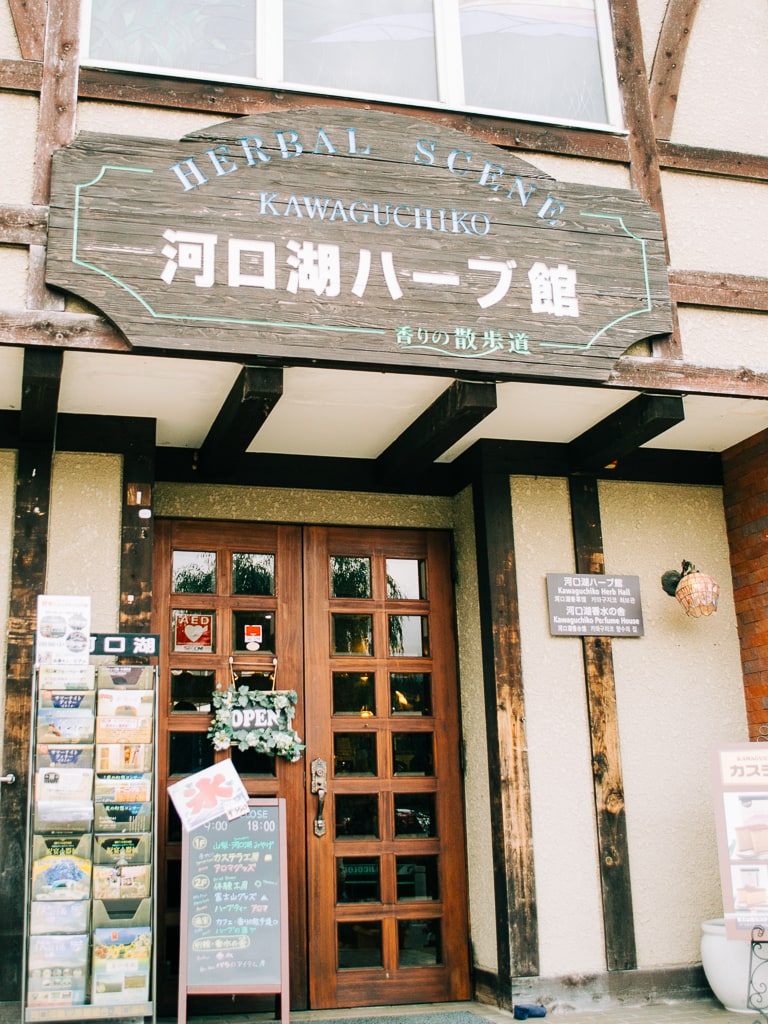
18. Visit the Kawaguchi-ko Herb Hall.
Kawaguchiko loves its herbs, so once you’ve finished walking through its various parks and admired the herbs growing in neatly cultivated plots, take some time to walk through the Herb Hall and purchase some herbs of your own. Perhaps take a craft-making class or create your own perfume. The herb hall is an interesting place to stop in and explore.
How to get there: Walk from Green-Line Bus stop no. 5, or a few minutes from Yamanashi Gem Museum.
19. Visit Momiji Tunnel in autumn.
Not to be confused with Momiji Corridor, Momiji tunnel is sort of an unofficial title for a section of road lined with maple trees that form a sort of “tunnel” of branches and leaves.
20. Visit Momiji Corridor in autumn.
Momiji is Japanese for Autumn Leaves, so the name of this attraction should be rather self-explanatory. Every year between October to mid-November the maple trees next to the Itchiku Kubota Art Museum turn to a deep fiery red, and people from all over Japan come to witness this small “corridor” of trees. Be sure to visit near sunset so you can see the trees both in the sunlight and the nightly illumination. The locals take this opportunity to set up food and souvenir stalls, so take advantage of it.
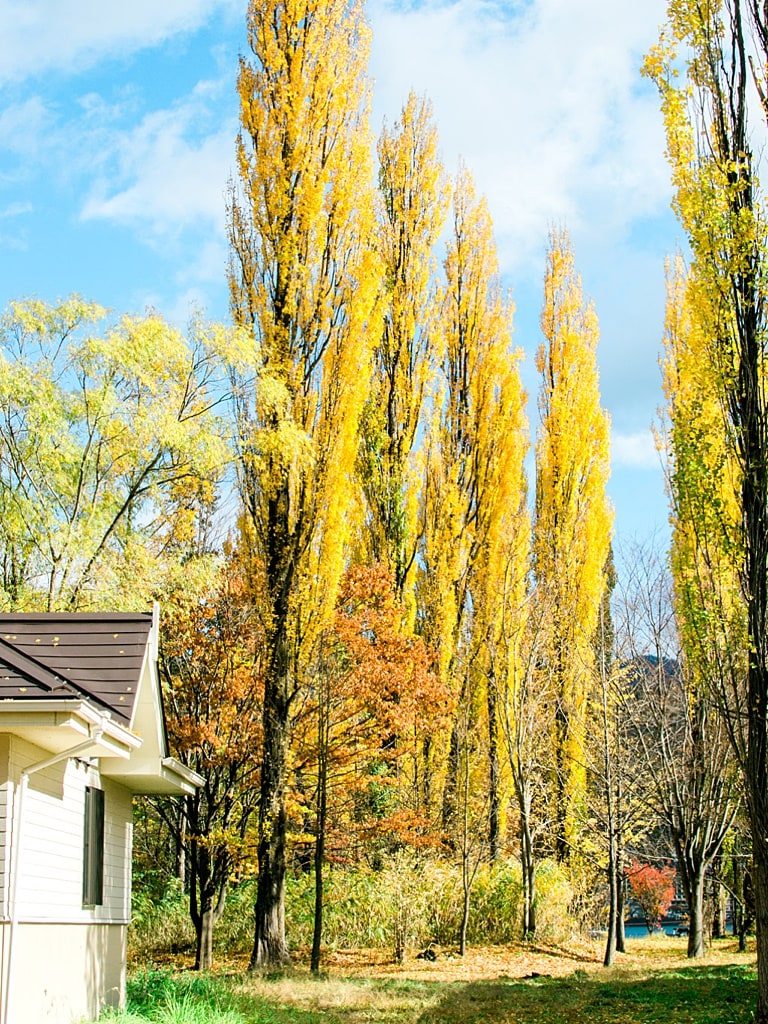
21. Visit Oike park in autumn.
Oike Park, a park in front of Kawaguchi Herb Hall, is lined with poplar trees which turn a beautiful yellow in late October to early November. Mt. Fuji isn’t so visible here because it’s partly a residential area, but it’s worth visiting only during autumn.
22. Dine-in at Partita Italian restaurant (or Restaurant Cafe Partita).
The towns and villages around Mt. Fuji have strong western influences, and there are a surprising amount of Italian restaurants scattered throughout, and Partita is the best among them. Incredible food, a cozy atmosphere, and a wonderfully helpful host really set this place above the rest. It’s actually incredible that the whole restaurant is run by a single man. The best part is even if the dish you’re looking for isn’t on the menu, the owner/chef/host may still make it if you ask. It’s recommended that you make a reservation ahead of time, but not always required. Just be aware that you may be turned away without one.
23. Eat raw horse meat (basashi) Houtou Fudou restaurant.
This one may turn many of you away, but horse meat is actually a pretty important part of the Yamanashi area. While not overly common, you’ll still find it on a surprising number of menus; one of those menus belonging to Houtou Fudou restaurant. Horse meat sashimi is probably the most popular item at this restaurant, outside of the noodles themselves. So if you’re feeling up to it, give it a try. If not, grab a bowl of delicious hoto noodles, and chow down!
24. Enjoy Lake Kawaguchi in a Canadian canoe.
Spend a day on the lake by paddling your way around it in a canoe. Either as a guided tour or going it solo, decide depending on your own experience level. Honestly, this one is pretty self-explanatory, so grab a paddle and go!
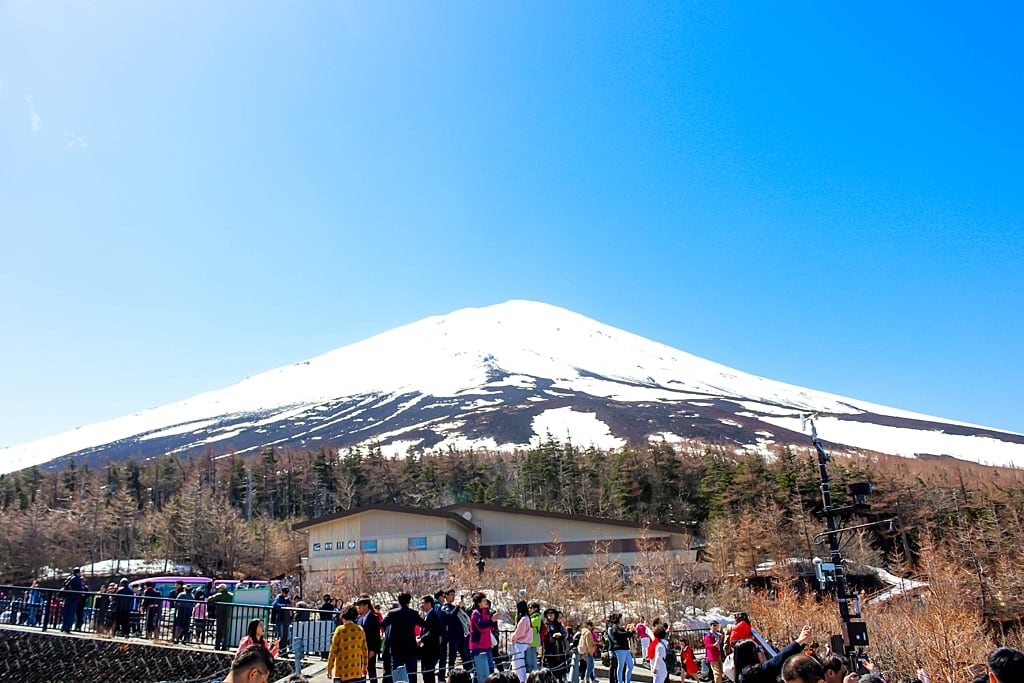
25. Visit souvenir shops and a short walking trail around Mt. Fuji’s 5th Station, if you’re not climbing.
photonewman /Depositphotos.com
If you’re not feeling up for a 6-8 hour hike to the top of Japan’s tallest mountain, peruse the gift shop and walk around the 5th station for some impressive up-close views of Fuji-san. For those of you looking to challenge yourselves, however, see #26.
26. Climb Mt. Fuji!
joejoestock /Depositphotos.com
The official climbing season for Mt. Fuji is from the beginning of July to mid-September, and during this time hundreds of thousands of people attempt the climb. On a clear day, the view from the summit can’t be beaten, and you can take it in with a bowl of ramen from the outpost at the top (if you make it up before they close). Walk around the rim of the volcano (Fuji is a volcano if you didn’t know) and look over all of Honshu. Perhaps take a walk to the NPO Research Station located at the top, or just rest and prepare for your descent. It can’t be stressed enough to only climb during this time of year, as off-season hikes are not only against the rules but extremely dangerous.
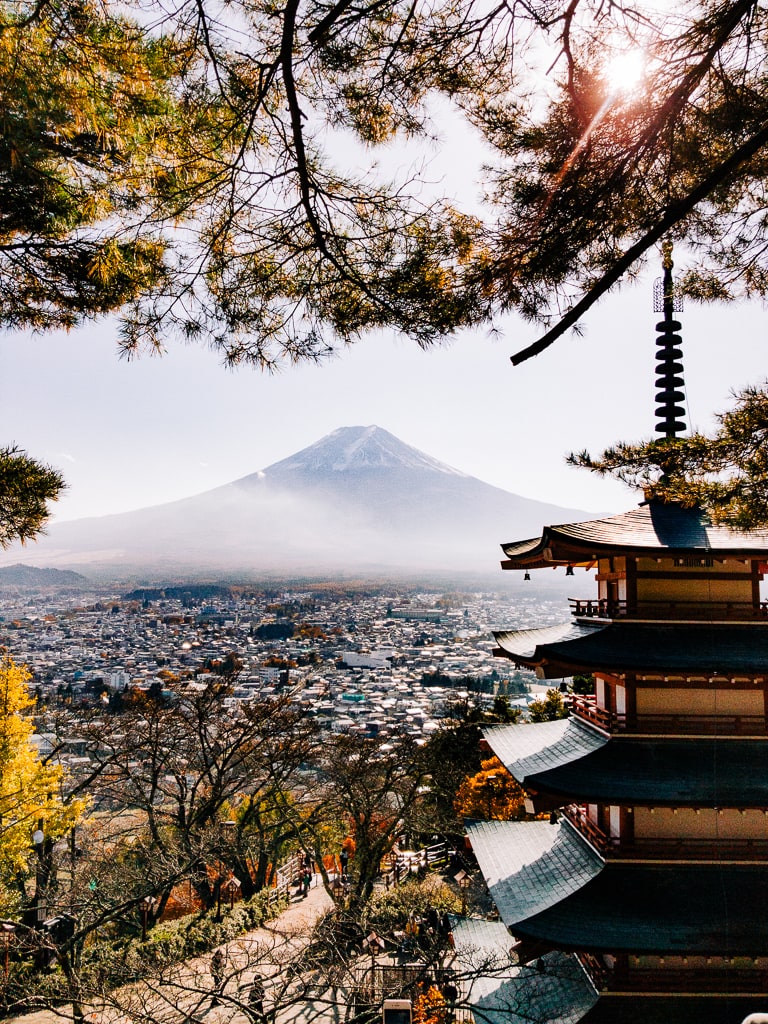
28. Climb the 400 steps in Arakurayama Sengen Park and see Chureito Pagoda.
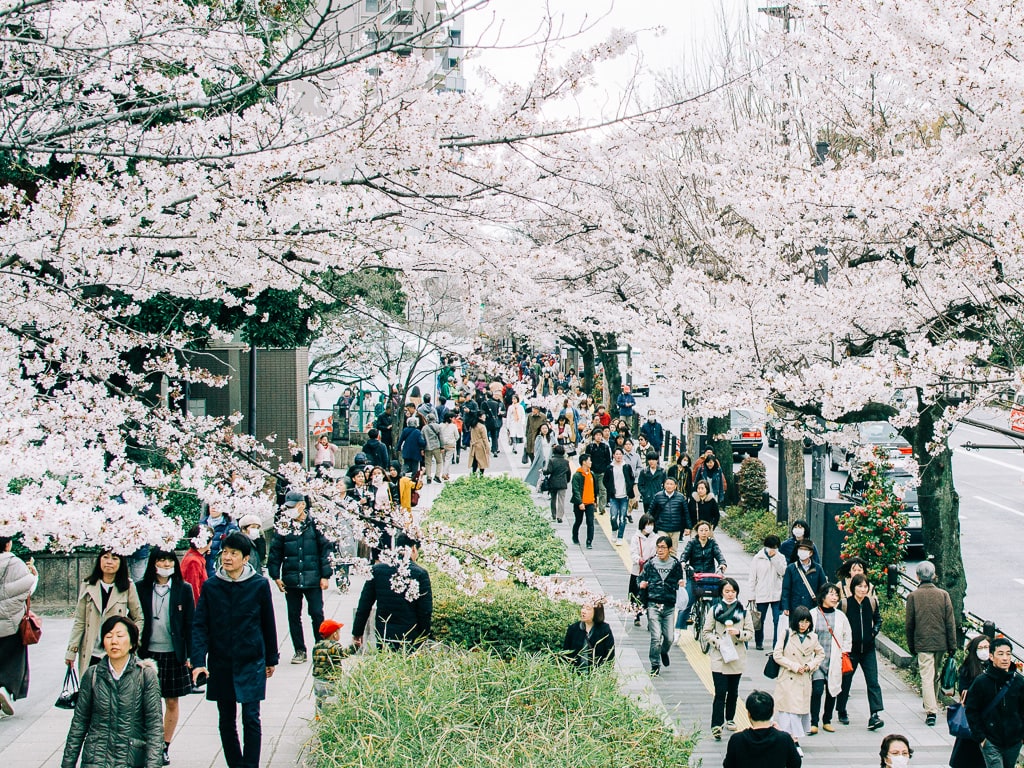
They say the journey of a thousand miles begins with a single step. Well, the journey to Chureito Pagoda requires nearly 400 of them. Taking a trip to this famous pagoda is best during cherry blossom season as steps and park are lined with sakura trees, adding another layer of beauty to the experience.
How to get there: Arakurayama Sengen Park is about 20-min walk from Shimoshida Station.
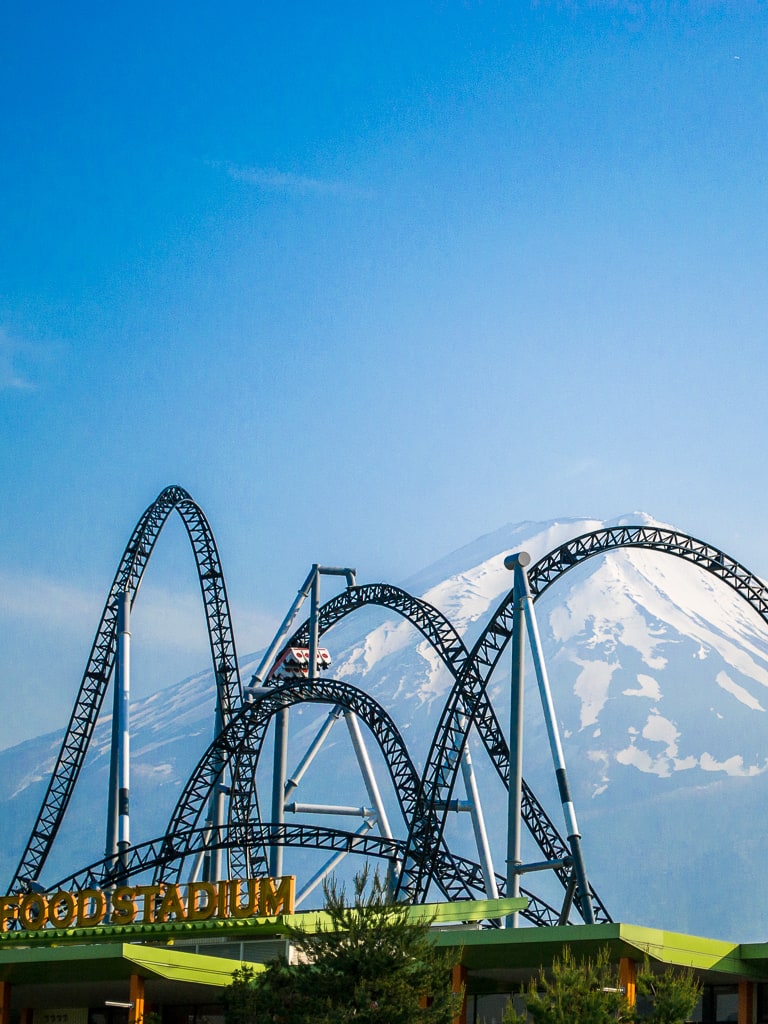
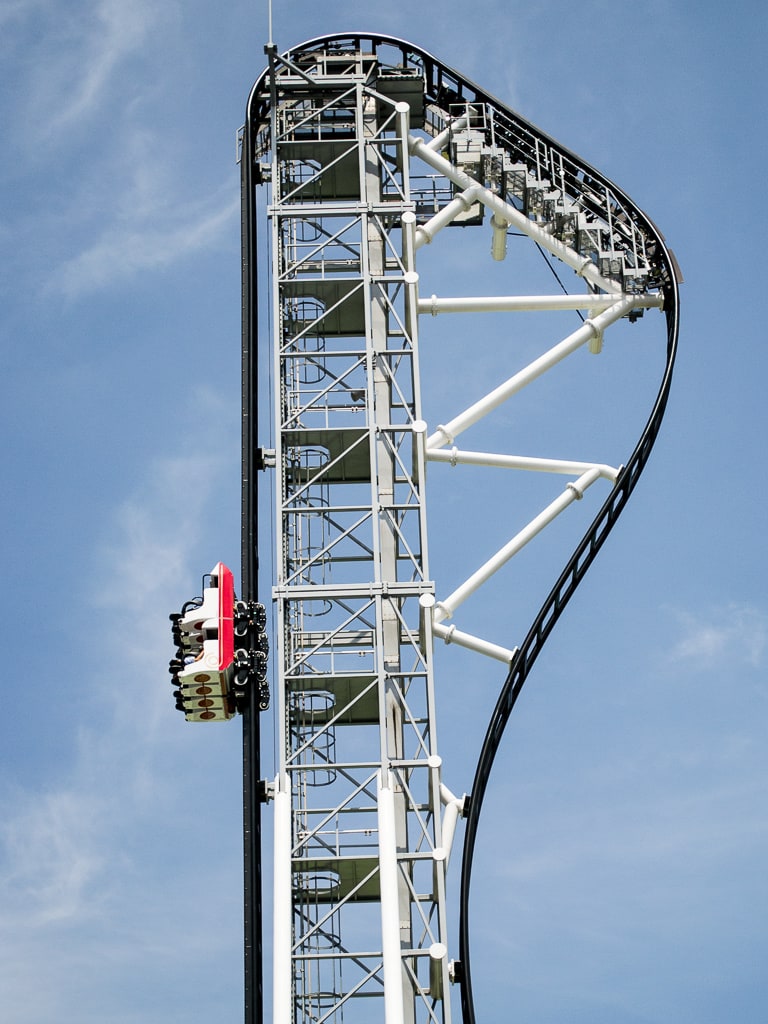
29. All-day fun in Fuji-Q Highland.
A popular theme park is known for its roller coasters and thrill rides. For those less enthusiastic about thrill rides, there are 3 other areas; Thomas Land, La Ville de Gaspard et Lisa, and Fuji Hidden Leaf Village, each with less of a focus on rides and more on the “Theme” of Theme Park. So no matter your feelings towards rides, Fuji-Q has something sure to entertain you!
How to get there: Take the Fujikyu bus from Kawaguchiko Station.
30. Experience Fujiyama Onsen.
I was REALLY late to the party known as Japanese Onsens, thanks to my damned American modesty, but now that I’ve gotten over that mental hurdle, I can safely say that there is no better way to relax than in one of these Japanese baths. Fujiyama Onsen is located near Fuji-Q Highland and offers both indoor and outdoor baths.
The bathhouse itself is massive and offers several different baths of varying temperatures, as well as a restaurant and relaxation area to kick back in after a long day. So get over your modesty and relax in one of these baths!
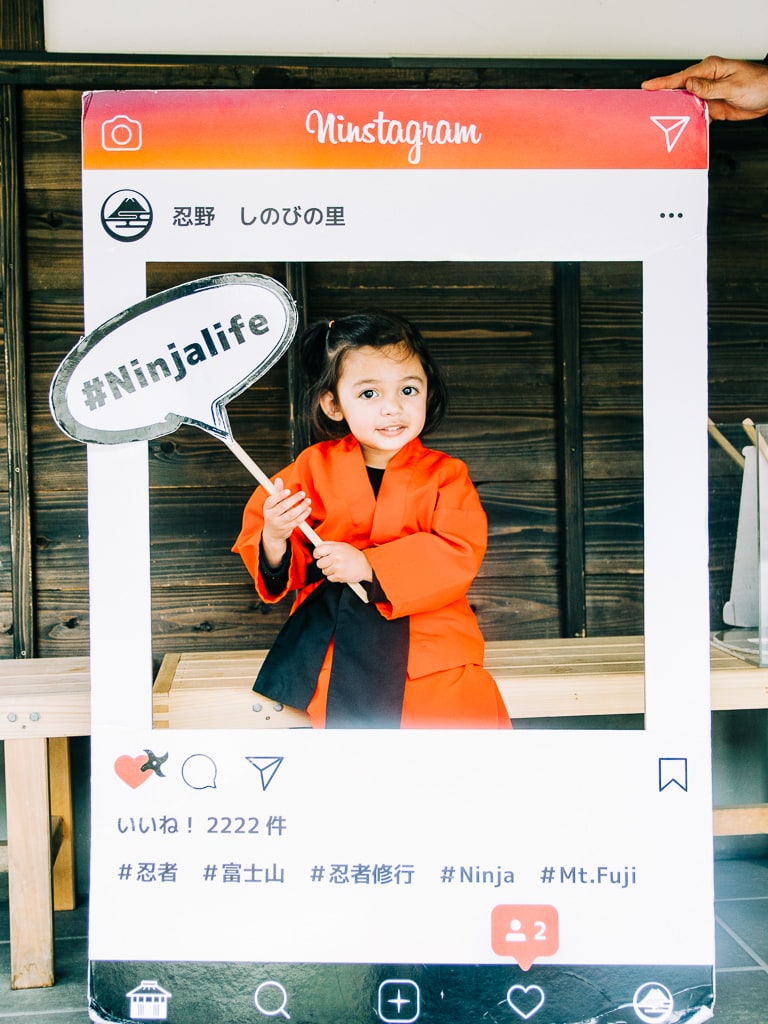
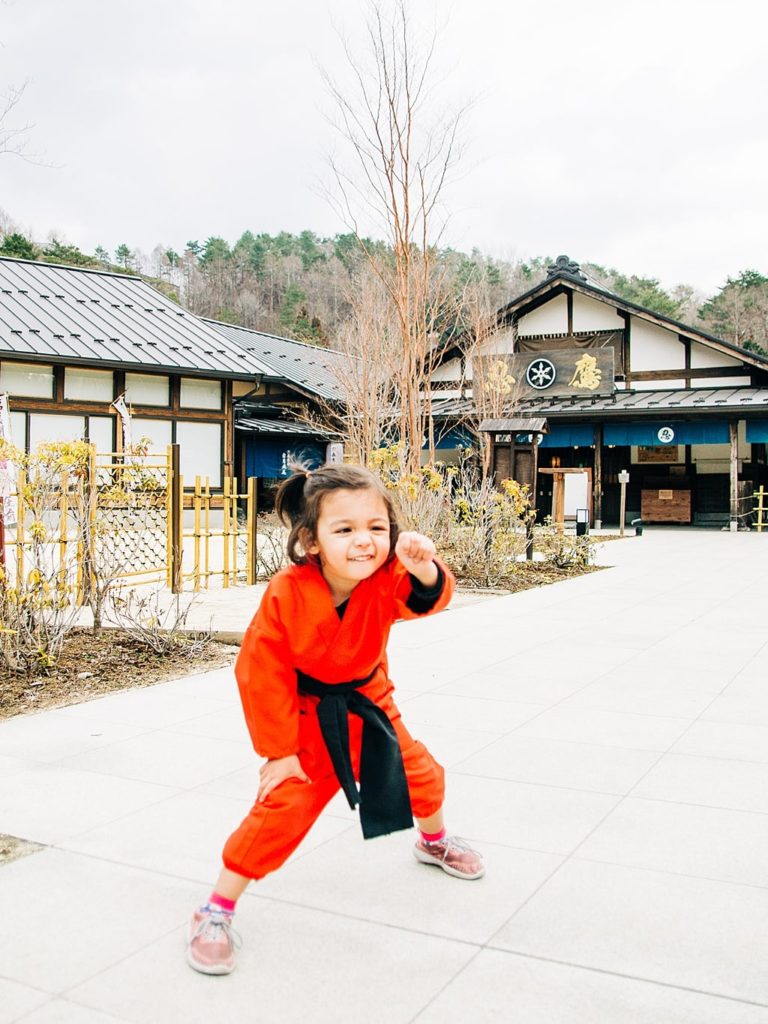
31. Show off your ninja skills in Shinobi Sato Ninja Village.
If you’re traveling with children then stopping into Oshino Shinobi no Sato is a great place to entertain them, as well as allow them to burn off some energy! The “village” has a main showroom, where a very entertaining show is performed, a trick house, where you can see some of the special building techniques used by shinobi, and a few areas where ninja inspired games can be played.
There’s also a very pretty garden and a gift shop where you can rent your kids a ninja outfit to wear during your visit! Our daughter loved this place!
Buses here are rare. We absolutely recommend that you join this day tour as it also goes to Oshino Hakkai Village (see below).
32. Stroll and take in the view of Mt. Fuji in Oshino Hakkai.
A small thatch roof village built around 8 small ponds, this is a popular tourist stop with some awesome views of Mt. Fuji. Many of the ponds are filled with large fish and other aquatic life, and are crystal clear, offering some great photo opportunities.
Probably one of my favorite locations in the area, Iyashi no Sato Nenba is a gorgeous little thatch-roof village with ponds, crafts, and tasty snacks. Step back in time to see how early Japanese villagers lived as you walk through the houses and take it all in with Mt. Fuji as a beautiful backdrop. Outside the village, in the parking area, be sure to buy some of the dried fruits, pickled vegetables, and honey!
How to get there: Green-Line Bus stop no. 48 (Saiko Iyashi-No-Sato).
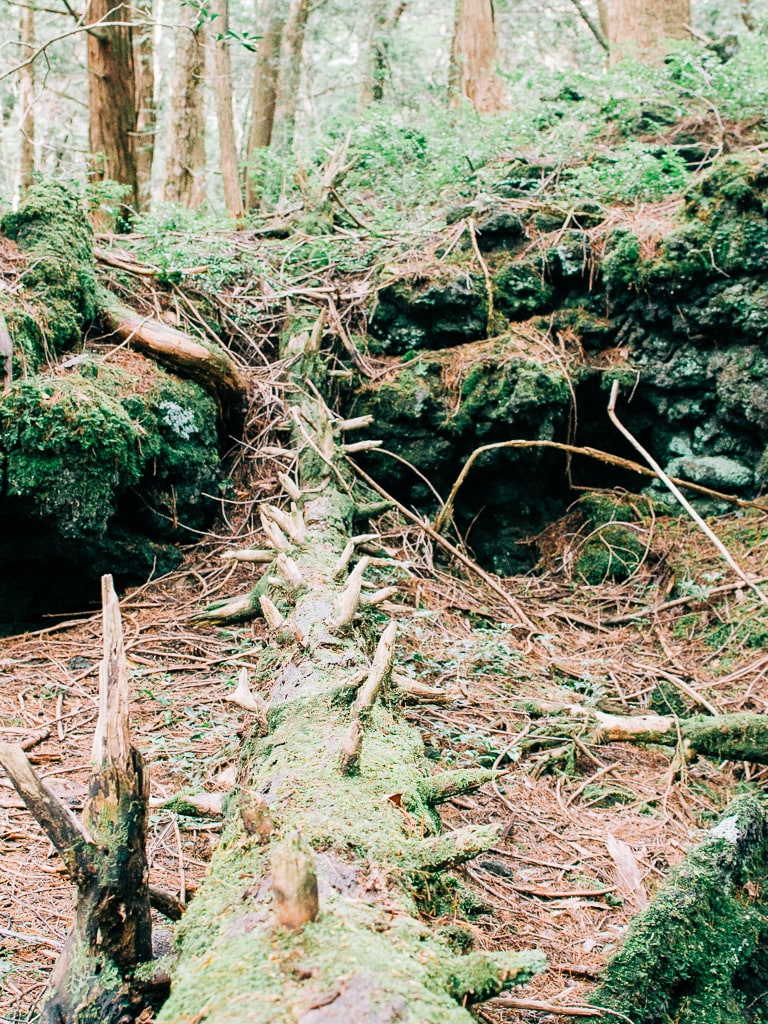
34. Hire a nature guide in Aokigahara Forest (Suicide Forest)
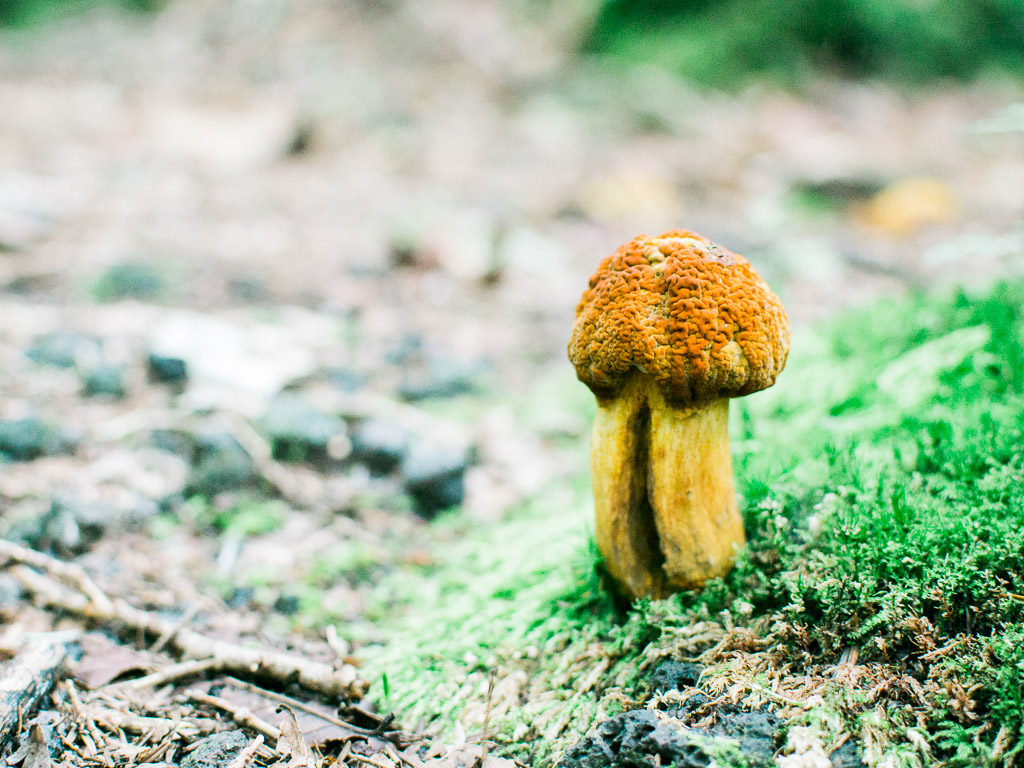
Best known for its unfortunate reputation, Aokigahara is like stepping straight into a forest imagined by J.R.R. Tolkien, missing only Elves and magic. The trees and forest floor are overgrown with brilliantly green moss and loads of mushrooms, making it look completely untouched by humans.
The forest is best experienced with a guide to take you along the path and the surrounding attractions to gain a better understanding of the area and the importance of the forest.
One of the three cave systems located near Aokigahara Forest, this cave was once home to a large population of bats and can be explored a short distance with or without a guide.
How to get there: Green-Line Bus stop no. 45 (Saiko Bat Cave / Lava Cave).
36. Fugaku Wind Cave.
Used in the past as a sort of natural refrigerator, the cave is the shortest and easiest of the 3 caves to explore and has a few store boxes of silkworm cocoons and lava shelves.
How to get there: Green-Line Bus stop no. 51 (Fugaku Fuketsu / Wind Cave).
37. Narusawa Ice Cave.
As the name suggests, the Ice Cave has many natural ice formations that reach down from the ceiling. It should go without saying, but be sure to dress warmly before going into the cave, as it remains below freezing year-round.
How to get there: Walk from Fugaku Wind Cave.
38. Walk the short trail of Koyo Dai in autumn (Koyo means “red leaves” in Japanese).
A beautiful 360-degree view awaits those who walk this short trail to the observatory located at the top. The view during the autumn imitates a carpet of reds, golds, and greens all leading to the snow-capped Fuji. Koyo Dai is hardly accessible by public transport, it’s recommended to drive.
39. Mt. Sanko Dai, just 15 minutes from Koyo Dai.
Named for its view overlooking 3 of the 5 lakes (Saiko, Shojiko, and Matosuko), Sanko Dai is located along the Tokai Nature Trail, but can also be accessed near Lake Saiko. There are many other trails located near here as well, so take advantage of it if you’re looking to spend some time outdoors!
40. Visit Saiko Wild Bird Forest during the Ice Tree Festival in winter.
Looking like trees trapped in crystals, the Ice Tree Festival, held from January to February, exhibits incredible natural ice formations as they form around the trees in the area. If you can’t make it during the winter festival, the forest is also home to about 60 species of birds and hosts various different festivals throughout the year, including a mushroom and gardening festival.
How to get there: Green-Line Bus stop no. 49 (Saiko Yacho-No-Mori park).
Shojiko
Lake Shoji is the smallest of the Fuji Five Lakes and is very popular among fishing enthusiasts. Popular fish to get here is the crucian carp. The Blue-Line Sightseeing Bus runs around Shojiko only every 1-2 hours or 2-3 hours during the off-season. So we’d recommend that you drive around here.
Located between Lakes Motosuko and Shojiko, Panorama-dai is my favorite 360-degree view in the Five Lakes area and is just a short hike to reach. Unlike many other places around here, there’s no gift shop or food stall located at the top, just the view, and it’s completely worth it!
42. Kodaki Fuji.
Shojiko is the smallest and least developed of the Five Lakes, so everything around it is all about nature. Here at Kodaki Fuji, you’ll find yourself at the shore of the lake to take in the view of Fuji and the surrounding mountains.
43. Fishing.
The most popular pastime for many locals is fishing, and Shojiko, despite its size, offers some great fishing opportunities. There are a few places to rent boats and fishing gear for a day out on the lake.
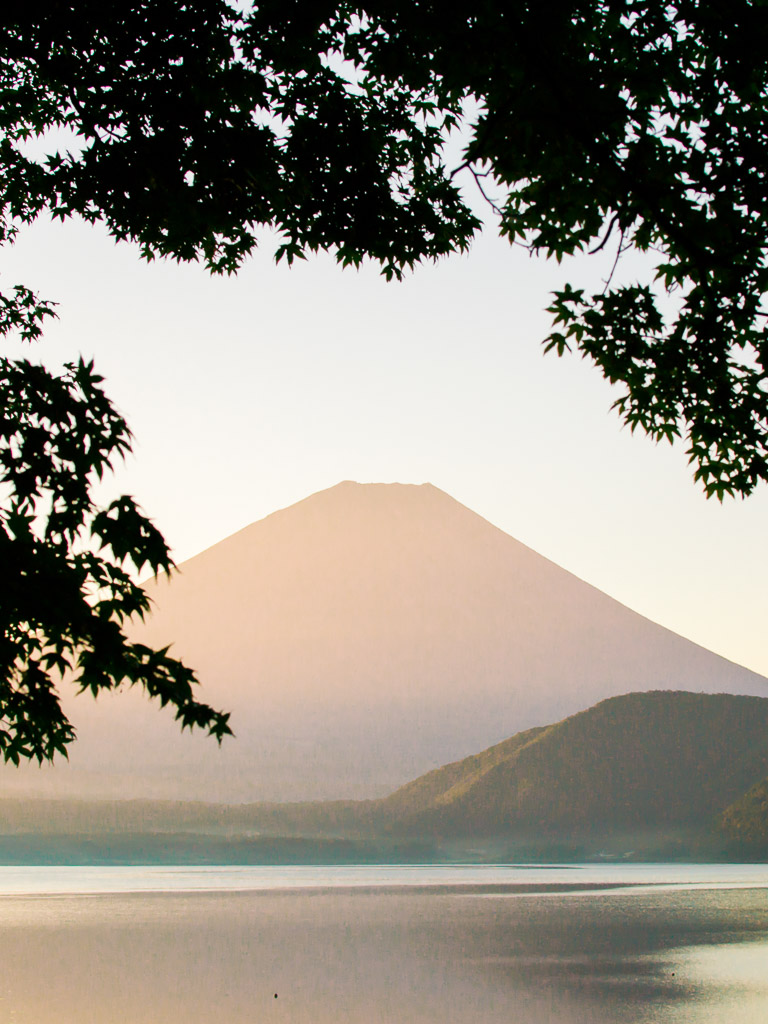
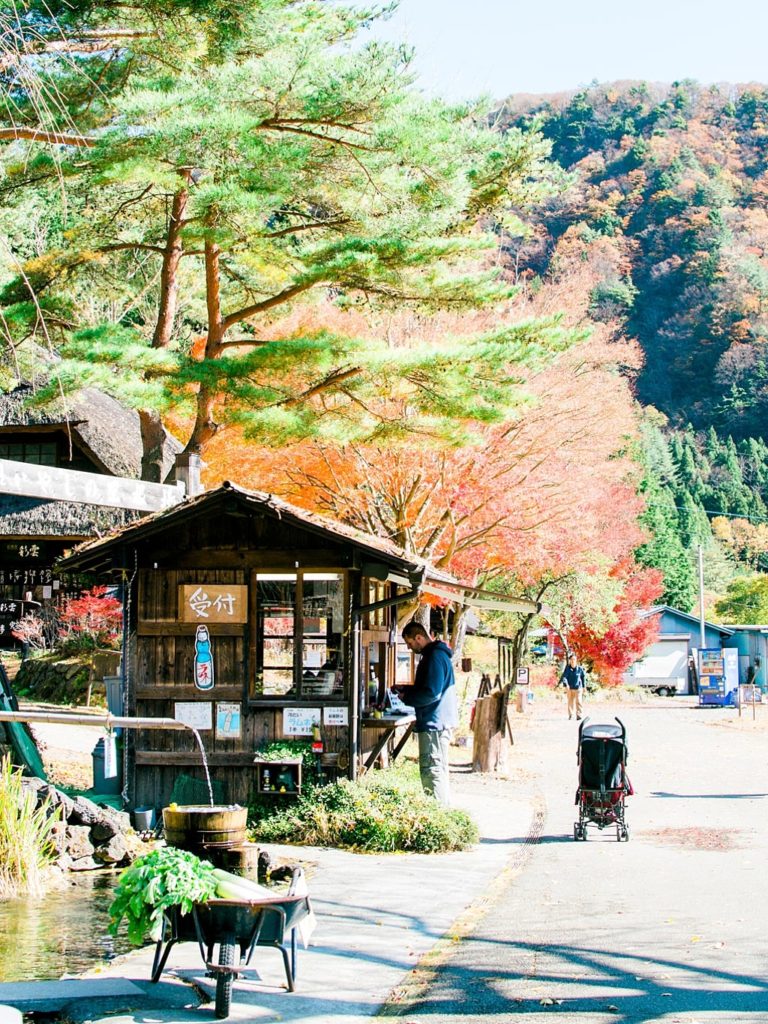
Motosuko
Lake Motosu is the deepest lake of the Fuji Five Lakes. Interestingly, there’s evidence that its water is connected underground to Lake Sai.
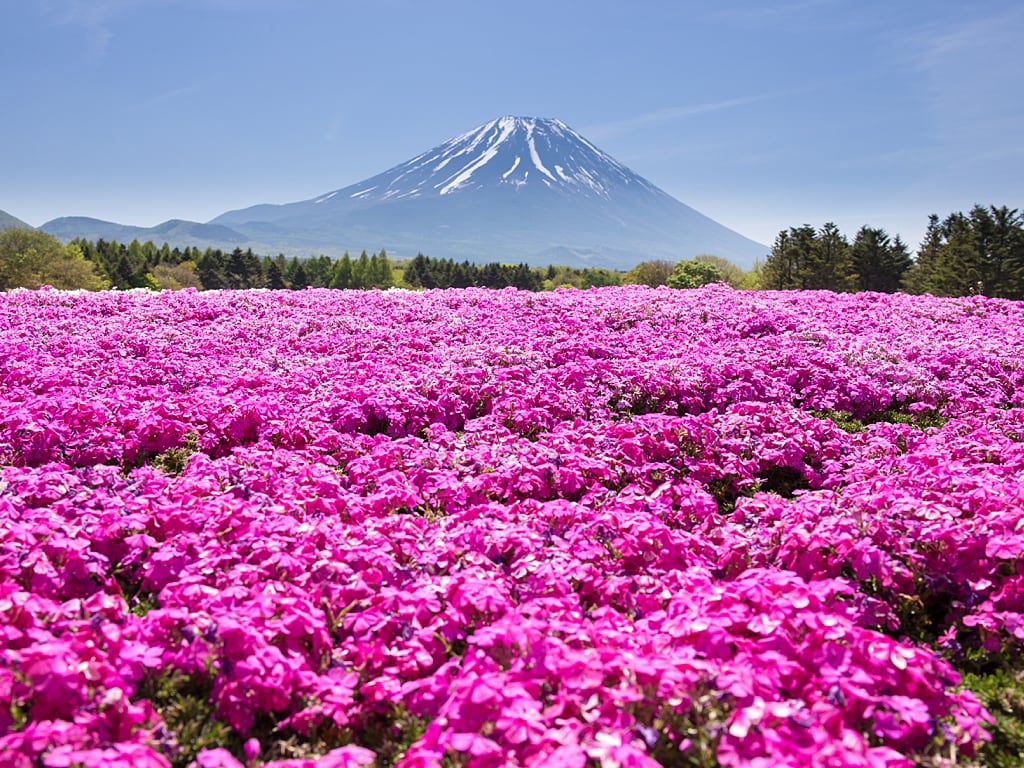
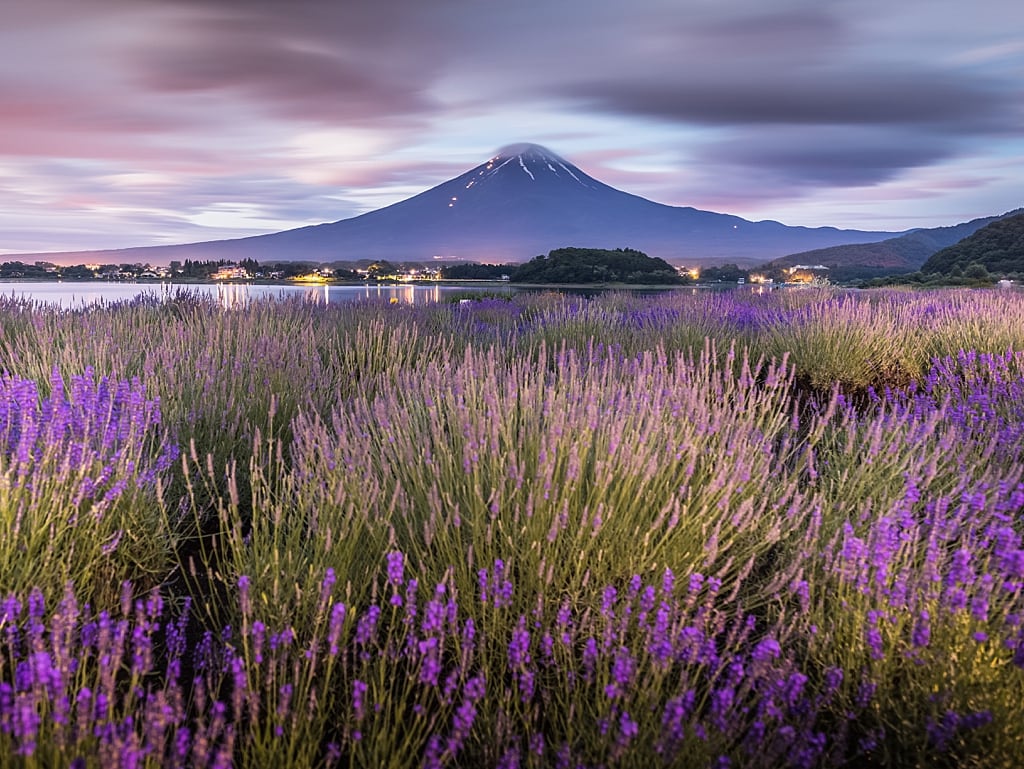
44. Visit the Fuji Shibazakura Festival in spring.
The most popular annual event near Lake Motosuko, each year between April and May the grounds near Chichibu turn radiant pinks and purples as the Moss Phlox fully blooms into a beautiful carpet of flowers. If you’ve missed the Sakura festivals held between March and April, then this is the next best thing!
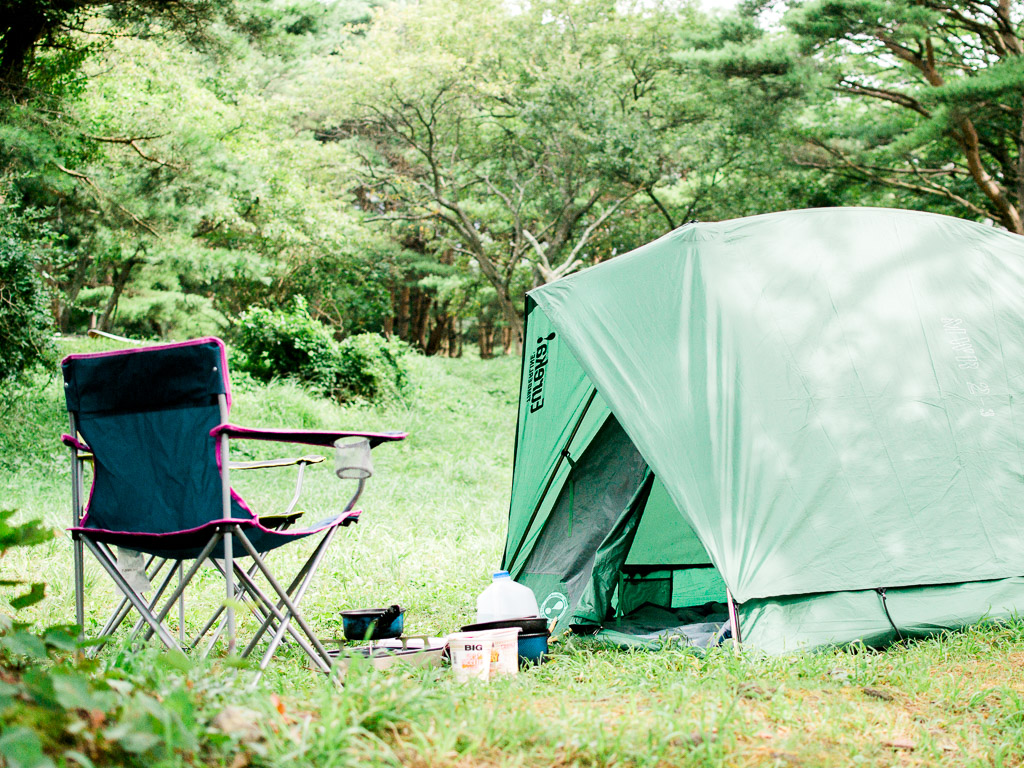
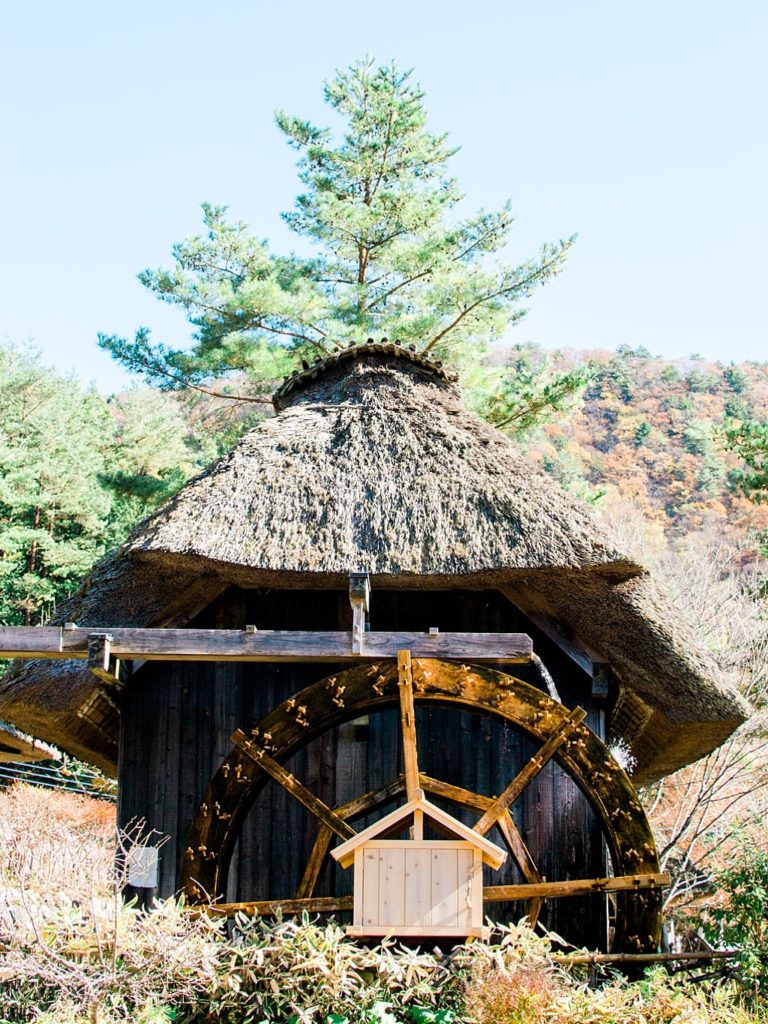
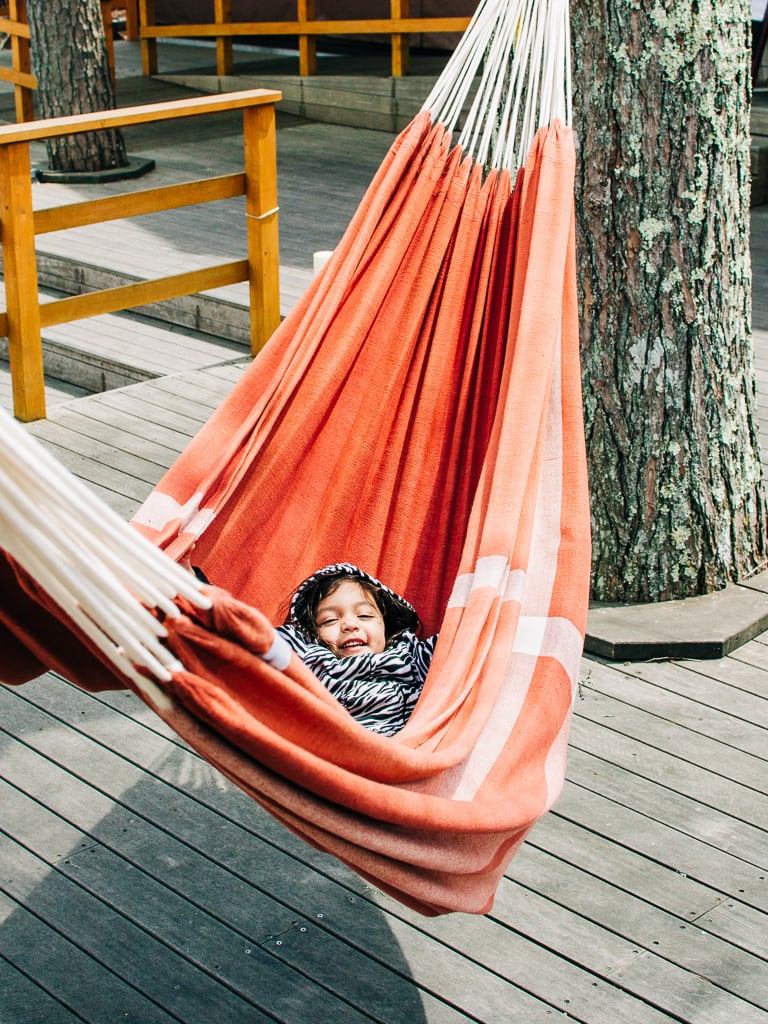
45. Camp by the lake.
Motosuko isn’t nearly as well-developed as Kawaguchiko and Yamanakako, which makes it a perfect location for camping and barbeques. There are a few free campsites around the area that offer some basic amenities, but you can stay at one of the paid grounds which offer cleaner amenities, and occasionally better views.
A little known observation point, Nakanokugatoge is located near the popular Koan campground, the view of Fuji found here can also be found on the back of the 1,000 yen bill. The observation point here is a simple 30-minute hike to reach and is a great detour for those camping near the lake.
Yamanakako
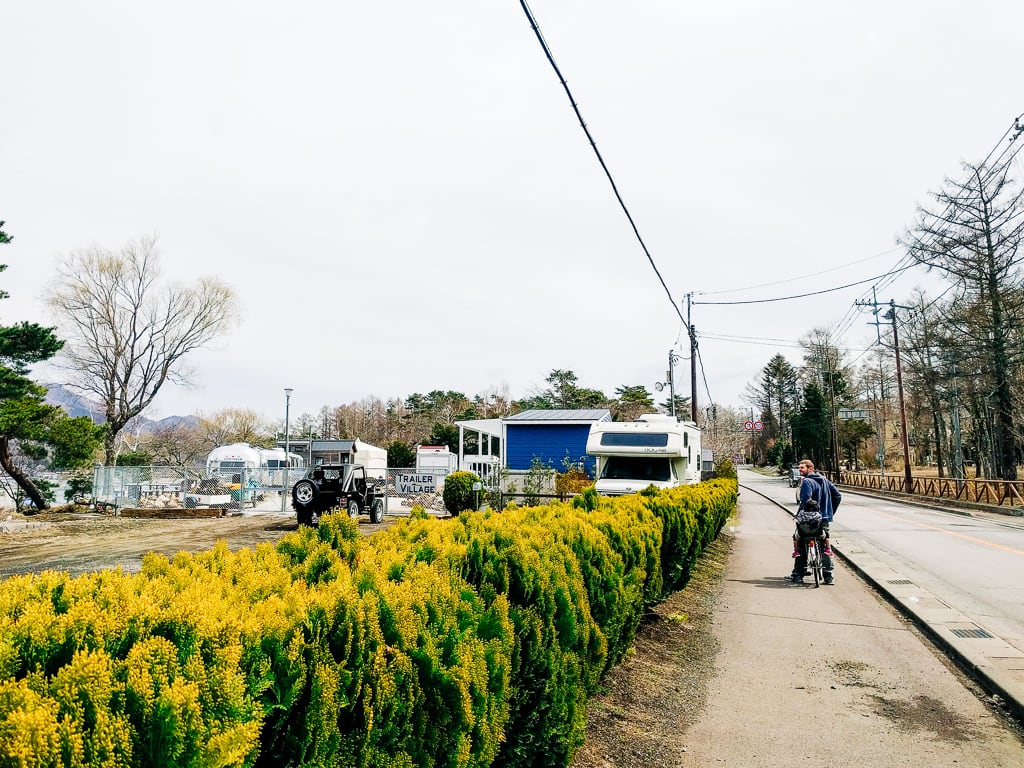
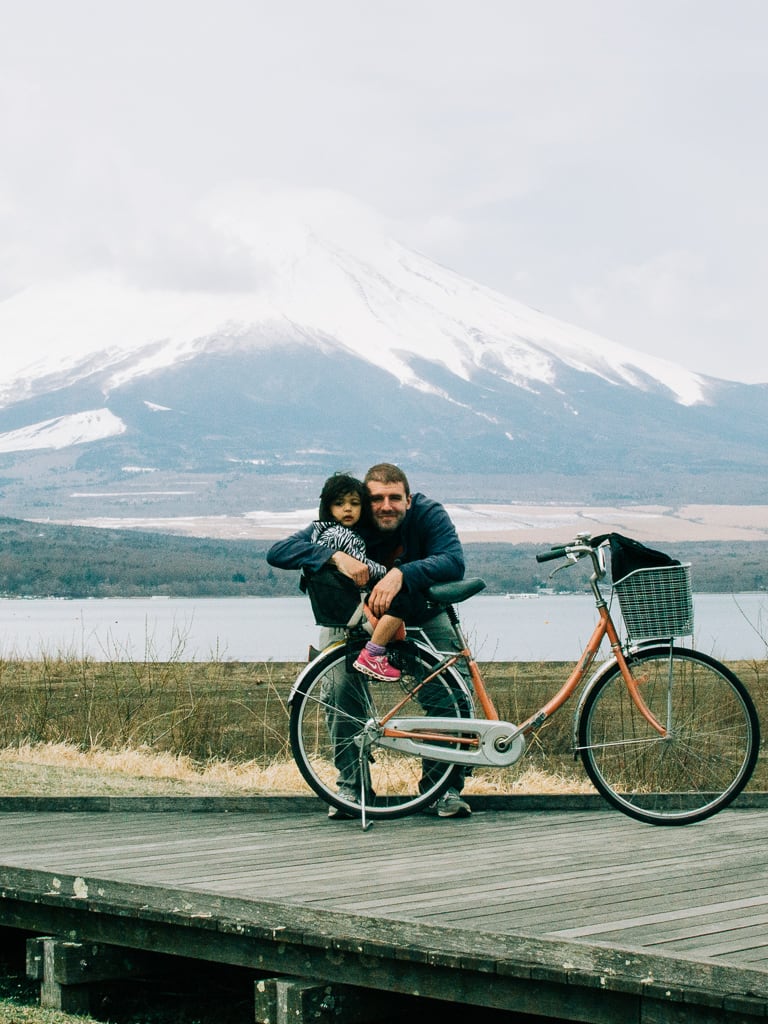
Lake Yamanaka is the biggest of the Fuji Five Lakes. Although its the biggest, it’s the easiest to bike around because there’s a dedicated path for cycling here. Driving is recommended when exploring the Yamanakako area.
As with Kawaguchiko, Yamanakako also has a wonderful bike path surrounding the lake and has cheap bicycle rentals around the lake. In fact, the cycling path here is much better in Kawaguchiko and you can circle around for 2 hours. This is also the easiest way to explore the area since the buses don’t run as often as you’d find in a major city.
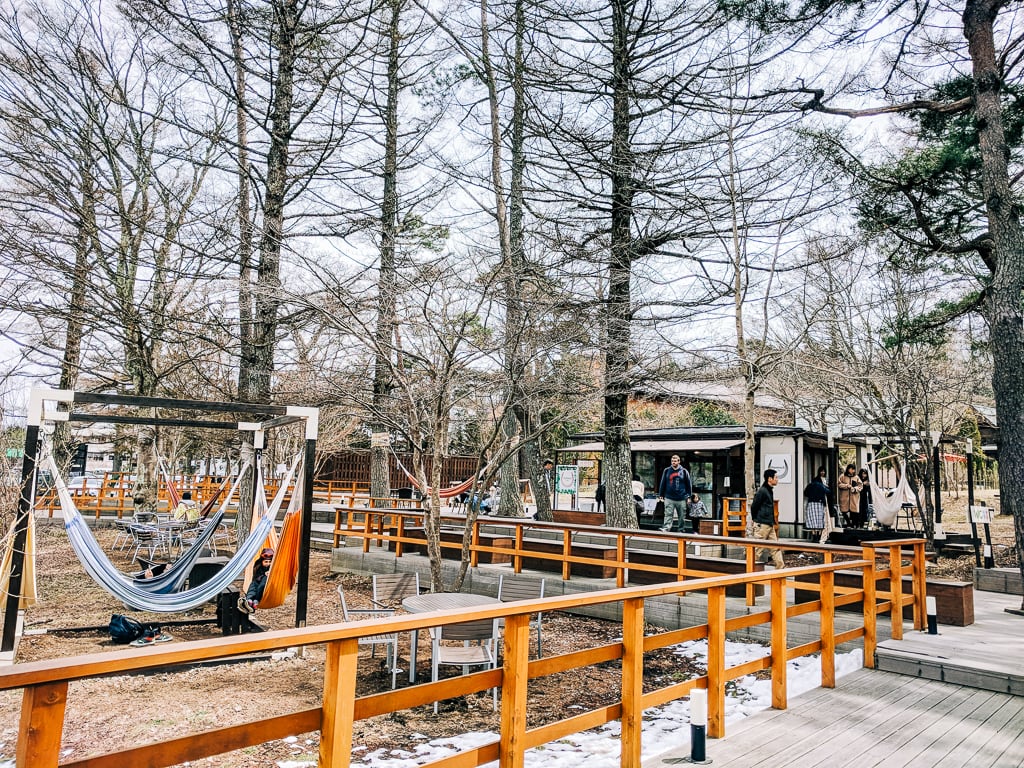
Take a break from biking around the lake with a cup of coffee, tea, or ice cream in this unique little cafe, where you can lay back in hammocks and relax.
This is one of our absolute favorite experiences that we’ve had in the Five Lakes area. This large western-style house is a family run business that has been operating for decades but just recently started offering their services online, which is how we found them.
The house is incredibly cozy, and they offer an incredible breakfast with the stay that really capped off a great experience. Don’t forget to try their peanut butter! For photos, reviews, more information about this unique accommodation, visit this link.
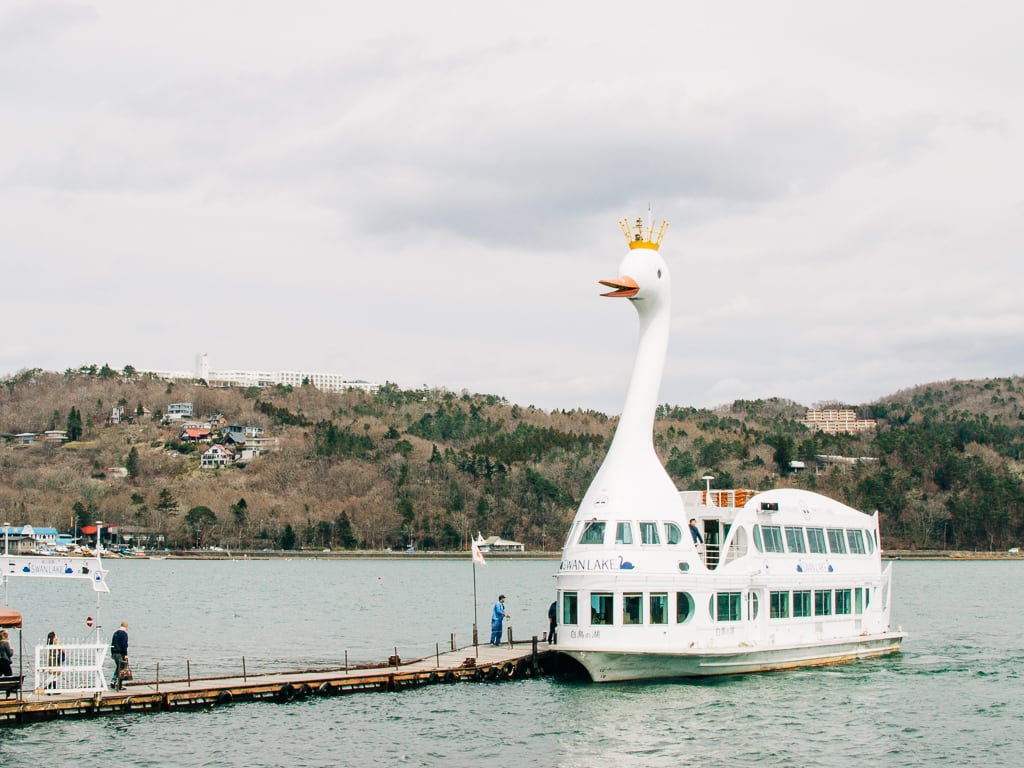
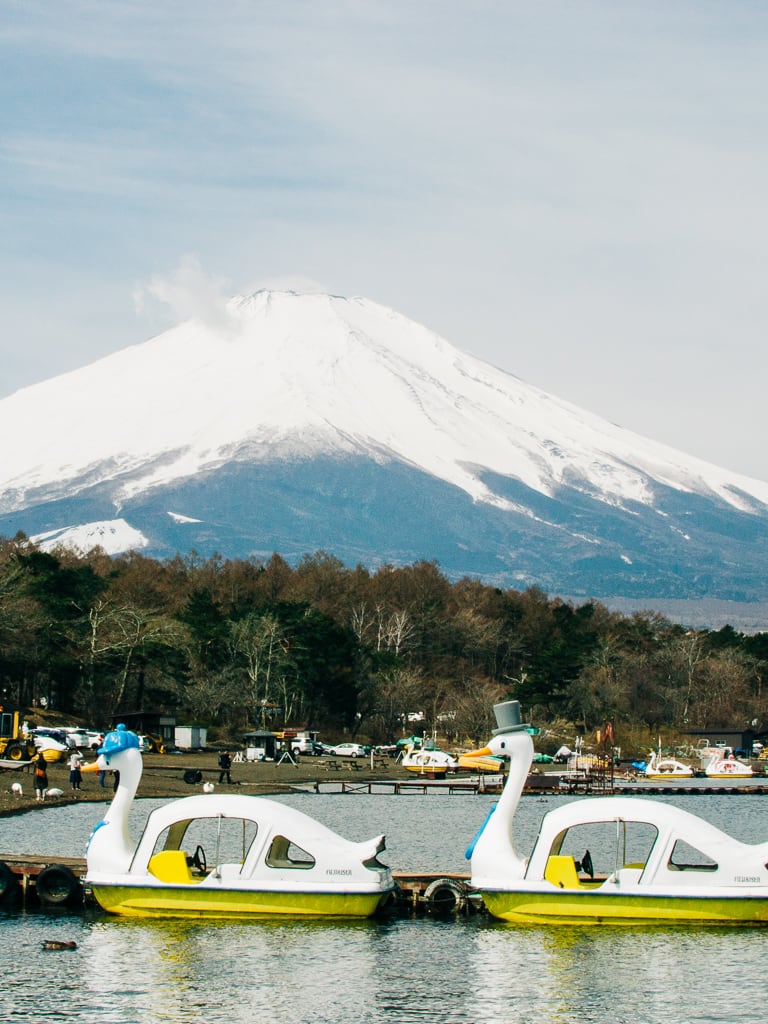
50. Rent a Swan boat and pedal around the lake.
Spend some time out on the lake by renting a small pedal boat made to resemble the much larger Swan Boat which takes tourists around the lake. It can be a bit of a workout but offers some great photo opportunities and relaxation.
In a small unassuming building, we found this absolutely incredible Mom and Pop curry shop. Offering great food for low prices, along with very friendly owners, this is our favorite restaurant around Yamanakako, and we want to share it with you!
Benifuji no Yu Onsen is actually a popular onsen in Yamanakako. This offers a great place to relax after a long day, and also offers some great food with a ton of variety.
53. Visit Lake Yamanaka Panoramic Deck.
If you’re looking for a great spot for a picnic, look no further than here. A popular Mt. Fuji viewing spot, this Panoramic deck can be accessed by either car, bike, or hike, so choose your favorite.
If you want a more dynamic view of the landscape, consider taking a helicopter tour for an unforgettable experience as you fly around Fuji and take in views you can’t get anywhere else! Seeing Japan from altitude leaves you with some of the most breathtaking views you’re likely to see in your lifetime, and many people go out of their way to hike up the tallest mountains possible to achieve these views.
Whew! That’s a HUGE list! As long as Mt. Fuji is in the scenery, the areas of Fuji Five Lakes is absolutely worth visiting. How about you? Have you been to any of Mt. Fuji’s Five Lakes? If so, which one is your favorite? Each has something unique to offer and has its own beauty!
Our family frequents the surrounding areas of Mt. Fuji, especially Kawaguchiko — our favorite day trip with our daughter. I just can’t get over how lucky the locals in this area are… snow-capped Fuji-san, beautiful breathtaking views, great food (houtou noodles is our absolute favorite!), and the people are always nice.
In fact, they’re so nice, I’ve actually lost count of how often the locals have given our daughter gifts just because they find her adorable. All of these things combine to make an ideal location, and one we hope to call home someday in the future. Because of how often we visit the areas around Mt. Fuji, we keep this as sort of a living article, which we update as we find something new and interesting in the area.
Understanding Mt. Fuji and Fuji Five Lakes
The main sightseeing attractions and in this itinerary guide are in the town of Fujikawaguchiko–the nearest town to Mt. Fuji that is easy to access on a day trip. The TOP tourist attraction here is Kawaguchiko or Lake Kawaguchi, the second-largest lake of the Fuji Five Lakes (or Fujigoko as the Japanese call it).
Lake Motosu and Lake Yamanaka, however, are not part of Fujikawaguchiko town. The Fuji Five Lakes were formed when Mt. Fuji erupted during the ancient times. From the (literal) ashes of such an awesome destructive force, these lakes have all become fantastic tourist attractions, an inspiration for artists, poets, and philosophers alike, and some top-notch fishing spots.
Kawaguchiko and Saiko
Kawaguchiko with the view of Mount Fuji
The beautiful and creepy Aokigahara Forest near Saiko
Of these lakes — Kawaguchi and Sai — are the most easily accessible by bus due to the bus frequency from Kawaguchiko Station.
Of the two lakes, Kawaguchiko is the most popular due to the area being better developed, as well as offering many experiences for tourists. Motosuko, Shojiko, and Yamanakako can also be accessed, but buses only run to each lake once every 1-3 hours!
Of course, there are more attractions and things to do around the area such as camping in Lake Motosu, fishing in Lake Shoji, kayaking, visiting the Shiraito Falls, Oshino Hakkai, the peaceful Kitaguchi-Hongu Fuji Sengen Shrine, and others.
But those merit separate posts as they are complicated to access. So in this guide, we will concentrate ONLY on the two popular and easy to access lakes–Kawaguchiko and Saiko.
Kawaguchiko or Hakone: Which is worth visiting?
Kawaguchiko is the BETTER option of the two because of the view of Mt. Fuji is EVERYWHERE in the area. And in terms of great Mt. Fuji views, Kawaguchiko is the very first place that should spring to mind, not Hakone, as the visibility of Mt. Fuji from Hakone is often poor because it’s a fog-prone area.
The food in Kawaguchiko is also much better (and cheaper), not to mention having the amazing hoto noodles! Some of the best tempura I’ve ever had in my life is also in Kawaguchiko (more on that later), and there are many local restaurants and shops there that can only be found there.
This isn’t to say Hakone is bad, it’s actually a very nice town with many unique attractions and has many popular ryokans with private onsens. Hakone, as we’ve found, is loved by locals as an onsen getaway, but not really for sightseeing Mt. Fuji.
How to get to Kawaguchiko from Tokyo
The highway bus is the CHEAPEST and FASTEST option to get to Kawaguchiko from Tokyo. And if you have a JR Pass, the highway bus is still the cheapest and fastest option for you.
From Shinjuku Expressway Bus Terminal to Kawaguchiko Station it costs around ¥2,000 per adult, with a travel time of about 1.5 hours, depending on traffic. I recommend that you take the earliest bus from Shinjuku, at 6:05 a.m., as the chances of seeing Mt. Fuji in the early morning light is highly likely.
Biking is the best way to explore the entirety of Lake Kawaguchiko as the sightseeing buses always get caught in traffic.
In fact, biking is actually the faster approach if only have a day in Kawaguchiko, since you won’t need to wait at bus stops.
You can rent a bike for a whole day, with prices starting at ¥1,800-¥2,000, and there are many bike rental shops outside the Kawaguchiko Station.
2. By Sightseeing Bus
One of the retro buses. But this one is bound for Fuji-Q Highlands
The Sightseeing Bus bound for Lake Kawaguchi and attractions nearby runs every 15 minutes, while the Sightseeing Bus bound for Lake Sai runs every 30 minutes.
These sightseeing buses are also known as Sightseeing Retro Buses because of their, you guessed it, retro design.
Be aware that during peak season (autumn and spring), you’ll experience MASSIVE delays in the bus schedule because of traffic, which can really SLOW DOWN your itinerary.
If you choose to do this option, I highly recommend that you make your trip overnight (2 days) and get the Unlimited 2-Day Ride Pass. You can get the Unlimited Ride Pass at the visitor’s center of Kawaguchiko Station. Check out our recommended accommodations in Kawaguchiko.
Which is better, join a day tour or on your own?
I get this question a lot from my friends who visit me in Japan and want to see Mt Fuji up-close. This is my answer to them:
Join a charter day trip tour if you want to save time and money, and aren’t looking to stay overnight.
It is also the perfect option for solo travelers, families, or large groups. Another advantage of joining a day trip tour is that you also get to visit other areas near Mt. Fuji but are outside of the Kawaguchiko and other Fuji Five Lakes.
Heck, you might not even need to read this article since you are accompanied by a professional tour guide! If you’re in a large group, say, 6-8 people, it’ll definitely be cheaper to just → book a Private Mt. Fuji tour and divide the costs among you.
Some private tour guides can also act as your personal photographer! You can also customize your tour and even go to tucked-away destinations around Mt. Fuji that are not easily accessible by public transport.
If you can, driving around the areas of Mt. Fuji is the best way to explore as you can explore at your own pace. In fact, this is what we do every time we visit.
If you’re looking to rent a vehicle, then we recommend → Web-Rentacar by White Bear Family Co., Ltd. (Japan-based). We’ve used them a number of times before, and their prices are pretty hard to beat!
If you do decide to drive, we’ll have suggested itineraries for you later. It should go without saying, but there’s no need to buy the Unlimited Ride Pass with this option.
The main advantage of driving in these areas is that parking is free everywhere in the Fujikawaguchiko area, and you don’t need to worry about relying on the buses. We have prepared an itinerary for you below to make the most out of your Mt. Fuji experience!
If you plan to rent a car and you’re not comfortable driving from Tokyo to Kawaguchiko, we recommend that you take a bus and rent the car in Kawaguchiko. You have to make sure that you book in advance online. We have not experienced walking into rental car agencies in Japan, but we’ve never had any trouble reserving a car online.
Please note that unlike the American rental companies, the Japanese tend to be strict on the pick-up and drop off times, and will absolutely charge you.
NOTE: Don’t forget to obtain an International Driver’s Permit! For the Americans out there, be sure your permit is from the American Automobile Association (AAA) or the American Automobile Touring Alliance (AATA). All other agencies are either not legal or are simply middlemen price gouging you.
Know before you go
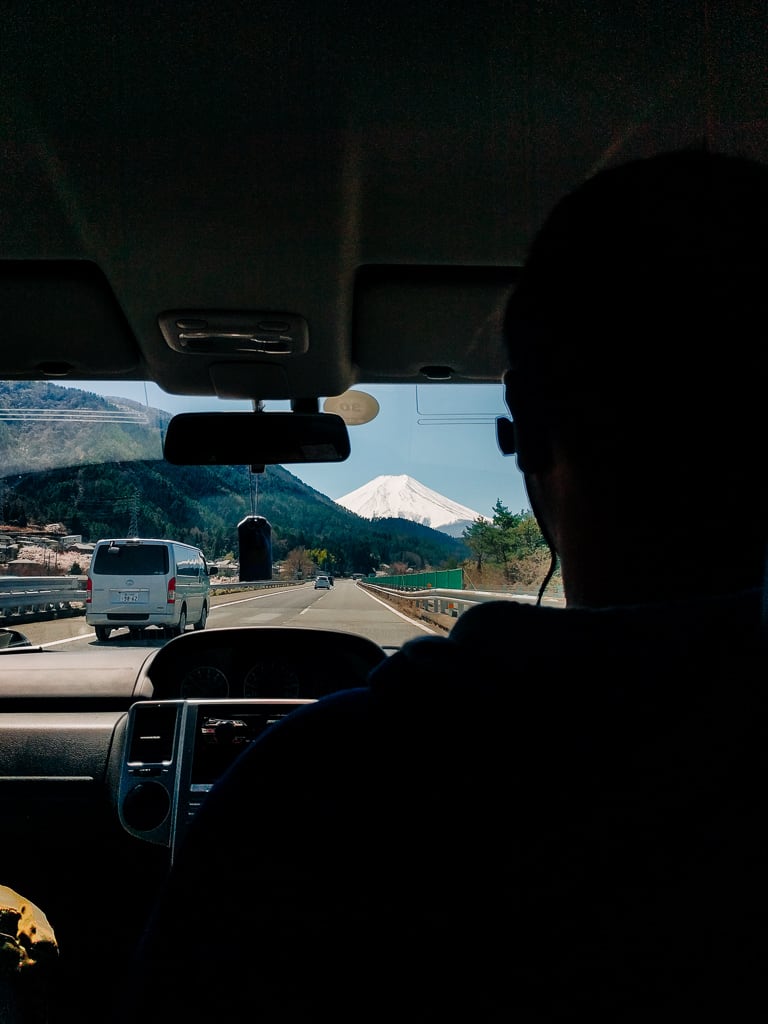
1. Weather. Mt. Fuji is very dependent on the weather. Cloudy days, obviously, completely obscure your view. And if there’s one thing I’ve learned about climbing Fuji-san, it’s that the skies always seem to be clear and beautiful…on the days you’re not climbing. So the good news is, if you visit outside of the climbing season, you should have many splendid views of the mountain. Unless you visit during the rainy season.
2. Best time to see Mt. Fuji. After years of living in Japan and living in a house that actually had a view of Mt. Fuji, we’ve found that November to February offers the best visibility of Mt. Fuji (and its famous snow cap!) You can still definitely visit year-round, it’s just that you have to time your visit on the sunniest and clearest weather forecast possible.
3. Carry cash. Unlike the cities in Tokyo, most of the small shops and restaurants you’re likely to encounter around Kawaguchiko and Saiko don’t accept credit cards. So make sure you have enough yen before you go sightseeing.
Our Suggested Mount Fuji & Kawaguchiko Itineraries
So you want to do it on your own? Awesome! First off, remember to check the weather forecast for the days you’ll be visiting (if possible).
We admit that it’s a huge DOWNER when Mt. Fuji is not visible. But don’t let that discourage you from visiting! The chances it will be like that if you stay multiple days are slim. Make sure to BOOK your accommodation in Kawaguchiko well in advance.
Here are our Mt. Fuji & Kawaguchiko itineraries that you can copy from Tokyo:
Itinerary 1
Itinerary 2
Itinerary 3
Itinerary 4
Itinerary 5
2-Day Kawaguchiko & Saiko
Day 1: Take the early morning bus from Tokyo to Kawaguchiko Station. Upon arrival in Kawaguchiko Station, get the Unlimited 2-Day Ride Pass at the visitor’s center, then hop on the Red-Line (Kawaguchiko Sightseeing Bus).
Your first stop is the Natural Living Center. Explore the Natural Living Center, the Oishi Park is just outside and offers one of the best panoramic views of Mt. Fuji with Lake Kawaguchi.
Next, hop on the Red-Line bound for Kawaguchiko Station as your next stop will be the Itchiku Kubota Art Museum. Pay the entrance fee of ¥1,300 and explore the museum’s entirety!
Once done, why not have some lunch? Try houtou noodles, a popular delicious regional dish from Yamanashi! From Itchiku Kubota Art Museum, walk to Momiji-tei Restaurant and order their beef houtou. You’ll not be disappointed.
After the big lunch, you have the option of exploring this area. Kawaguchiko Music Forest Museum and Konohana Museum are just around the corner. Just choose one or just keep exploring.
Mt. Fuji is actually very visible from this area. The best spot to take photos here is the North Coast trail, which is just behind the Konohana Museum. Admire Mt. Fuji there, and why not have a cup of coffee?
After that, go to the nearest Red-Line bus stop and, if you still have time, go to the Sightseeing Boat/Ropeway Ent. bus stop for the Kachi Kachi Ropeway and ride the cable car going up to Tenjoyama Park, which offers not just another beautiful view of Mt. Fuji, but the town and surrounding mountains as well.
Afterward, depending on where you booked your hotel (which should be just around Kawaguchiko Station), check-in.
Day 2: Eat your breakfast and check out of your hotel. Take the Green-Line Saiko Sightseeing Bus. Your first stop should be the Saiko Iyashi-no-Sato.
Take your time exploring Iyashi-no-Sato, you could easily spend half the day here relaxing while viewing Mt. Fuji. They have samurai costumes to rent during your time here as well.
Next, go back to the bus stop and take the Green-Line again for Kawaguchiko Station. Your next stop is Yagisaki Park, which, depending on the time of year you visit, can be filled with flowers and herbs.
During peak season, you’ll find many food stalls here serving ice cream, dango, and other sweet Japanese street food. Small coffee shops are also scattered around the area. We personally love Milky Way and Cisco Coffee!
After relaxing, hop on the Green-Line bus and head back to Kawaguchiko Station, then back to Tokyo.
Day 2: Breakfast and check out. Hop the Green-Line bus and go to Fugaku Fuketsu bus stop to meet up with your nature guide for the beautiful Aokigahara forest exploration.
Afterward, you are free to go explore the rest of your day, you can either visit the Iyashi-no-Sato healing village or head straight to Yagisaki park (see Day 2 of Itinerary #1 for ideas). Head back to Tokyo.
2-Day Kawaguchiko & Fuji-Q Highlands
Day 1: No need to buy the 2-Day Unlimited Pass! Explore Lake Kawaguchi by bike! There are many bike rental shops around Kawaguchiko Station.
Rent a bike for the whole day (usually ¥1,500-2,000 per day) and follow the Day 1 of Itinerary #1.
Don’t forget to grab a map from the shop for the dedicated bike route to the attractions mentioned on the Itinerary 1.
Day 2: From Kawaguchiko Station, take a bus to Fuji-Q Highlands and spend the day riding some of the world’s top roller coasters! There’s plenty more to see and do between rides, so be sure to explore as you go.
When you’ve gotten your fill, head back to Tokyo.
NOTE: For those of you able to spend the 3rd day here, consider relaxing in the nearby Fujiyama Onsen after your day in the Fuji-Q!
2-Day Kawaguchiko & Arakurayama Sengen Park
Day 1: Do Day 1 of Itinerary #3.
Day 2: Take the train from Kawaguchiko Station to Shimoyoshida Station and walk to Arakurayama Sengen Park.
Do some warm-up stretches as you’ll be climbing nearly 400 steps to see the beautiful Chureito Pagoda on top, which offers a breathtaking view of Mt. Fuji and the entire town of Fujikawaguchiko and Fujiyoshida City.
When you’re ready, head back to Tokyo.
1-Day Kawaguchiko (by bike only)
Just follow the Day 1 of Itinerary #3–explore Lake Kawaguchiko by bike!
Top things to do around Mt. Fuji’s Kawaguchiko & Saiko
1. Sightseeing Retro Bus
Sightseeing buses starts at Kawaguchiko Station
If you’re doing this trip on your own, again, I highly recommend that you stay overnight, ideally near Kawaguchiko Station as the bus starts there.
The Unlimited 2-Day Ride Pass is ¥1,500. You just have to show the pass to the bus driver when boarding and exiting the Retro Buses. There are two bus lines that take you to the tourist spots around the area.
First is the Kawaguchiko Sightseeing Bus or the “Red-Line” which will bring you to areas around Lake Kawaguchiko. The second one is the Saiko Sightseeing Bus or the “Green-Line” which will bring you to areas around Lake Saiko.
2. Tenjō-Yama Park Mt. Kachi Kachi Ropeway (also known as Mount Fuji Panoramic Ropeway)
Probably the most popular attraction within this little town, the ropeway provides you with easy access to the top of Mt. Tenjo and gives you a great view overlooking the lake and town with the many mountains surrounding it all.
While you can take the cable car to the top, you also have the option of hiking up the mountain, although it’s a deceptively difficult trail…if you’re carrying a child on your shoulders.
The only real drawback to hiking up is finding the actual entrance to the trail is a bit of a hassle. It honestly took us about an hour to finally find it because, like many hiking trails in Japan, it’s sort of in a weird place, and makes you feel like you’re trespassing at the start.
At the top, there is a small souvenir and snack shop, along with a few trails leading to better views, and other mountains.
We suggest hiking up and riding down the ropeway cable care if you’re feeling up to it, or vice versa. Riding both ways simply robs you of some of the best views of Fuji you’re likely to find, as well as robbing you of an excuse to eat one of the tasty treats found at the top!
3. Kawaguchiko Music Forest Museum
Inside the music forest museum
The buildings inside the Music Forest Museum remind me of a European fairy tale setting, with somewhat exaggerated buildings, and lots of pink paint.
The whole “forest” itself is built to resemble a town square of sorts, with a central fountain. So if you’re expecting a walk through a nature trail, it’s not like that. There are two buildings with things to do or see inside, and all the others are some form of a souvenir store. The whole area is handicap and stroller accessible.
The only thing we don’t like about this place is the admission ticket price — ¥1,500 per person. But there are 2 ways to get some discounted tickets for the music forest for about ¥300 off:
By printing the web coupon screen from their website or;
By reserving in advance through their website and paying through PayPal.
4. Konohana Museum
Home of Dayan the Cat, the Konohana museum is a fantastical stylized architecture, reminiscent of the Ghibli Museum. Containing the works of Akiko Ikeda, it was built to look like the Tachiel Enit Museum in the fictional Tachiel City, and is as much a part of the artwork as the pieces it houses.
Wachifield is the fictional world created by Ikeda-san, and the love and care that went into making this museum feel as authentic as possible can be felt as you wander its halls. Pictures, sculptures, and dynamic dioramas can all be found inside.
And while the exhibit itself is rather small, that makes it easy to fit into most itineraries!
5. Kawaguchiko North Coast Walking Trail
Kawaguchiko North Coast Walking Trail
The North Coast Walking Trail is just a 7-minute walk from the Kawaguchiko Music Forest Museum and located behind the Konohana Museum. This short trail offers a 180-degree view of Mt. Fuji and is a place that many tourists are unaware of.
We saw many restaurants as we walked the trail, mostly Italian restaurants (there is a strong European influence here), cafe shops, and dessert shops. But we didn’t dare to try one. They were expensive!
It seemed to me that you are mostly paying for the comfortable seats and view, rather than the quality of the food that you order. So I suggest just enjoying the view and skipping the restaurants, maybe bring a boxed lunch, or just eat at one of the much better options elsewhere.
6. Itchiku Kubota Art Museum
Itchiku Kubota is actually my favorite museum in Kawaguchiko. The museum lies inside a paradise-like forest with breathtaking views of the calm lake of Kawaguchiko and Mt. Fuji. It’s the most fascinating museum I’m ever seen.
It’s because the building is made up of Okinawan corals and limestones, and the foundation of the main gallery building is made from Hiba trees that are more than 1,000 years old. With an entrance fee of ¥1,300, we were able to learn about the life of Itchiku Kubota and his fascinating artwork “Tsujigahana.”
Tsujigahana is a technique of dying kimonos which was prevalent around the period of the 13th to 15th century, or Muromachi Period, and became mostly extinct during the 16th to 17th centuries.
Kubota was 14 when he became a kimono artist. However, when he saw a 350-year old silk fragment, which was a remnant of Tsujigahana in Tokyo National Museum, he became fascinated and devoted his life to reviving it.
Several years after, Kubota was captured by the Soviets and was imprisoned in Siberia during World War II. When he was released, he studied the tsujigahana technique. But, because no instructions survived explaining how to reproduce it, Kubota was forced to experiment on his own for decades. Eventually, Kubota was not only able to reproduce it, but also modernized it.
He had his first exhibition in 1977 at the age of 60, and his works quickly went abroad and received various awards due to their uniqueness and superb quality. I would really recommend visiting this museum when you travel to Kawaguchiko and allow yourself to be inspired by Itchiku Kubota.
When you really want something to happen, the whole world conspires to help you achieve it. ― Paolo Coelho
Seeing his art really left me in awe, and I’m sure it’ll have a similar effect on you.
7. Kawaguchiko Natural Living Center and Oishi Park
Located on the opposite side of the lake from Yagisaki Park, Oishi Park also takes part in the annual herb festival, and the Natural Living Center acts as a sort of a gift shop for buying herbs and blueberries.
Oishi park is also famous for its Kochia plants, which bloom in early autumn. You really can’t go wrong with either park, so why not just spend some time in both?
8. Yagisaki Park
Located along the southern coast of Kawaguchiko, Yagisaki park offers both an incredibly peaceful and relaxing atmosphere, as well as an absolutely gorgeous view of Fuji-san and the surrounding mountains.
I suggest planning your visit to the park between June and July, as the park holds the annual Lake Kawaguchi Herb Festival during that time. The plants will be in full bloom and the entire area will be filled with vendors selling delicious treats and souvenirs.
There is also a popular art museum called Muse-kan (Muse Museum) in the park, which displays the work of Yuki Atae, a famous doll-maker in Japan. There are approximately 90 dolls on display within the museum and are rotated twice a year. There’s also a cafe and gift shop within as well.
9. Saiko Iyashi-No-Sato Nenba (Healing Village)
Located near Saiko, Iyashi No Sato Nenba is an open-air museum that features thatched roofed houses that are similar to the historic village of Shirakawa-Go in Gifu Prefecture. These thatch-roof houses were originally built by farmers for raising silkworms back in Showa Period (1926-1989).
A typhoon in 1966 actually destroyed the village, but now, reconstructed 40 years later, there are over 20 thatched houses that were converted into shops offering souvenirs, workshops, or hands-on activities like paper mache, Hina doll making, or weaving.
Each thatched house has its own specialty, including souvenir shops, tea houses, handicraft workshops, and art galleries. This place is beautiful and relaxing and made more beautiful by the surrounding foliage.
This is also one of the best views of Fuji to be found in the five-lakes area. There are also stores near the parking lot with local fruits and vegetables, honey products, and other Japanese street food. In fact, my husband didn’t want to leave because a man was selling huge jars of honey for ¥2,000, which is unthinkably cheap in Japan!
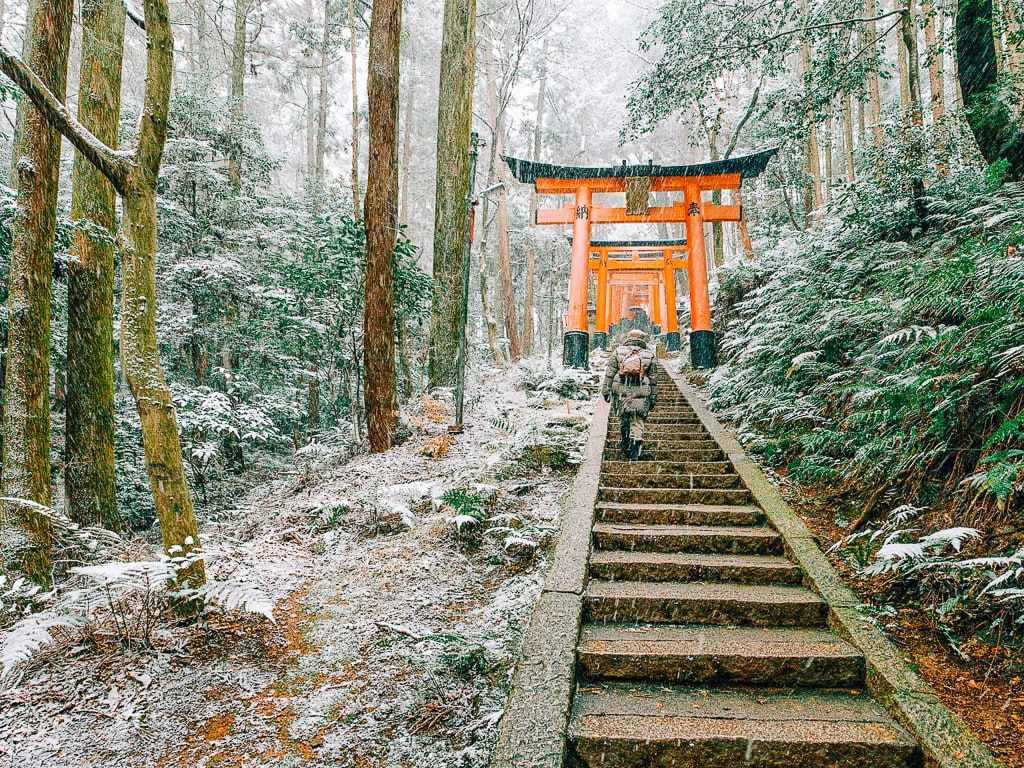
10. Aokigahara Forest (Suicide Forest)
After reading many of the urban legends about this enigmatic forest online, I tended to think it was enough to discourage people from trying to enter this forest.
Exploring the infamous Aokigahara Forest was something I thought would be impossible given the stories surrounding it. But apparently, it’s not. The forest is open to the public and is actually a major attraction for the area.
Upon reaching the entrance to the forest, however, it becomes clear that not all the stories are myths. There are warning signs in Japanese telling you to stay on the hiking trail and avoid going too far from the entrance, as it was believed that people get lost because the GPS doesn’t work in some areas of the forest.
The entrance also has a sign in Japanese talking about suicidal thoughts, as well as listing various help hotlines. It reads:
Life is an important thing we receive from our parents. Think once more about your parents, your siblings, your children. Don’t suffer alone. Please talk to someone.
Aokigahara is both beautiful and creepy, and if you’re interested in seeing it for yourself, you should definitely join a guided nature tour.
Oh, and don’t be a Logan Paul…
11. Arakurayama Sengen Park
Home to the Chureito Pagoda, this park offers yet another incredible view of Mt. Fuji, while also overlooking Fujiyoshida City. It’s over almost 400 steps to the park, but the way is lined with cherry blossoms, which should take your attention away from your burning thighs.
It’s a hike to the top but you’ll be rewarded by the panoramic views of Mt. Fuji along with the Pagoda, made famous by Japan postcards.
12. Fuji-Q Highland
Probably the main attraction for Japanese locals around Mt. Fuji, not named Mt. Fuji, is this amusement park known for its roller coasters and thrill rides. For those less enthusiastic about that sort of thing, the park also offers 3 other areas to explore that don’t focus on rides.
Made up of four separate areas/parks, there is the main park, Fuji-Q, which is where the major rides and attractions are. Thomas Land, based on Thomas the Train, for the kids. La Ville de Gaspard et Lisa, based on the French picture book characters “Risa and Gaspearl.”
As I said before, the area around Fuji has a strong European influence). And it’s the newest area, Fuji Leaf Village, based on the popular manga anime Naruto and Boruto.
I’ve been to the park about 3 or 4 times, but I’ve honestly only been to the main park. Thomas Land was the only other area at that point (and we didn’t have a child at that point), and I haven’t returned since the other areas were built.
This is definitely on our to-do list, and we’ll be sure to get back to you with our thoughts as soon as we do. As for the main park, the roller coasters are incredible and are definitely the main attraction.
Each also affords a great view of Mt. Fuji (except Dododonpa, you’re going too fast), right before you take your first drop. I highly recommend stopping here during your trip if you’re looking for something different than the normal trip to Disneyland or Universal Studios Japan.
After all, you can get those in America as well. But there’s only one Fuji-Q.
Want to See More?
Our 53 Best Places & Things to do around Fuji Five Lakes
There are so many things to do around Fuji Five Lakes! Even when you can’t see Mount Fuji, you can still enjoy all the attractions and off-the-beaten spots around the Fuji Five Lakes area.
1. Kawaguchiko Herb Festival in summer. Mainly lavender fields in Yagisaki Park and Oishi Park. Lots of Japanese street food, so make sure you try some. Event dates here.
2. Momiji Corridor Festival (Maple Corridor Festival) in autumn. Lots of fiery maple trees lined up with many street foods and souvenir stalls down the road. This is a very popular event in the autumn and is jam-packed with “Leaf-Peepers” (for my Mainers out there). Event dates here.
3. Oishi Park’s Red Kochia in autumn. A great alternative to Hitachi Seaside in Ibaraki, Oishi Park has plenty of Kochia plants that turn a deep red during mid-October. And the best part is it has Mt. Fuji as the backdrop.
4. Oike Park in autumn. Oike Park, a park in front of Kawaguchi Herb Hall, is lined with poplar trees which turn a beautiful yellow in late October to early November. Mt. Fuji isn’t so visible here because it’s partly a residential area, but it’s worth visiting only during autumn.
5. Arakurayama Sengen Park. Although still, very nice year-round, Arakurayama Sengen park is EXCEPTIONALLY beautiful when visited during cherry blossom and autumn season.
Where to Eat in Kawaguchiko
Food is our favorite part of every journey, and Kawaguchiko is perhaps one of our favorite places in Japan as it has really superb food. The Yamanashi area as a whole is most well known for its famous Hoto Noodles, and Kawaguchi has many restaurants specializing in it.
We tend to favor and remember restaurants which offer both great food AND kind staff, so here’s our list:
1. Momijitei restaurant
Momjitei is just a 7-minutes walk from the Itchiku Kubota Art Museum. And it is famous for making the best Houtou noodles in Kawaguchiko, and the best restaurant to go for your lunch.
Just make sure to get there early as it fills up fast! Their homemade miso sauce is aged for two years and is what sets them apart from other houtou noodle restaurants.
We had beef houtou during our visit and it was one of the best meals we’ve ever had! The staff instructed us by pointing to the condiment tray on our table that we could also add some Nanban (miso topping) for an added oomph to the soup flavor.
2. Houtou Fudou restaurant
Houtou Fudou has several branches in Kawaguchiko, and we ate at their main branch near the Kawaguchiko Music Forest Museum. All their branches are always extremely busy!
That’s how popular they are. There’s one just in front of Kawaguchiko Station, and of course, due to its location, it’s always jam packed!
Now if you were to ask us which Hoto noodle shop is best, we would personally choose Momijitei Restaurant because the food is great, it comes in a large portion, and the staff was very friendly.
3. Tempura Restaurant Ninja
This restaurant is only a 4 minute walk from Kawaguchiko Station. Now, I don’t usually like tempura because it’s generally greasy, but this is different and has become the only tempura I really like!
Our picky daughter surprisingly ate their tempura as well, which is always a plus. Something about their tempura is unique, I think it might be air fried, but who knows. The staff here are very nice too, and, as usual, our daughter received treats from them.
4. Cisco Coffee
This cozy coffee shop is located near Yagisaki Park is a San Francisco style coffee shop in a relaxing shop to sit and relax with a good book. The menu is pretty simplistic, but the coffee is top notch and really helps warm you up on a chilly morning by the lake.
5. Milky Way
This is a traditional shop that is also located near Yagisaki Park. They have an incredibly cozy atmosphere inside.
Now, I won’t lie, I’m a sucker for Mom & Pop type places, and this shop is clearly a passion project between the joint owners who run it. The desserts here are absolutely incredible, and the owners were super patient with our daughter, who was being rather moody this day.
There are plenty of toys to entertain most kids, but apparently, not enough for ours. I can’t recommend this place highly enough!
6. Troisieme marche
We love this coffee & bakery shop, and we wanted to enjoy it more, but our daughter just wouldn’t sit still. This is located near Kawaguchiko Forest Museum, and is famous for their cake desserts, which were amazing.
And that’s it! Please know that the itineraries presented above are based on our experience, so it’s tried and tested.
If you have any question, please leave you comment below!
Now let’s talk about visiting Japan on a tour package or escorted tour — what is a good travel agency to use that is worth your money? What are the things to consider before booking your Japan tour package?
Which the tour company provides the best Japan package tours?
A reader’s email asked a wonderful question: “Which tour company do you think provides the best Japan vacation package tours?” This is a tricky question because each has different focus and specialties (i.e. luxury, family, active, off-the-beaten path, foodies, etc.) and it also depends on which destinations you want to visit.
After digging into many online marketplaces for multi-day Japan tours, we’ve finally narrowed down our answers to a few different ones and turned it into this helpful guide. The tours in this guide are carefully-curated from TourRadar. We decided on using TourRadar as they’re the most trusted online marketplace for third-party tour operators offering multi-day packages to Japan. However, TourRadar has over 230 Japan package tours to choose from!
As we dig through, we quickly realized that not all tour providers specialize in Japan experiences. It may show Gold or Platinum badge on their profile, but that doesn’t mean they’re necessarily good for you. That’s is why we’ve created this article–we did the work for you. We only listed trusted providers with impeccable service history and solid Japan itineraries, prioritized agencies utilizing local guides, and categorized them based on your preferences all in one page. This is meant to save you the headache of having 15 windows open to compare tours against one another.
Tips before you book your Japan tour package
1. Decide on how many days you want to travel to Japan. If you were to ask us how many days you should visit Japan, a solid number would be 14-days.
Two weeks should give you enough time to adjust to the time zone and explore some of the major sights of Tokyo. I would also try and stick mostly within the Greater Tokyo area to experience modern metropolitan Japan and go to the Kansai area for cultural preserves and Japanese historical landmarks.
Depending on how in-depth you want your tour to be, you could visit almost every prefecture in Japan within 14 days with a JR Pass, but you wouldn’t be able to spend much time in each. So to create a meaningful and memorable Japan experience, I suggest picking a few areas and sticking to them. After all, you’re in Japan to enjoy yourself, not to spend most of your trip traveling to a new location.
2. Before you book your flight, check the tour availability first. To keep the cost low, most of the tour packages to Japan are NOT all-inclusive. So you’d have to book the flights on your own. Ideally, you’d have to book the package tour first before booking your flight.
3. Find flight deals to Japan. If you’re from North America, use Google Flights and look for the dates with the cheapest roundtrip flights. Now, if you’re from other parts, like Asia or Europe, you might get better flight deals from Skyscanner, because Skyscanner focuses on flights to the Asia-Pacific region.
TIP: Add extra days after your tour. For example, you booked a tour package for 10 days. Don’t just stay in Japan for those days and just end your experience there. Instead, try to extend your stay in Japan for around 3 or more days, and explore some parts perhaps not covered by your tour.
4. Know your Japan travel goal. How would you like to discover Japan? What type of accommodation do you need? Are you a culture buff looking to see sumo, kabuki theater, or experience a tea ceremony? Are you traveling alone or with your family?
Choose the package tour according to your profile and your preference.
Join the tour that interests you and caters to your needs, NOT just because you see a lot of reviews for it.
If this is your first time in Japan, we highly recommend that you read our Japan packing list article as well.
Japan tour companies that are now accepting bookings for 2022
For those of you looking to travel to Japan during the Olympics (July 24th – August 9th, 2020), you’re in luck. These travel companies are now accepting reservations for next year!
While you may be traveling here for the games, don’t limit yourself to them. This may be your one opportunity to visit Japan, so make the most of it.
Of this list, as a companion to our Tokyo 2020 Hotel Guide. And, like hotels in that guide, these tours are likely to increase their prices as we draw closer to the games. So be sure to book early to avoid the inflated prices.
Here are some package tours to Japan that are now accepting bookings for the Tokyo 2020 Olympics:
A great option, particularly if you’re looking for a small group tour, which offers a lot of bang for your buck. This tour begins in Tokyo, where you’ll sightsee, make sushi, and be entertained at the infamous Robot Restaurant.
Working your way southeast you’ll experience a traditional Japanese temple stay in beautiful Takayama, then travel to Kyoto to explore the Bamboo Forest, Golden Pavilion, and practice Kendo. Your tour ends in Japan’s kitchen, Osaka, where you’ll be treated to a food tour of the city and end with a night of Karaoke!
This tour offers much of the same experiences as its 10-day counterpart, listed above, but continues on from Osaka. After your night of karaoke, you’ll wake to explore Osaka on your own, then meet back up with the guides in the evening to visit Osaka castle and enjoy a Shinsekai dinner.
The following day you’ll travel to Nara, to visit the temples and feed the local deer, then make your way to the heart of the mountain, Koyasan, for another overnight stay in a traditional temple. Your tour will then take you to Hiroshima to visit the Peace Park and end on Miyajima Island.
In my opinion, there is no better activity in Japan than hiking through the thousands of mountains that make up the island. It’s wholly unique and needs to be experienced to understand, and this tour is a great way to do just that. Beginning in Kii-Tanabe, you’ll meet up with your guide for a filling Japanese dinner (you’ll need the energy) and safety brief.
The hike will take you across the northern mountains through Yunomine, Nachi, and Koguchi, and will end in Kumano. You’ll visit various shrines, onsens, temples, and mountain villages all along the way, and see sights rarely seen by even the local Japanese. So pack light, and strap on your boots for a trip of a lifetime!
NOTE: The trails are moderate to hard in difficulty but are very long. It’s recommended that you are physically fit to attempt this tour.
Taking place on the lesser-known northernmost island of Japan, Hokkaido, this tour takes you on a road trip across this magical island to see its rolling hills, serene lakes, and towering mountains. Starting in the capital city of Sapporo, you’ll meet up with your guides at the airport, then, after being escorted to your hotel, you can spend the rest of the evening touring Japan’s 5th largest city.
The next day you’ll travel to Shikisai no Oka, where you’ll find expansive views of the patchwork landscapes of flowers and herbs. Over the next few days, you’ll visit the Kurodake Ropeway, multiple onsens, Lake Mashu (The clearest lake in the world), and witness Ban’ei horse racing. This tour is perfect for those looking to see a different side of Japan, and relax in some of the most beautiful and picturesque locations imaginable.
Everything I said about hiking in Japan in the previous tour applies here as well. There truly isn’t a better way to experience Japan in my opinion. In this hiking tour, you’ll begin in either Tokyo or Kyoto (depending on where you arrive) where you’ll travel to Nakatsugawa via the shinkansen (bullet train).
Here you will relax and eat a hearty dinner, then stroll through the town in a yukata. From here the tour will take you on a trail through the mountains, which will take you through bamboo forests, small mountain villages, onsens, and shrines. Again, hikes like this reveal a much more traditional side of Japan rarely seen and is guaranteed to leave you longing to return.
Destination itinerary summary:
4-day Nakasend Hike
Best 7-Day Japan Tour Packages
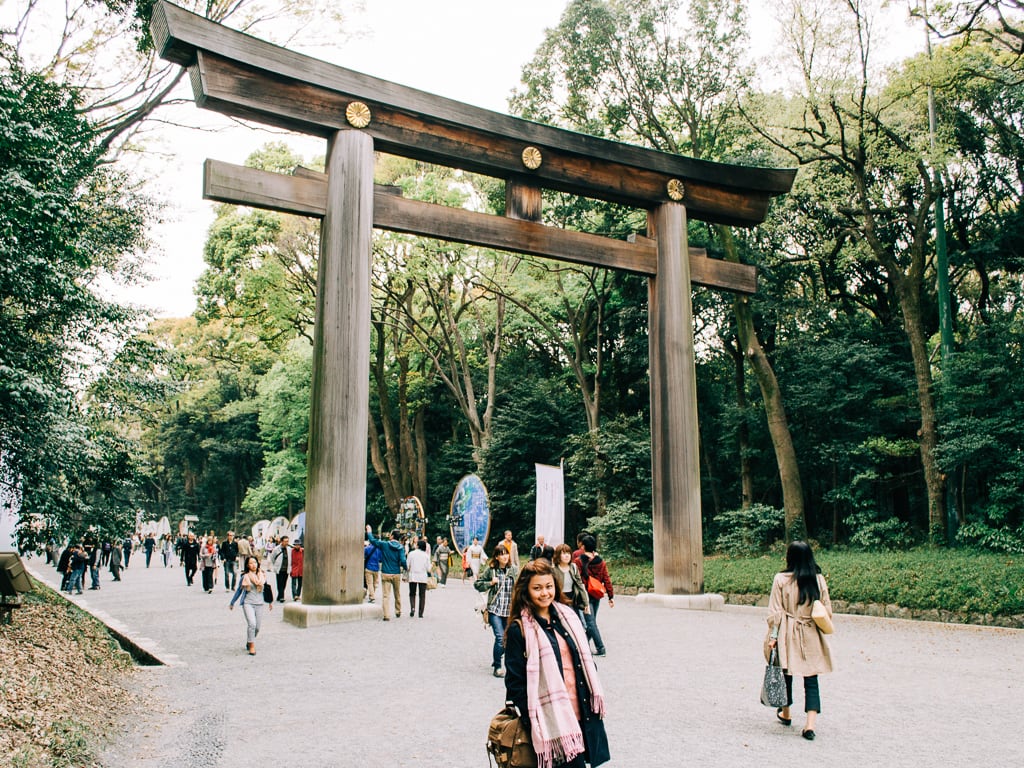
Meiji Shrine in Japan
In my opinion, a 7-day tour is actually a really good length for a structured tour, as long as your actual time in Japan is over 7-days. There are many reasons for this but the biggest is jet lag.
The same can be said for all the tours on the list, but I find it’s best to have time before and after the tour to both adjust to the time difference and relax before leaving, and a 7-day tour usually fits into almost any itinerary.
Here are our recommended 7-day package tours to Japan:
Just as the name suggests, this tour takes you from Tokyo to Kyoto and hits as many tourist hotspots as possible on the way. In the modern cityscape of Tokyo, you’ll explore Asakusa and the famous Senso-ji temple, then take a cruise down the Sumida river and see many of the most famous landmarks of this megacity.
From Tokyo, you’ll head to the quiet town of Kamakura to visit the Great Buddha statue. Your trip ends in Kyoto where you’ll have the opportunity to visit more shrines, temples, and pavilions than you’ll know what to do with.
Much like nearly every tour on this list, this one begins in Tokyo where you’ll see the sights and take in a bit of nightlife as well. This tour also includes a visit to the famed Akihabara (Akiba), which should satisfy the otakus among you.
You’ll also travel to Kawaguchiko to take in views of Mt. Fuji and visit Iyashi no Sato Nemba before moving on to Kyoto and Osaka, where you’ll take in the incredible culture of both Japanese heritage and culinary arts.
This is a 6-day tour package. Beginning by meeting you at the airport, you’ll travel to the hotel and have dinner before traveling to Kyoto the following morning. In Kyoto, you’ll get an up-close look at Japanese culture with activities ranging from museums to temple tours.
Walk down the streets of Gion and watch the Geisha and Maiko travel between tea houses while you take in the sights of Kyoto’s nightlife. After your fill of temples and shrines, you’ll head to Osaka and visit Nara, a town filled with deer, then eat till you drop while wandering through Osaka’s Dotonbori!
If culture and history is your thing, this tour might just be for you. While all the tours here let you experience Japanese culture in one way or another, this one focuses on World Heritage shrines, temples, castles, and gardens, as well as seeing some of the more out of the way locations, such as Hakone.
A highlight of this tour is the Lake Ashi Cruise and Hakone Ropeway, giving you some incredible photo opportunities.
Unlike most of these tours, this one actually begins in Kyoto and ends in Tokyo, and it works out pretty well as if gives you more time to explore Tokyo than you otherwise would have. The start of the tour, however, hits a big highlight for me, Todaiji Temple in Nara, which holds the Guinness World Record as the largest wooden building.
From there you’ll move on to the Golden Pavilion and have lunch with a Maiko (Geisha apprentice). On your way to Tokyo, you’ll stop off in Hakone to enjoy Japan’s first-ever open-air museum, and explore this mountain town before ending in Tokyo, where you’ll be given plenty of time to explore and sightsee.
Destination itinerary summary:
Osaka (1 day)
Nara (1 day)
Kyoto (1 day)
Hakone (1 day)
Tokyo (3 days)
Best 10-Day Japan Tour Packages
Fushimi Inari Shrine in Kyoto
A 10-day tour has many of the same advantages as a 7-day tour, but without having to feel rushed at each attraction. You can use those extra days to either spend more time in fewer destinations or simply join a tour with more destinations.
Here are our recommended 10-day package tours to Japan:
This tour will have you traveling all over Japan as you visit some of the most popular cities and cultural sites in the country. Beginning in Tokyo you’ll visit some lesser-known attractions like Yoyogi park and the Gotokuji Cat Temple.
You’ll then travel to Kanazawa via the bullet train, and visit the 17th-century gardens, Kenroku-en, and beautifully preserved Samurai and Geisha districts. From the historic and serene Kanazawa, you’ll visit Kyoto and Hiroshima, before ending your tour in Japan’s kitchen, Osaka!
Kyoto is the focus of this tour as you’ll spend 3 days exploring the many cultural landmarks throughout this historic city. Before that though, you’ll spend some time in Tokyo learning to make your very own sushi, then travel to the UNESCO World Heritage site in Takayama for an overnight in a traditional temple.
Your tour will end with a bang as you visit Osaka for a food tour and a night of karaoke!
With an emphasis on cultural landmarks, this tour hits all the normal cities you’ll find in most tours, but focuses on the traditional and cultural over the modern and contemporary.
During this tour, you’ll take in glorious views of Mt. Fuji, and explore places such as Lake Ashi, Nijo Castle, the Golden Pavilion, the Pure Water Temple, Koraku-en Gardens, and the Peace Park. Needless to say, this tour should more than satisfy any culture buffs among you!
Of all the 10-day tours this is probably the closest to what I’d consider a “typical tourist” tour, and that’s not a bad thing. The advantage of this tour is that its sort of a sampler platter of the many sides of Japan, so you can experience a little of everything.
You get the popular sightseeing spots and modernity of Tokyo, Mt. Fuji and Hakone for some nature, Kyoto for a cultural experience, Hiroshima for history, and Osaka for cuisine. So you really can’t go wrong with this choice.
Unlike other tours on this list, this one only hits two major cities, the rest being small towns (by Japanese standards) and villages, and that’s what really makes this one stand out to me. This tour will take you to Lake Kawaguchi to view Mt. Fuji, then to the mountain towns of Matsumoto and Takayama, to visit castles, temples, and other historic venues.
You’ll also visit Shirakawa and Kanazawa to see the incredible gardens and take part in a gold leaf class to make a custom bento box! The tour concludes in Kyoto, where the modern and traditional clash and mix to create something wholly new and original.
Destination itinerary summary:
Tokyo (2 days)
Mount Fuji and Kawaguchiko (1 day)
Matsumoto (1 day)
Takayama (1 day)
Shirakawa (1 day)
Kanazawa (1 day)
Kyoto (3 days)
Best 14-Day Japan Tour Packages
Itsukushima Shrine in Miyajima
Best for those who either have a lot of time to spend in Japan or who just want to take all of the guesswork out of their itinerary. A tour of this length really allows for an easy pace and a lot of sightseeing.
As these tours generally cover much of what the shorter tours do — I can only describe Tokyo sightseeing so many ways before becoming repetitive — I’ll try and keep the summaries to what sets them apart.
Here are our recommended 14-day (2 weeks) package tours to Japan:
Japan is a culture of juxtaposition. On one hand, fully embracing modern technology and pushing cities to their limits, on the other holding tight to tradition and the culture that makes their people so unique and incredible.
This tour seeks to highlight this by taking you through the cities and cultural sites which bring the past to life, and wrapping it all up with your time spent in Tokyo, possibly the most modern and high tech city on the planet.
From relaxing at a traditional tea ceremony in a zen garden to rocking your best rendition of ‘Shook Me All Night Long’ at a high-tech karaoke bar in Tokyo, see all Japan has to offer during this amazing experience.
Your tour begins and ends in Tokyo as you make a loop around the main island and visit the cities, rural towns, and villages that makeup Japan. After sightseeing around Tokyo you’ll visit Nagano to see Zenkouji temple before relaxing in a hot spring bath at your ryokan.
Then travel to Matsumoto where you’ll take a short hike to see a large troop of snow monkeys enjoy their very own hot springs before traveling to Takayama, Gokayama, and Kanazawa. The second half of your tour will take you through Kyoto, Hiroshima, Miyajima Island, and Hakone before bringing you back to Tokyo for a farewell dinner!
Beginning in Osaka, you’ll work your way east to Tokyo. Along the way you’ll feed deer in Nara, walk through the Bamboo Grove in Kyoto, visit a Samurai’s House in Kanazawa, visit Old Town in Takayama, view incredible Ukiyo-e paintings in Nagano, walk through a 1,400 year old temple in Masumoto, take in the view of the majestic Mt. Fuji, and finally sightsee in Tokyo before either heading home or resting after such an eventful tour!
Okay, now this tour is something special because it really does take you off-the-beaten-path. The first half of the tour is your standard offering of Tokyo, Fuji, and Kyoto, but it’s the second half that truly sets it apart. Rather than heading to another major city, you’ll turn south to visit the Kii Peninsula and take a walk through the World Heritage Pilgrimage Route, before relaxing at Kawayu Onsen.
Your adventure continues on to Kumano Hayatama Taisha Shrine and Kii Katsuura; a beautiful Pagoda near a waterfall. Towards the end of the trip, you’ll visit Tsumago and Magome, where you’ll step back in time to a world before gadgets, internet, and even cars. Before returning to Tokyo you’ll soak in one last onsen to relax your sore muscles after so much walking and hiking.
If you’ve been reading the other 14-day tours up to this point then you’ll know what each city on this itinerary has to offer. Tokyo, Kanazawa, Takayama, Hiroshima, Kyoto, and Kawaguchiko are all on the docket, and while the destinations don’t offer anything particularly unique, what sets this tour apart is it’s exceptionally professional and knowledgeable guides and excellent customer service.
Which, for anyone who has gone on guided tours before, you know isn’t always a given. This tour also offers a number of optional excursions, some free and some paid, to further customize your experience.
We personally love this one as it’s a well-paced offering 2 days at each destination.
Destination itinerary summary:
Tokyo (2 days)
Kanazawa (2 days)
Takayama (2 days)
Hiroshima (2 days)
Kyoto (2 days)
Mount Fuji and Kawaguchiko (2 days)
Back to Tokyo (2 days)
Best Japan Tour Package for Active Travelers
Seiganto-ji and Nachi Waterfall in Wakayama
Traveling to Japan and taking advantage of the plethora of outdoor activities available to you is my personal favorite way to experience this country. Whether you’re hiking, biking, or taking some time out on the water, Japan’s natural beauty beats anything you can find in the city.
These tours, however, allow for both. Spend some time experiencing city life in Japan, and contrast it to the laid back rural towns and villages. It’s hard to go wrong here.
Here are our recommended package tours to Japan for active travelers:
Visiting Japan during the winter months may seem like a bad idea, but it’s actually our second favorite time of year to travel here. The lines are shorter, the skies are clearer and, if you can deal with the cold, there are tons of winter events to experience.
This tour package takes advantage of the season because many of the tourist hotspots on this list are far less populated this time of year, leading to a more enjoyable experience, in our opinion. Plus, it has the added benefit of a ski trip to Hakuba, one of the world’s top skiing destinations!
New to skiing? Take a couple of lessons with an experienced instructor. Already a Pro? Cut loose and take full advantage of the day. These four days are yours to do with what you please on the slopes, so go nuts!
For the triathletes among you, this tour allows you to experience a road far less traveled as you make your way towards Tokyo, visiting as many off-the-beaten-path landmarks as possible in between.
Hongu Taisha Shrine, Katsuura, Wakayama Castle, Ikeuchi Jima, and Matsuyama are just a few of the places you’ll see along the way to Hiroshima, before boarding the bullet train to Tokyo and a well-deserved rest.
Bicycles are a regular fixture on Japanese roads, so traveling Japan by bike is about as authentic a way to see it as any. It should go without saying, but be sure you’re in good cycling shape before attempting this tour as you’ll be riding for hundreds of miles with varying degrees of difficulty.
From Kyoto, you’ll travel north to the Noto Peninsula to ride along the stunning coastline while stopping off in the charming villages along the way. Your ride will end in Anamizu, where you’ll take a well-deserved soak in the Wakura onsen before boarding a train the next day to Tokyo and the end of your adventure.
Destination itinerary summary:
Kyoto (2 days)
Nara (1 day)
Kanazawa (1 day)
Noto Peninsula (4 days)
Tokyo (3 days)
As you can see Japan’s travel industry is booming right now, and it shows no signs of letting up any time soon. Many of these tour options are offering discounts of up to 30%, so take advantage of these prices while you can, because it’s only going to get more expensive the closer we get to the Olympics!
If you enjoyed this article, why not check out some of our other stuff? Learn the do’s and don’ts of Japan here, or book your hotel for Tokyo 2020 here.
✅ Best for families and foodies. ✅ Only accepts guests 15 and above (or contact agent).
If you’re anything like my husband, then food is the main attraction of any trip. Japan Real Food Adventure offers this and so much more.
From bustling city-center of Tokyo to a Buddhist temple in the mountains of Japan, you’ll take in the sights, tastes, and aromas of the Japanese culture on a trip you won’t soon forget!
Features Highlights:
Includes 11 breakfasts, 3 lunches, and 5 dinners, along with samples of food along the way.
Visit the famous Tsukiji outer market and sample the freshest sushi from the source.
Taste some of the most delicious beef in the world in Takayama.
Visit the Omicho market in Kanazawa and take part in a sweets-making class.
Show off your own cooking skills during the traditional Obanzai Ryori class.
Experience the daily routine of a Buddhist monk during an overnight stay in Koyasan, a center for
religious practice for over 1,200 years.
Take a walk through a tea field and learn about the history and cultural importance of Japanese tea.
A word about the lodging: This tour has some accommodations which you may find (particularly westerners) either incredible or unacceptable, depending on your own personal preference.
This includes 2-nights at traditional Japanese ryokans with shared bathrooms/toilets and many rules, and one night at a Japanese monastery, wherein the only bathing facilities are traditional public baths.
The operator says that some accommodations may be changed in certain circumstances if you contact them about your concerns.[/su_note]
The accommodations are a bit average, but one of the hotels offered on this tour (Hotel Green in Takayama) is a bit hit or miss with travelers. I suggest reading reviews of the hotel and contacting the tour agency about any concerns.
Once the tour starts you will have very little time to explore Tokyo and Kyoto, so I suggest booking a couple of extra days if you want to see more of the cities.
✅ Best for families with small kids and slow-paced travelers.
Japanese cherry blossom or sakura is one of the biggest tourist draws to the country, and this tour allows you to experience this incredible sight in 7 popular viewing locations.
The tour runs from March 17th – April 28th and repeats annually. These dates fall within the prime sakura blooming season and guarantee breathtaking views of these short-lived pink petals.
This is a 9-day tour starting from the day you step foot into Japan. From Tokyo, you’ll head to popular cities such as Hakone, Kyoto, and Hiroshima, along with some lesser-known places where you’ll visit castles, temples, and onsens, all while keeping the picturesque cherry blossoms center stage during your tour.
Featured Highlights:
Cherry blossom centric tours.
Daily breakfast buffets, 3 lunches, and 3 dinners.
Airport pick-up from both Narita and Haneda.
Includes tours of the Tsukiji fish market, Asakusa, and Harajuku.
Relax in an onsen (Japanese public bath) in Hakone.
Includes shinkansen (bullet train) ride.
Tour of historic Kyoto, including the Golden Pavilion, Bamboo Grove, and experience a Maiko dinner.
Visit other places including Himeji Castle, Miyajima Island, and the Peace Park memorial.
Lowlights:
Other major attractions, such as Disneyland isn’t included, so you’ll need to pay for them separately if you want to visit them.
Cherry blossom season is also generally the start of the rainy season in Japan, so the weather may work against you.
Cherry blossom season is also the most popular tourism season for Japan, so expect millions (yes, millions) of people moving visiting the city at the same time looking for the same photos.
Bottom Line
Choosing the best Japan tour package for you is fairly simple: Know what you want to see and go from there. If you still need help on which tour package is best for you, please leave your comment below.
Reaching the summit, watching the magical golden sunrise, and eating a delicious bowl of ramen noodles on top is the most rewarding part of climbing Mt. Fuji or Fujisan as the Japanese call it. Those are just a few reasons why climbing Fujisan is a must for adventurous travelers.
And those who have climbed her will tell you, that it’s the highlight of their experience in Japan. So, if you’re joining a guided tour or climbing solo, our article is all about making sure your climb is a safe and unforgettable one.
If you’re joining a guided Mt. Fuji climbing tour, we have compared the top three (3) tour operators based in Japan to help you determine the best experience for you. You’re not just climbing the highest volcano and highest peak in Japan, you’re also climbing an iconic cultural symbol, a UNESCO Culture Heritage Site, and a highly respected volcano in Japan.
So you don’t just go there and climb thinking that it’s going to be just another normal hiking activity. In fact, you need to know a lot of things about climbing Fuji-san.
It really depends on your individual travel circumstances:
1. If you’re traveling solo and/or it’s your first time climbing Mt. Fuji.
Then join a guided tour. Joining a group or private Mt. Fuji climbing tour through a licensed agency is the best way to experience it. Not only will you be in the safe hands of an experienced climber, but you’ll also enjoy the service of Japanese tour guides and English interpreters who are experts about Mt. Fuji and can tell you facts, history and stories, and their own experiences.
Honestly, climbing as a group is just more fun. Whether that group is you and your friends or a tour group doesn’t really matter in the end. The camaraderie and extra motivation can really help the last stretch of the mountain.
NOTE: DO NOT attempt to climb Mt. Fuji alone.
2. If group climbing tours don’t align with your schedule.
Then arranging a private tour is a great option. You have the freedom to choose your own climbing dates or even arrange a special experience after climbing Mt. Fuji.
3. If you live close to Mt. Fuji and you drive a car.
Then climbing independently makes a lot more sense. Driving on your own may be cheaper especially if you’re with your friends. However, you need to do some research about the deets of the climb such as where to park your car during peak season, Mt. Fuji rules and regulations, which trails you plan on starting your climbing, and safety briefs on your own.
Note that, if you’re driving your own car, the 5th Station is closed and cannot be accessed during peak dates (see here). So you need to park in Fujihokuroku Parking and take the shuttle bus to the 5th Station.
When are the best dates to climb Mt. Fuji?
The official Mt. Fuji climbing season is in the summer from July 1 to September 10. During this time the various facilities along the main trails are open, transportation to and from the mountain is easy and accessible, and the trails themselves are safest to hike due to the relative lack of snow.
If you’re an inexperienced hiker then this is the best time to tackle the mountain. But pay close attention to the Japanese holidays.
What are the dates to avoid?
Avoid climbing during Yama no hi (Mountain Day) which is a non-working Japanese holiday on August 10-11, 2020, during which seemingly every local is outside and climbing the mountains! If climbing on those dates is your only option, expect to queue from 9th station going up or down the mountain.
Avoid the Obon and Tanabata Festivals as well. While technically not a holiday’s but Buddhist celebrations which take place every 15th of the 7th lunar month and July 7th respectively. Obon lasts for 3 days (August 13-15, 2020) and are the busiest days.
So try to time your climb before those mentioned holidays.
Is climbing Mt. Fuji tough?
joejoestock /Depositphotos.com
There is a famous Japanese proverb that translates into something like:
“He who climbs Mt. Fuji once is a wise man; he who climbs twice is a fool.”
The climb can be a bit difficult. But much of its difficulty lies in the mind rather than the actual trail. This isn’t to say there aren’t some rough spots along the path to the summit. Nor are we saying that you should jump off your couch directly into a Fuji climb.
We’ve seen some very fit people start out strong racing to the top only to be passed by little old ladies at the halfway mark. So the motto to remember here is slow and steady wins the race.
You may have seen other bloggers and vloggers climbing Mt. Fuji wearing only tank tops, shorts, and sneakers. Don’t do this. Mt. Fuji has been responsible for countless injuries and even a few deaths over the years.
Most of these injuries can be attributed to people simply being underprepared, and much of this is the result of peer pressure of those pushed to climb it. So if you aren’t both mentally and physically ready to climb it, then don’t attempt it until you are.
The weather around Mt. Fuji also changes in a heartbeat and can be misjudged even by the most accurate weather channels. So be prepared for sudden weather changes such as rainstorms or windstorms. We’ll discuss the proper equipment to bring in the next section to be better prepared for this.
As you ascend, the air starts to thin out as there’s an elevation gain of 1,500 meters above sea level from the 5th Station to the summit. A sudden elevation gain like that can challenge your mental and physical fitness and can make your entire hike difficult as you gasp for more air.
Most climbers back out once they reach 8th station as this is where they start to show altitude sickness. Canned oxygen can be bought at almost every station to help combat this.
This section may seem like a lot of doom and gloom regarding the difficulty of the climb, but it’s all for your own safety. We certainly don’t want to give you a false impression of it being easy. But, as long as you’re in moderate physical condition, then you should be good to go.
As we mentioned, much of the climb comes down to being well prepared and mental fortitude. Trust us, by the 8th station, your mind will be screaming for you to give up. But stick it out and the reward is absolutely worth every bit of soreness that comes with it!
How long does it take to climb Mt. Fuji?
Note that these are just an approximate for an average person and should not be followed as a guideline. Avoid “bullet climbing” or climbing without resting just to meet minimum hours of climbing.
Climbing Mt. Fuji is not a race.
Here’s the summary of ascending and descending times of each trail:
Yoshida Trail: 6-7 hours ascend and 4-5 hours descend.
Fujinomiya Trail: 5-6 hours ascend and 3-4 hours descend.
Subashiri Trail: 6-7 hours ascend and 3-4 hours descend.
Gotemba Trail: 7-8 hours ascend and 3-4 hours descend.
Willer Express is one of the most popular highway bus companies in Japan. Their basic Mt. Fuji Climbing group tour package with no gear rental starts at US$200 which meets at the Fuji Subaru Line 5th station. Or for US$250 if you’d like to be picked up near Shinjuku Station in Tokyo.
All of their packages include:
Round trip bus transfer from Shinjuku or meet-up at Fuji Subaru Line 5th Station.
Stay at Tomoekan mountain hut at 8th station.
Dinner and breakfast meals.
English-speaking professional licensed tour guide.
This tour is conducted by Club Get. Club Get doesn’t have an English website so this tour can only be booked through Voyagin. Voyagin is an online travel agency based in Tokyo specializing in local experience.
The best thing about booking your climb with them is that the tour is highly customizable. You can choose between Yoshida Trail and Subashiri Trail (read about their differences later).
You also have an option to include a one-of-a-kind experience to see the magnificent Hoei crater. The price also includes a lot of free stuff or bonuses.
Their Mt. Fuji climbing tour highlight and inclusion:
Round trip bus transfer from Shinjuku Station
A mountain hut stays at Mt. Fuji 7th or 8th Station.
Dinner and breakfast meals
The professional licensed tour guide can speak basic English.
A ¥100 coupon for Mt. Fuji pilgrim staff.
A special lucky charm and/or free mineral water.
Option for gear rental during the checkout process.
This is not to say that the first two tours are not quality experiences. But this tour company looks to make your ascent comfortable from beginning to end.
And this all starts with reservations at Toyo-Kan Mountain Hut, at the 7th station, which is the most high-end hut in Mt. Fuji (read more about Toyo-Kan later) and allows you to rest and be fully prepared for the last stretch to witness the glorious Mt. Fuji sunrise.
After your long and arduous journey up and down Fuji-san, JTB’s Mt Fuji Climbing tour package provides you with an incredibly relaxing and soothing onsen (hot spring) experience in Lake Yamanaka — Beni Fuji No Yu Hot Spa, the only spa that offers the best views of Mt. Fuji while you’re soaked in their therapeutic waters.
Seriously, this will feel like the best bath of your life after the climb. I’ve been to Beni Fuji No Yu twice and have always enjoyed the experience, so I highly recommend it.
If you’re curious what a high-end mountain hut looked like and want a ‘better’ stay, then you’ll want to book with JTB. JTB is actually the largest travel agency in Japan and known for providing top-notch tourism experience for its customers.
So these guys know exactly how to please their guests.
Mt. Fuji Climbing Routes: Which trail should you climb?
Our hike began at the Yoshida trail.
This section is to help you learn about the four trails which lead to the peak of Mt. Fuji.
Each trail is color-coded on Mt. Fuji to help hikers follow the trail and not wander off course by mistake.
1. Yoshida Trail.
Yoshida Trail at glance:
The trail begins at Fuji Subaru Line 5th Station in Yamanashi Prefecture at 2,300 meters altitude.
Yellow trail.
Zigzagging switchback trail.
There are many mountains huts to rest and stop on the ascending trail.
Separate ascending and descending trails.
No mountain huts on the descending trail and there’s only one toilet on the 7th station. The next toilet is 30 minutes away from the 6th station.
First-aid centers at 7th and 8th stations.
Sunrise side of Mt. Fuji.
Yoshida is the most popular hiking trail and is typically overrun by tourists and locals alike with the last record of over 172,000 climbers last 2017. Yoshida Trail is color-coded with yellow. Yoshida trail is very visible from afar on a clear day due to its zigzagging switchback trail.
The descent also forks at certain points into different trails, so make sure you’re paying attention to the trail color code and not taking a wrong turn to end up on the wrong side of the mountain as a former coworker of mine did (causing his group to wait for 2 extra hours for him to find his way back).
Most travel agencies climb the Yoshida trail as it’s slightly easier for beginners due to many shops to stop at. We recommend booking with Voyagin or Veltra to experience climbing Mt. Fuji on the Yoshida Trail.
2. Fujinomiya Trail.
Fujinomiya Trail at glance:
The trail begins at Fujinomiya Trail 5th Station in Shizuoka Prefecture at 2,400 meters altitude.
Blue trail.
The trail is steep and rocky.
The shortest trail to the summit.
There are many mountain huts.
Same ascending and descending trail.
Only 1 first-aid center at the 8th station.
Not on the sunrise side.
Fujinomiya trail is the second most popular trail and it has the shortest route to the summit as the trail begins at an altitude of 2,400 meters. However, the route is steep and rocky. The ascending trail is the same as the descending trail, so climbers need to keep in mind of making way for each other.
3. Subashiri Trail.
Subashiri Trail at a glance:
The trail begins at Subashiri 5th Station in Shizuoka Prefecture at 2,000 meters altitude.
Red trail.
Forested and shaded trail during the first hour of the hike.
Known for its volcanic sand and gravel section on the descending trail called “Sunabashiri”.
Separate ascending and descending trails.
The ascending trail gets crowded from the 8th station as it joins the Yoshida trail.
There are many mountain huts.
Only 1 first-aid center at the 8th station.
Sunrise side of Mt. Fuji.
The trail starts from Subashiri Trail 5th Station in Shizuoka Prefecture at an altitude of 2,000 meters. The Subashiri Trail is perhaps a local favorite or an avid hiker favorite. People who climbed Mt. Fuji many times choose Subashiri because it’s less crowded and provides an experience that isn’t present on the other trails.
The first half of the climb is tree-shaded by a lovely lush forest and it’s the only trail that directly faces the east which provides excellent sunrise experience.
For first-timers, be aware that it Subashiri trail merges with the Yoshida trail upon reaching the 8th station. So when descending, follow the red-coded trail which is a different trail from the ascend. If you’re interested in climbing Subashiri Trail, we recommend Voyagin as they offer a private climbing tour.
4. Gotemba Trail.
Gotemba trail at a glance:
The trail begins at Gotemba 5th Station in Shizuoka Prefecture at 1,450 meters altitude.
Green trail.
The longest trail to the summit.
Very few mountain huts and toilet is on the 7th station only.
Known for having access to the beautiful view of Hoei Crater, a parasite crater of Mt. Fuji.
Not on the sunrise side.
Gotemba trail is the least popular climbing routes. This is the longest trail out of the four trails and with fewer facilities for restrooms, no emergency facilities, and only 4 mountain huts for stops on the 7th station. For this reason, only experienced hikers are recommended to take this route.
On the brighter side, since this is the least popular, it is the least crowded of the four trails so you can enjoy it the climb quietly. Due to the very limited number of facilities on this trail, there are no available climbing tours. Therefore, you’ll have to do it on your own or arrange a private climbing tour.
What is the best mountain hut to rest or stay in Mt. Fuji?
The advantage of joining a group tour or a private tour is that hut reservations have already been taken care of by your local tour operator. If you’re planning on your own climb then you’ll have to make your own hut reservations and be prepared to deal with language barriers or limited English ability by the hut staff.
Toyo-Kan Inn. Located on the 7th station of Yoshida Trail, Toyo-Kan is like the 5-star hotel of all huts in Mt. Fuji; which, admittedly, isn’t a very high bar to clear. It’s the most modern mountain hut in Mt. Fuji that offers two room types. Rooms start at ¥10,000 and com with delicious breakfast and dinner meals.
Toyo-Kan is the only mountain that has a professional website where foreign guests can book conveniently. Due to its popularity, it is best that you book 1-2 weeks before your planned climb or join this Mt. Fuji climbing tour as they stay at Toyo-Kan hut.
Hiking undershirt. Ideally, 100% polyester such as this for you stays dry. Undershirts like Under Armor and compression shorts are great as they prevent chafing and wick sweat away from your body while maintaining flexibility.
Quick-drying shirt. I love my hiking shirt from Columbia. It’s comfortable, cool, very lightweight, and has UV protection. Consider a hiking shirt that’s polyester with lightweight fleece.
Gore-tex Shell Jacket. The weather in Mt. Fuji changes quickly in a heartbeat. It may say it’s sunny on the weather forecast on the day of your climb, but it’s actually raining in Mt. Fuji itself. Bring a shell jacket designed for rain and sudden change ice condition. An excellent shell jacket for Mt. Fuji climbing should be waterproof, windproof, and can withstand sudden extreme alpine conditions — the temperature drops on the summit of Mt. Fuji. And Gore-Tex material can withstand all those conditions. Think of it as an all-in-one jacket.
Hiking pants. Again, I love Columbia’s hiking pants, and I have their Anytime Outdoor pants which are lightweight, water-resistant, quick-drying, and stretchable, and very comfortable.
Hiking boots. It should be waterproof with mid or high ankle support. Don’t attempt to hike in water shoes or sneakers. I use this one.
Thick hiking socks. Preferably wool because it can absorb sweat, keeps your feet warm, and doesn’t stink too much.
Gloves. It can get very cold once you’re nearing the top so you need gloves. It also protects you from rocks as you climb.
Lightweight rain gear (raincoat and pants). Always assume it’s going to rain. If it doesn’t, great. If it does, you’ll be prepared. It’s a win-win. You can buy this at any Don Quijote or ¥100 stores.
What not to wear
Cotton shirts
Jeans
Shorts
Aqua shoes or Sneakers
2. Hiking equipment:
Backpack with built-in rain cover. Bring a backpack with at least 25L capacity to hold your necessities.
Headlamp. A headlamp is mandatory in climbing Mt. Fuji as the sun will often set during your decent. Bring a headlamp instead of a flashlight.
Hiking sticks. Some may not need this but hiking sticks make a huge difference in providing less pressure on your knees.
3. Mt. Fuji hiking essentials:
Portable oxygen can. Oxygen can prove to be the most useful equipment when climbing Mt. Fuji and the one that you should use to combat altitude sickness and air gasping. You can buy oxygen can ahead in any Don Quijote or any convenience stores in Japan for about ¥500 – 700.
Sunscreen. Preferably, with at least 50++ UPF with UVA and UVB protection.
Lip balm. I always use Vaseline petroleum jelly for my lips as it is more effective than chapstick or any other medicated lip balm.
Sunglasses. A pair of sunglasses can protect your eyes from dust or sand. It also protects your eyes from UV rays.
2-liter water. Each person needs to bring at least 2 liters of water and it can be refilled from mountain huts. You pay ¥500 for each refill.
Food and snacks. Climbing Mt. Fuji is not the right time to restrict your diet as it a very strenuous activity. You can burn around 7,000 calories so you need to replenish your body with high-energy snacks and bars ideally high in fats.
Cash. Your credit cards are no use here. Bring at least ¥10,000 cash including several ¥100 coins for using the toilet (¥200 as a donation), buying ramen noodles or Japanese curry, and refilling your water bottle. If you’re getting your pilgrim staff stamped, add another ¥5,000 as each stamp costs ¥300-¥500 for each station. If you’re staying at a hut, add another ¥10,000 – ¥13,500.
Ziploc bags. Bring a couple of gallon Ziploc bags that come in handy to keep your valuables dry especially your electronic gadgets. These are also important because any trash you take up needs to come back down with you.
Toilet paper. Not every public restroom is well-stocked at all times. And, in the unfortunate situation where you have no public restroom to use (a bad day considering the number of other climbers), it’s best to have some handy.
A small towel. Use for wiping your sweat or drying your hands after using the toilet.
4. Other things to consider:
Camera. Unless you’re a professional photographer commissioned to take photos of Mt Fuji, don’t bring your big heavy lenses and camera body here. Just use a compact camera like a mirrorless or your phone to take pictures.
External battery for your phone. Batteries suffer and discharge faster in cold temperatures and mountain huts don’t generally allow you to charge your electronic devices, so don’t forget an extra battery or external battery pack on hand. Aside from allowing you to taking photos, being able to contact emergency services is important at all times.
Balaclava or face cover. For sand, snow, and dust protection.
Cards. For playing with your friends or other guests inside a mountain hut.
Extra socks and shirts. If you’d like to change to the mountain hut.
Toiletries. Just limit it to toothbrush and toothpaste. There are no shower or onsens (hot spring) at the huts in Mt. Fuji.
First aid kit: You can build your own well-stock first-aid kit in a zip-lock bag or buy the entire kit but make sure to only carry essential items for mountain climbing. And don’t bring the bulky container that comes with it. Your first-aid kit should have gauze pads or sterile kit for minor cuts, medical tape, butterfly bandages, band-aids or adhesive bandages, disinfecting or antibiotic creams like Neosporin, over-the-counter pain medications and anti-diarrheal medication.
Insurance. Read our Japan travel essentials for we recommend travel insurance for travel in Japan.
Knee braces.
“I twisted my knee early on during my 2nd Fuji climb (remember that proverb?) and decided to finish the climb despite the intense pain because I forgot a knee brace to help alleviate some of the forces on my knees. Don’t be like me. Bring a brace or two to help if you know you have knee issues…”
~ shared by my husband.
What not to bring:
Sleeping bags. If you will stay at a hut, they provide sleeping bags and blankets.
Big heavy lenses and camera body. The weight can really add up. So only bring a compact or a mirrorless camera. If you have the latest version of GoPro, that’s a much better option since they’re now waterproof.
Laptop or iPads. These devices are easily broken on Mt. Fuji’s extreme weather changing conditions and just adds to the weight. Leave them.
How to Prepare for your Climb
We suggest starting out small before tackling Fuji-san such as doing some pre-climb training or hiking smaller mountains a month before you climb Fuji-san.
Here are some pre-climb preparation recommendations:
Cardiovascular exercises such as running or jogging.
Upper and lower body strength training such as squatting and weight lifting.
Tokyo alone has so many things to do and it’s mind-boggling. But don’t pay extra on-site when you can book online and see more for less.
So in this article, we’ll help you save some money as we cover some of the top attractions, tours, and cultural experiences in Tokyo that are actually cheaper when booked online.
1. Tokyo Skytree (Tembo Deck and Tembo Galleria Tickets)
Standing 634-meters tall, Tokyo Skytree is the largest tower in the world and offers breathtaking views of the metropolis. Located in the Sumida City Ward (near Asakusa) the Skytree is an active broadcast tower and popular tourist attraction, with a cafe and restaurant on the observation decks and shopping center and aquarium located at its base.
Tokyo Skytree is divided into two observatory floors — Tembo Deck (350m) and Tembo Galleria (450m) and you need to get a combo ticket to get to both.
Combo ticket price at the counter: ¥3,100 Weekdays; ¥3,400 Holidays Combo ticket online price: → ¥2,700
Before the Tokyo Skytree, Tokyo Tower was the iconic symbol of Tokyo. Tokyo Tower is divided into two observatory floors — the Main Deck (150m) and Top Deck (250m). But visiting the Main Deck is all you’ll need to view the entire Tokyo metropolis. The best time to visit the tower is right at sunset to watch the city come alive at night.
Main Deck ticket price at the counter: ¥900 Main Deck ticket online price: → ¥850
3. Sanrio Puroland
Sanrio Puroland is probably the most adorable indoor amusement park in Japan. Families with small children will especially benefit from its facility because it super baby-friendly, except that strollers are not really allowed inside. So don’t forget to bring a baby carrier with you when you visit. But Sanrio Puroland is not just for babies, kids at heart or people who grew up adoring Hello Kitty will absolutely love this place as well.
Before the Robot Restaurant show came along there was the Black Swan Lake Show. This show has been running for 40 years in Kabukicho, Shinjuku and is perhaps a better (and cheaper) alternative to Robot Restaurant show. It’s a “real” cabaret show and, unlike Robot Restaurant, they have friendlier performers that will actually try to entertain or talk to you on your table. You can watch the show itself for only ¥2,500 , but we recommend that this show is best enjoyed with an all-you-can drink plan.
Walk-in rate: ¥6,500 (+¥500 during December) Online price: → ¥6,000
5. Kimono Rental in Asakusa
Possessing the shitamachi atmosphere, Asakusa is the best place to wear a kimono while sightseeing in Tokyo. Starting at 2,500+ , you get to choose your kimono design and color from 3,000 selections. After selecting your kimono, your hair will be arranged by a Japanese hair stylist for that tidy and matching look, and a photo session is also included in the package! After which you are free to explore Asakusa on your own in a kimono. Just make sure to return it before the kimono shop closes.
6. Roppongi Hills Observation Deck Ticket with Mori Art Museum Admission
The Roppongi Hills Observation Deck offers a great photo opportunity of both the Tokyo Skytree and Tokyo Tower set against the city below. After which, you can visit the Mori Art Museum on in same building which features interesting cultural exhibits which changes every few weeks. By booking online, you’re not just getting a discount but you’re also skipping the line.
Price at the counter: ¥1,800+ Online price: → ¥1,500+
7. Tokyo Dome City and Space Museum
Tokyo Dome City is a fun attraction in the heart of Tokyo. Not only does it feature the Tokyo Dome stadium, which will be a venue for the Tokyo Olympics 2020, but there are so many fun attractions within it — amusements parks, shops, spas, museums and restaurants. Try riding the Thunder Dolphin, a signature ride with a top speed of 130 km/h!
Price at the counter: ¥5,920 Online price: → ¥3,000
8. The National Museum of Emerging Science and Innovation
The National Museum of Emerging Science and Innovation also known as “Miraikan” is an interesting museum for all ages. This science museum is huge and you’ll likely need to spend the entire day just to see everything. There are 3 permanent exhibitions here with the themes: “Explore the frontiers,” “Create your future,” and “Discover your Earth.” If you have kids interested in the Earth and our Solar System then this is where you’ll want to go.
Price at the counter: ¥620 Online discounted price: → ¥490
9. Go-karting in Asakusa and Roppongi
Before Nintendo sued them, their company was called MariCar where you could rent costumes such as Peach, Mario or Luigi and drive around the city in go-karts. But since the lawsuit, they’ve changed the name and costume line-up a bit. Driving around dressed as Batman or Pikachu isn’t so bad though!
Anyways, go-karting is actually one of fun ways to sightsee Tokyo with a go-kart and guide. There are several companies that offer go-karting in Tokyo. The one you probably hear the most is MariCar which is now called Samurai Kart since the rebranding. You can start from Asakusa or Roppongi.
Walk-in rate: ¥10,000 Online price for go-karting in Asakusa: → ¥7,000 Online price for go-karting in Roppongi: → ¥5,000
10. Private Tsukiji Fish Market Tour and Eat Sushi
Unaware to many, the Tsukiji Fish Market is actually still there. The only thing that moved was the tuna auction which is now located in Toyosu but the market admitted that it’s still working to invite people to visit their location. That’s because it’s now further away from the center of Tokyo than its previous location, and now in order to watch an auction, it’s required that you go with an accredited tour guide or agency.
Oedo Onsen Monogatari in Odaiba is a big hot spring facility which features a foot bath, rock salt sauna, hot spring with nano bubbles, and a really fun amusement area with restaurants and carnival games. The amusement area is the common area with “Edo town” feeling where people meet after the onsen and are dress in yukata. Baths are separated for men and women of course. So if you want to experience the Japanese bathing culture, then Oedo Onsen Monogatari is a great hot spring facility to experience it.
Walk-in rate: ¥2,720 or ¥2,936 if Saturday and Sunday Price online: → ¥2,693
12. LEGOLAND Discovery Center
This is a great place to take your LEGO-loving kids between 3-10 years old. Miniland, Duplo Village, and Ninjago City Adventure are just some of the many attractions you’ll find inside. They have several passes available, but, if you’re only visiting for a day, make sure to book it online because the walk-in rate is expensive at 2,400 per individual (age 3 and up).
NOTE: If you don’t have kids or you are not accompanied by a kid, you cannot enter LEGOLAND. One group must have at least one kid to enter.
Madame Tussaud is a fun realism wax sculpture museum which features international and Japanese celebrities. Madame Tussaud is located just next to LEGOLAND Discovery Center. So consider buying a Combo ticket if you want to experience both for 3,000 per person. Children 0-2 years old are free. Children age 3+ are full price.
Robot Restaurant is the most notable show in the heart of Tokyo’s most notorious red-light district, Kabukicho; which is just pure entertainment madness. Despite its name you don’t actually have to eat here. In fact, we don’t recommend that you do because the menu is pretty limited. The show itself is the main course and something you’ll never forget. That said, I wouldn’t pay for the full price for it, it’s a staggering 8,000 ! So thanks to their partners, you can buy a ticket at up to 45% off.
Joypolis is an indoor amusement park based on SEGA Games intellectual properties. It’s divided into 3-floors of attractions. There are lots of VR experiences, so VR lovers will especially love this amusement center. The coolest VR experience though is the ZERO Latency VR, which is an additional price of 2,000 and must be reserved in advance. Otherwise, get the Passport ticket if you plan on experiencing all the rides.
Maxell Aqua Park is a state-of-the-art adventure park in Shinagawa which features interactive touch-panel aquariums, illuminated tanks for a mesmerizing exploration of aquatic life, jellyfish exhibitions, and much more.
Frank is a local tour guide born and raised in Tokyo. He runs a blog called “5AM Ramen” where he writes about his favorite ramen experiences in Tokyo. To enjoy ramen to the fullest while learning the history and culture, join Frank’s tour and slurp a bowl of ramen per his recommendation on that day.
If you’re looking for the best pocket WiFi in Japan, then I have a secret to tell you. Based on what we’ve discovered, they’re ALL the same. Japan Wireless, Sushi WiFi, Fox WiFi, PuPuRu WiFi, Ninja WiFi, Global Advanced Communication, eConnect Japan, etc. — they are ALL from Softbank. Same speed, same features, same ISP (Softbank). Literally, the only difference is the price! So we’ve narrowed down the results to the three best-priced plans.
Key Takeaways:
The best and cheapest portable WiFi Hotspots rental in Japan is Sakura Mobile Pocket WiFi. They offer a 4G LTE unlimited data hotspot plan. Click here to reserve and for more information.
How to Get Wireless Internet Service in Japan
Japan has many wireless internet service providers (ISP) and the most popular are NTT DoCoMo, Softbank, and au by KDDI. These three are the local ISP giants and provide reliable internet connections throughout Japan.
However, getting an internet service directly through them is NOT possible for short-term tourists. As a result, you will need to rent a portable hotspot (known as pocket WiFi in Japan) or buy a Japanese data SIM card.
But we’re going to focus on portable hotspots because they’re extremely easy to get in Japan and don’t have phone incompatibility issues.
Booking Ahead vs On Arrival
From our experience, you should reserve your portable WiFi it at least 3 business days before your arrival in Japan. That way, it will be waiting for you at the airport or your hotel. It’s more expensive if you get it on your arrival at the airport kiosk, and there’s NO guarantee you’ll get one because they sell out, especially during peak seasons.
So any WiFi rental company using the term pocket WiFi for their portable hotspot router cannot be technically called “Pocket WiFi” if it uses an NTT DoCoMo or au by KDDI network. FYI.
Here are some tips & advice our readers and clients have found helpful for first-time travel to Japan:
Without the internet in Japan, all of these things become MUCH more difficult:
Navigating to and from your hotel or accommodation.
Utilizing the train, bus, and subway systems.
Communication with Japanese locals.
Navigation in general (Japan has hundreds of unnamed streets).
Relying on free and unsecured public hotspots poses security risks and it’s a hassle to find them while you’re trying to enjoy your time sightseeing. If you are staying at an Airbnb, their connection is not reliable. The previous occupants may have used up all the data; which happened to us every time. So having reliable internet access while traveling in Japan is important.
Portable WiFi vs. Data SIM Cards: Which is better?
Data SIM card is cheap, but make sure your phone is unlocked and it’s compatible. SIM cards also don’t often allow you to tether to other devices such as laptops.
To help you decide, here’s a comparison:
Portable WiFi device
Data SIM Cards
Usability
Can be connected to any device that supports WiFi.
Phone and some tablets only.
Battery
Needs to be charged to stay connected.
No charging is required.
Setup
Can be used right away.
Needs to be set up correctly.
Shareability
Can be shared with multiple devices.
Cannot be shared or tethered.
Pickup and Return Considerations
When ordering your pocket WiFi online, consider how you want it to be picked up and returned. Most rental companies have 3 convenient pickups and return options:
Airport
Hotel delivery
WiFi company’s office (usually in Tokyo)
Airport and hotel pickups (recommended): Double-check the opening hours of the rental company’s kiosk at the airport and see if it aligns with your arrival time. If you’re arriving in Japan outside of the kiosk opening hours, then it’s best to choose the hotel delivery pickup option.
Office pick-up: You may encounter a rental company that has a physical office in major cities like Tokyo. You need to take note of their opening and closing hours and be at least familiar with how to get to their office. I don’t recommend this option because going to their office is going to be an additional cost for you.
Returning: If you through the airport on your departure date, you again need to check their operating hours. Or you can choose the post office box return option. In my experience, it’s more convenient to return the device through a post office box as they’re practically everywhere in Japan.
NOTE: Staying at an Airbnb? Unfortunately, WiFi rental companies will not generally deliver to an Airbnb accommodation. This is because most Airbnb hosts don’t want to deal with picking up the package and you might end up not getting it.
3-Step Guide to Choosing the Best Pocket WiFi for You
Step 1: Assess what kind of user you are.
Many WiFi rental companies in Japan like to tout their pocket WiFi by flaunting their pricing along with the term “unlimited” and “fast” data speed. But the real deal here is how much data you typically use in a day.
So which are you?
Heavy data user – someone who watches videos, uploads multiple photos/videos on social media, and plays online video games while traveling to Japan.
Casual or light data user – someone who just uses Google maps and browses information about Japan, as needed.
Heavy data users
For example, my husband is a heavy internet user (super heavy). He will probably consume 2-3 GB a day just watching Youtube videos and uploading photos on our social media account. For a user like him, a pocket WiFi with at least 10-20GB of data throughout his stay won’t fail him. However, you may need to pay considerably more for that much data.
If you have kids who watch videos to entertain themselves while traveling in Japan, you’re also on the heavy user side. Plus, since you’re a family, you are probably sharing the connection through that device.
So you’ll probably need more GB data to survive your trip.
Casual data users
If you’re like me, who’s a casual user, who only looks at my phone to use Google Maps and navigate the train, or find an interesting restaurant to eat at, or read ebooks, then you don’t need super high GB data.
You can get away with an unlimited plan or 1GB a day or even less might even work for you. And it is usually way cheaper too.
Step 2: Get the router model that suits your needs.
We created this comparison chart of common wireless routers that can be rented in Japan. Look at the specifications carefully and see which one best suits your needs.
601HW
501HW
HWD11
303ZT
305ZT
FS030W
Aterm
MR04LN
Aria 2
Wireless Router Model
Brand
HUAWEI
HUAWEI
HUAWEI
ZTE
Fujisoft
NEC
Freetel
Rented by
Ninja
PuPuRu, eConnect Japan, H.I.S, and Japan Wireless
PuPuRu
Ninja
LightPocket and Sakura Mobile
Genki Mobile
Sushi Wi-Fi
Battery capacity
2,400mAh
3,000mAh
3000mAh
2,700mAh
3,060mAh
2,100mAh
2,300mAh
Continuous Communication Time (approx.)
6-8.5 hours
10 hours
9 hours
9 hours
20 hours
12 hours
17 hours
Network Speed
4G LTE/3G
4G LTE/3G
4G LTE/3G
4G LTE/3G
LTE/3G
LTE/HSPA+
4G LTE
Downlink / Uplink (best-effort speed)
187.5Mbps / 37.5Mbps
187.5Mbps / 37.5Mbps
75Mbps / 25Mbps
187.5Mbps / 37.5Mbps
150Mbps/50Mbps
150Mbps/50Mbps
150Mbps/50Mbps
WLAN version
IEEE 802.11 a/b/g/n/ac
IEEE 802.11 a/b/g/n/ac
IEEE 802.11 b/g/n
IEEE 802.11 a/b/g/n/ac
IEEE 802.11 a/b/g/n/ac
IEEE 802.11 a/b/g/n/ac
IEEE 802.11 a/b/g/n/ac
Weight
135g
150g
136g
150g
128g
111g
110g
Step 3: Start comparing plans and prices.
PuPuRu
Ninja
eConnect Japan
H.I.S
Japan Wireless
Plans and the router model
(excl. taxes and/or shipping fee)
Based on our test, PuPuRu and Ninja WiFi connection speed were outstanding and we never experienced any downtime. But that’s because we used it casually as it’s intended it to be.
We’d like to think that their unlimited plan is still capped somehow. But, at the time of writing, both pocket WiFi rental companies, so far, are the cheapest WiFi hotspot for rent in Japan for short term stays (10 days or less).
In terms of value for long-term use, we found that Ninja WiFi offers the cheapest plan if you’re renting the hotspot device for 11-30 days because of the flat-rate price of ¥7,000.
It says on their website that they offer unlimited data, however, based on our test and usage, the speed was average.
We like eConnect Japan’s full transparency and full disclosure of their plans and hotspot specifications. They’re the only company that does that.
Their basic 4G plan has 1GB data per day and comes with free 10GB data (11GB total) which is perfect for heavy data usage like watching videos or playing video games.
Plus, their service comes with free Power Bank mobile charger, and you can’t beat that feature set at its low price.
We’re not against WiFi companies that use the term “unlimited” for their WiFi rental plans. But, if they’re going to use it, they might as well indicate the Fair Usage Policy (FUP) on their websites. After all, the internet is a shared network environment and how you use it affects other internet users.
If a provider says “unlimited,” then that doesn’t mean it’s “ultra-fast speed and unlimited all the time.” It only means that you won’t lose the connection and can use the internet in an unlimited manner. However, there will be either data capping or bandwidth throttling imposed by the network provider (bandwidth throttling is when an ISP intentionally slows down the internet connection speed of a device).
With Fair Use Policies, ISPs will significantly reduce the download and upload speeds of a user who has passed their allotted data limit to ensure that others using the same network are not affected by heavy internet users. Because of this, a wireless plan at 500MB a day might be faster than an “unlimited” plan.
Caring for your portable device
For those who like to prepare for the worst, you can consider adding gadget insurance offered by the provider during the booking process to protect yourself if the device somehow gets broken.
That said, it’s usually an additional ¥300-¥400 per day, which is quite expensive on top of your mobile WiFi cost. So it’s up to you.
If you opt to go without it, then make sure to always keep your portable WiFi in a safe place inside your bag or backpack, and package it appropriately when returning it through a post office box.
Otherwise, you have to deal with the replacement fee if you lose or damage the device, which can be around ¥25,000-¥45,000!
Lastly, don’t use too much internet…
Remind yourself that you’re in Japan!
That it is much more enjoyable to put your phone down and just savor your time and the Japanese culture around you.
Try and keep your usage to navigation and photography, rather than spending your vacation glued to your phone.
We’ve finally visited all of the Fuji Five Lakes! It took a while to explore the areas around this lake. We couldn’t find any information online about activities around the area. So, after much procrastination, we decided to simply go there and find our own adventures.
Despite being the largest of all the five lakes it’s a very underdeveloped area. But we still had the feeling that there was something around it waiting for us to uncover. And it turns out that our hunch was right — Lake Yamanaka indeed has some surprises to share.
So in this trip report, we’re going to share the things we did and our exact itinerary during our overnight trip here.
Check out some of our articles about Fuji Five Lakes:
DAY 1 — We first stopped by Lake Kawaguchi for Mt. Tenjō Ropeway (also known as Kachi Kachi Ropeway). We’ve visited the Mt. Tenjo Ropeway before when I was still pregnant, but this time it was her daddy’s turn to carry her! I also decided we needed to hike up to the top instead of taking the ropeway (mwahaha, revenge is mine!).
We got lost a couple of times trying to find the “trail” and ended up walking back to the highway hoping to see the entrance to the trail, and we’re happy we did. Strangely enough, the trail signs call it “Ajisai (Hydrangea) Route” and give little other information. The name makes sense at least because the trail was really full of Hydrangeas.
Unfortunately for us though, it was off-season so the flowers were all dead which made it easy to miss. I imagine that this trail is beautiful during hydrangeas season in summer around June to July. Also, the tourist guide map told us to look for a “torii gate” and not the hydrangeas route. We saw the torii gate eventually, which was part of the small shrine called Tenjoyama Gokoku shrine, a shrine that was erected in memory of people who were killed during the Russo-Japanese war.
The hike to the top of Mt. Tenjo is about 900m but it felt like 1.5km for us because our toddler constantly wants to stop and pick up as many rocks as she can along the way. The highlight of this hike was the Nakabadaira observation area, which offered one of the best panoramic views of Mt. Fuji we’ve ever seen!
The Mt. Fuji view from Nakabadaira is something that a lot of people who ride the Kachi Kachi missed. It was beautiful–and made even more pristine due to the lack of people! They were all in the Kachi Kachi Ropeway observatory! We were so lucky this day, even the skies were clear so Mt. Fuji was very visible.
After we stopped to rest on one of the many benches and took several photos, we continued our trek to the peak of Mt. Tenjo, where the tourists flock. We cheated and went down Mt Tenjo via the ropeway and reached Lake Kawaguchi again in less than 15-minutes.
Check-in
Just so you know, we booked our accommodation in advance the day before our trip. The Fuji Marriott Hotel is actually around Lake Yamanaka, and while we could have stayed there for free, we chose an accommodation that’s family-owned because we always get the best hospitality from our experience. We ended up booking at Pension Cottontail. I got really curious about the pension because its photos from the outside looked really adorable, and since a western farmhouse looks completely out of place in Japan.
Dinner in 食楽酒房パパさん (Papasan Curry shop)
I have no idea how my husband manages to find such amazing places to eat in such unlikely places! This was AMAZING! And you’d never know it from the outside. I had the chicken katsu curry while Eric had the curry ramen with cheese (yup, that’s a real thing). The portions were massive, the food was incredible, the owners were very kind, and it was pretty inexpensive. Yeah, I really don’t have a lot more to say here. Just do yourself a favor and eat here!
Yamanakako Onsen Benifuji no Yu (Hot Spring)
Name a better way to relax after hiking and a whole lot of walking? Go on, I’ll wait… Well, normally this is the best way to relax. Turns out that a hyperactive toddler who doesn’t like being told ‘no’ can really make put that assertion to the test, haha! At least she (mostly) waited until the end to freak out.
The onsen here offered both indoor and outdoor baths and everything else that a regular onsen enthusiast would expect to find; like a sauna, steam room, various types of baths, and a restaurant, all at a pretty reasonable price. It was also one of the most crowded baths I’ve visited as well; probably because of the aforementioned price and tour groups. But that was the only real downside, so I still fully recommend giving this onsen a try after biking, hiking, or walking around the area! (Sorry, no photos)
Breakfast at Pension Cottontail
NEXT DAY — During breakfast, my husband and I had a lot of observation going on. As we ate our breakfast, our eyes were feasting around the interiors of the house, it was very adorable yet rustic farmhouse style, much like you’d find in the states. The pension, as the name implies, was inspired by the owner’s fascination with Peter Rabbit, thus Cottontail. We felt like we’re not in Japan. Outside of the house and its neighborhood reminded me of Maine too–logs, gardens, lumber, and a storage unit. I told my husband, it was the kind of house I wanted, cozy and warm.
The owners spoke English quite well, which gave me a chance to ask questions about the pension. I asked how long their pension was running; I asked this because the house looks new and very well maintained. So I was very surprised when he said it was in business for over 30 years (a long time for modern Japanese houses).
It was also surprising because, in Booking and JAPANiCAN, it was listed as “New Listing.” It finally made sense to me that they just got their property listed on English booking websites. They’re now on JAPANiCAN, Booking, and Expedia. So if you’re interested in experiencing our experience, you can book it through there.
The original price was $152 per night for all us three but we only paid $54 thanks to my credit card points. I know the original price is expensive! But that’s because the room we booked was supposed to be for a family of 5, which was the only room with a private toilet lol.
As an aside, I have to mention that, we had the best peanut butter there!! Oh my. Before we left the place, we had to ask the owner where in the world it came from. We thought it was homemade, but they said it was from a shop in Fujinomiya. We will get that peanut butter soon!
The pension house is also near Clover Ranch, an equestrian facility where you can learn horseback riding or watch a horse racing. So if you have kids interested in horses, this is a great place to take them. Our daughter is just too young for it, so we passed on the experience.
Bicycling around Lake Yamanaka
There’s a couple of places to rent a bicycle around Lake Yamanaka, but we chose the bicycle shop near the Asahigaoka Lakeside Greenspace Park because it looked like the main area for boating activities too. Apparently, the shop where we rented the bike is the oldest bicycle rental shop in Lake Yamanaka, opened in 1955.
We rented 2 bikes for 2 hours, one with a child seat to accommodate our daughter. The bikes were old but functioned well enough, and the staff was all very nice. The shop staff said the entire biking route around Lake Yamanaka was 14km, which was just short enough to cover in 2 hours.
The entire biking trail was really relaxing and we saw many interesting places along the way. Shops and restaurants that scream American countryside rather than Japanese lake. Trailer parks, wooden cabins for camping, and an interesting Hammock Cafe, all looking like you’re not in Japan. Indeed, Yamanaka has something really unique to offer that you won’t see Lake Kawaguchi.
Here’s the price for bicycle rental:
1 hour – ¥700
2 hours – ¥1,200
Half day (within 4 hours) – ¥1,700
1 day (4 hours or more) – ¥2,500
By the way, while researching this bike shop, I found that you could get 10% discount by printing this coupon. I cannot guarantee you though that it will work, but you might as well give it a try when going to Lake Yamanaka to rent a bike.
Our Hammock Cafe experience
We only saw the Hammock cafe upon ending our bike trip. The place looked really interesting and unique, so we decided to try it after we returned the bikes. Hammock Cafe is actually part of the Pica Yamanakako Village, a cottage resort that offers glamorous lakeside camping experience or “glamping.”
Hammock Cafe’s menu was very limited (and pricey). You can select from coffee or tea, then sandwich and their gelato. That’s it.
We both got drinks and we’ve got to be honest here, it was terrible. LOL. Really, nothing special. I guess we’re just paying for the hammocks. But we got our daughter gelato and it must have been good since she finished it.
Other than that, we still enjoyed the hammocks since they were very comfortable and relaxing! We could stay here all day!
Lunch at 浅間茶屋 山中湖畔店 (Asama Chaya)
After a lot of searching, we finally decided on houtou udon for lunch. Like most houto restaurants this one had a somewhat traditional feel to it. The udon was delicious but it was the sides (included with the set meal) that seemed to steal the show. The restaurant can get very busy as it seems to be a stop for group tours, and of course, we arrived during one of these tours so it took a while to be seated. I wish I could say more, but, to be honest, I can’t remember much about this place because our daughter was being VERY hyper, so we couldn’t fully enjoy ourselves.
Bottom Line
Lake Yamanaka was indeed a surprise for us. This was one of the first places we visited without a set itinerary and little to no information before arriving, and it actually worked out for the best.
So this is something we’ll definitely try again when visiting an unfamiliar place in Japan. It also really reinforces our belief that Japan is so much more than Tokyo, and to truly experience it you need to go off the beaten path to find what really makes Japan great!
You will see many general advice online on what to pack for Japan travel, from overstuffed high fashion wardrobe to minimalist capsule wardrobe. But the packing list for travelers visiting Japan is unique. At most basic level, two (2) things will dictate what you will pack for your trip: 1) Where in Japan you are traveling and 2) The weather you’d expect during your stay. Once this is determined, it will make packing lighter and much more manageable.
Travelers in Japan should expect rain at any time of the year, except when they visit Hokkaido. For detailed weather forecasts and earthquake information, go to Japan Meteorological Agency’s website at https://www.jma.go.jp/en/yoho/
What Should You Wear And Not Wear In Japan?
By now, you should be aware of the Japanese culture and traditions. A good traveler prefers not to look like a tourist in Japan and instead try to blend in. That is, at least as much as a foreigner can in a nearly homogeneous society. Leave your flip flops at home as they are considered very unstylish and underdressed by Japanese people unless you are going to the beach. However, in a somewhat weird contradiction, Crocs or foam clogs are considered perfectly acceptable.
Dressing inappropriately in public won’t work with Japanese people. In fact, Japan has strict dress code for many occasions. For women, avoid wearing spaghetti straps or blouses, or shirts with a plunging neckline. Avoid showing your shoulders when visiting temples or shrines. For men, wear a blazer or jacket when going to a restaurant or nightclub, especially if you plan to go to a fine dining restaurant or an upscale sushi bar. Some may tell you it’s okay since you are a foreign tourist, but Japanese people will respect you more if you abide if you dress appropriately. Avoid wearing all black. It’s strongly associated with funerals.
How To Pack Light in Japan
We all want to pack light when we travel so that our luggage doesn’t weigh us down as much as possible. Packing light also makes unpacking easier at the end of our journey.
Below are some tips to save space and weight in your luggage:
Leave your chunky or heavyweight sweaters and scarves at home. Cashmere sweaters and pashmina scarves are wonderful alternatives. They’re incredibly thin and lightweight for the level of warmth they offer.
For flexibility, pack a pair of black travel pants made of cotton and elastane fabric. They’re lightweight and dry out faster compared to jeans.
When packing your clothes, use the roll-out and put them in packing cubes like these ones to keep them compact and organized allowing for more luggage space.
When traveling between transitional seasons, pack a versatile jacket called 3-in-1 such as an interchangeable waterproof jacket with a removable liner that’s usually a fleece.
Only pack two pairs of shoes, dress shoes and your most comfortable walking shoes.
How To Travel Hands-Free in Japan
Most hotels in Japan have a check-in time of 3-4 p.m. If it’s an Airbnb or budget accommodation, they will often not allow you to store your bags. So you have three options to avoid walking around with all your luggage:
Luggage forwarding service. If you can’t pack light and have several pieces of luggage, you’re in luck. You can have your luggage delivered from the airport to your hotel, the same-day. Every airport in Japan has a luggage forwarding service or TA-Q-BIN, as the Japanese call it. Just look for the red sign, “Hand-Free Travel,” as they are the ones that will deliver the same day. Make sure the luggage being forwarded doesn’t have the items you need for traveling. The cost varies between ¥1,000-¥3,000 per bag, depending on the size and weight.
Coin lockers. Coin lockers are everywhere in Japan but can always be found at train stations. They come in small (¥300), medium (¥400), and large size (¥500-¥800), though the per-day prices may vary.
Luggage storage service. Another option is toleave your luggage at the Voyagin Office in Shibuya. There’s no size restriction. Their prices may change, and if it’s during the off-season, it can drop to ¥500 per day, so make sure to check the current price here.
Top 5 Essentials For Your Japan Packing List
There are specific instances that are somewhat unique to Japan that you’ll undoubtedly encounter. Above all, pack light and bring the most comfortable pair of slip-on walking shoes. You’ll understand more later as we progress, so let’s take a closer look.
The right luggage. A backpack or a duffel is the best luggage for travel in Japan. You can easily carry it up and down the stairs and at train and bus stations. Backpacks are preferred because you are going to encounter a lot of stairs in Japan. But if you need wheels to save your back, it’s best to get a wheeled backpack. Japanese trains and buses don’t have much space for large pieces of luggage, so if you have a backpack, please take it off when boarding and place it between your feet or on the overhead storage rack. An enormous suitcase will also take up a lot of precious space in your hotel rooms, which are small compared to western hotels. So pack light! Only take one piece of check-in luggage and a carry-on for your items. We have a guide to help you pick the best bags for you here.
A pair of comfortable shoes. When traveling in Japan, you’re going to walk a lot! Take your most comfortable pair of casual shoes for sightseeing, preferably with memory foam. They are beneficial in relieving pain and soreness. If you are traveling during the spring and summer seasons, take a waterproof pair. Many places in Japan also require you to take your shoes off, such as genkans (the entrance of a home), izakayas (Japanese bars), restaurants, ryokan (traditional Japanese inns), and temples. Slip-on shoes or simple-laced shoes will serve you well in these situations, so make sure your socks don’t have holes in them. Our favorite slip-on shoes are from the Skechers Go Walk series. Many tourists who traveled to Japan swore by the Skechers brand as well. If you plan to go to a fine dining restaurant or a business occasion, take your dress shoes.
A portable hotspot device or data SIM card. We cannot emphasize enough how important it is to have a reliable internet connection while traveling in Japan. If you haven’t reserved a portable hotspot device, book it here. If you’re traveling solo and short-term, it’s cheaper to get a data SIM card.
Cash. Despite being a very high-tech nation and being the host country of the 2020/21 Summer Olympics, Japan still relies heavily on cash for many transactions. Quick tip: Withdrawing cash from ATMs in Japan gives you a better rate than exchanging your currency for Japanese yen. After getting your luggage and getting through customs, make sure to pull out money inside the airport. You can withdraw cash from Japan Post ATM (JP Bank) and inside convenience stores such as 7-11, Lawson, Family Mart, or Ministop.
A prepaid IC card. Buying a reloadable prepaid IC card will make your travel in Japan so much easier and convenient. The primary purpose of IC cards is to avoid getting tickets from a ticket machine every time you ride a train. So you can simply swipe and go. You can use it to pay for buses and taxis and even some vending machines and convenience stores. You can purchase either a PASMO (by Tokyo Metro) or Suica IC card from any central train station. The initial cost is ¥1,000 (¥500 for card creation fee and the remaining ¥500 is ready for use). The ¥500 will be refunded if you return the card to the station office.
Japan Document Checklist
Due to the ever-changing circumstances and frequent travel updates for Coronavirus (COVID-19) travel restrictions, please follow the most recent directions from the Japanese Embassy in your country.
A valid passport and visa. Check your passport if it’s valid for at least 6-months and has a couple of blank pages. You should check with the Ministry of Foreign Affairs of Japan website if your nationality requires a Japan visa.
Travel insurance. COVID-19 has created a new normal for travelers, and in many countries, they make travel insurance with COVID-19 coverage mandatory. Before the pandemic, my US friends have used and recommended RoamRight. But in these changing times, it’s best to speak with your local travel agent to see which travel insurance provides COVID-19 coverage.
Flight tickets. If you’re planning on showing your flight tickets through your mobile, make sure you have downloaded a copy on your phone.
Hotel or Airbnb reservations. If you’re riding a taxi, it’s good to have your hotel’s address in Japanese. It’s also important to remember the nearest train station to your hotel so you’ll know where to go upon landing. Lastly, depending on where you’re coming from, having a hotel reservation could make your immigration time a bit smoother.
Japan Rail Pass (JR Pass). If you are traveling extensively in Japan for 7, 14, or 21 days, consider buying a JR Pass online. You can only buy the JR Pass outside Japan and through an authorized online distributor. To activate and use it, you need to exchange your email voucher at a JR office at the airport or main train stations. To learn more about JR Pass and whether it’s for you or not, click here.
Airport to hotel transfer reservation. If you don’t have the JR Pass, book your transfer from the airport to your hotel. Not only will it save you time and money, but it’ll make your arrival easy and hassle-free. It’s more comfortable and convenient to take a shuttle transfer from the airport rather than train based on our experience. These shuttles will drop you off directly at your hotel or a train station near your hotel.
Debit cards and credit cards. To save money, bring a credit card that doesn’t have foreign transaction fees. And a debit card that reimburses international ATM fees. Make sure to contact your bank about your travel plans to avoid disruptions with your card.
Passport and credit card photocopies. In case of emergencies like losing your passport or credit cards, it’s good to have copies of your passports and credit cards in your email or on your phone. All you have to do is take a picture of your passport’s bio page and your credit card’s front and back photos using your phone. Do this for your entire family traveling as well.
Confirmation tickets in Japan. If you book tours or activities, make sure to save the confirmation email on your phone or have it printed out if required by the travel agency. In Tokyo, we highly recommend booking a Mt. Fuji day tour, local food tours, tickets to Ghibli Museum, or Grand Sumo Tournament. If you’re visiting Universal Studios Japan in Osaka, it’s essential to book your tickets online as they sell out quickly at the gate.
International Drivers Permit. If you plan to rent a car or go-karting, you need an International Drivers Permit or a Japanese driver’s license to drive in Japan.
Gadgets and Electronics
Electronics. Tablets, mobiles, laptops, cameras, etc., do not check these in. Get a carry-on bag that is big enough for your electronics but still within your airline’s requirement. Check out a list of international flight-approved carry-on bags here or consider an underseat luggage.
e-Reader. Carrying books will only increase the weight of your luggage. An e-Reader such as a Kindle would allow you to read your favorite books. That’s if you find the time too!
Chargers.
Power plug adapter. Japan uses Type A and Type B plugs and sockets, just like in the U.S. and Canada. If you’re not from North America, get a universal power adapter, preferably with Type A & B sockets, we recommend this one.
Personal Care and Toiletries
Vitamins and supplements. If you have one.
Jet lag remedies. These jet lag relief pills are beneficial if you’re coming from a different time zone.
Prescription medications. Some common prescriptions and over-the-counter drugs in the United States are illegal in Japan. Notable decongestants such as Sudafed and stimulants such as Adderall are illegal. It does not matter if you have a valid U.S. prescription for a medicine/drug illegal in Japan: if you bring it with you, you risk arrest and detention by the Japanese authorities. For more information, click here.
Toiletries. I’ll leave this up to you since each individual varies. If you have a preferred choice of shampoo, conditioner, body wash, deodorant, etc., it is best to bring it with you. It is not likely that you would find the same brand in Japan. It may also be challenging to find similar products because the ingredients are in Japanese. For liquids, pack them into squeezable TSA-approved leak-proof travel containers like this one.
Noise-canceling headphones or earphones. For added comfort, you can get a pair of noise-canceling headphones like this.
Lip balm. I find the travel-sized petroleum jelly works best than Chapsticks.
Effective hand sanitizers. Bring a travel size one.
Optional Items But Recommended
Coin purse. You can easily find these in 100 yen stores in Japan, but if you already have one, bring it with you as you will get a lot of coin change.
Power bank. Your mobile phones are going to be running throughout the day because of continuous connectivity. Power banks are expensive in Japan and only provide a small mAh capacity, so get it from your home country. Our favorite power bank is this one. You may also consider the newer model with an enormous mAh capacity.
Collapsible water bottle. Tap water in Japan is safe to drink, and you can find drinking fountains pretty much everywhere. Taking them with you is not only good for the environment, but you will save you a ton of money during your sightseeing journey in Japan. Collapsible water bottles are affordable in Walmart and Amazon.
A spare packable bag. To avoid buying additional luggage while in Japan, which can be expensive, make sure to pack a spare bag. Souvenirs, Japanese instant noodles, milk tea, weird Kit Kat favors, and chuhai — if you fall in love with Japan’s flavors or culture, you will need extra storage space! To view our recommended duffle bags, click here.
What Not To Bring To Japan
Meat products, plants, fruits, and vegetables.
Firearms and pocket knives.
Illegal drugs and narcotics. For more information, click here.
Umbrella. These are very cheap to get in convenience stores in Japan.
When I planned my first ever trip to Japan in 2009, there weren’t many travel blogs that shared “personal” travel tips for first-timers.
Japan travel guidebooks are great, but they lack a personal touch and really only give you general information about Japan. Plus, they quickly lose their relevance since they can’t be updated without buying a newer edition.
Because of these factors, I had to learn from experience (embarrassing mistakes). By the way, you might want to check out our 10-day Japan itinerary here that’s REALLY “ideal” for first-timers!
So these are the first time travel tips I wish I knew before going to Japan:
Planning your First Trip to Japan
1. Only buy JR Pass if you plan to travel a lot.
I’ve seen friends fall into the trap of buying this and ended up not getting their money’s worth. Only purchase the JR Pass if you plan to travel extensively across Japan (e.g. traveling from Tokyo – Osaka – Kyoto – Hiroshima – Tokyo).
2. Fly into Haneda Airport.
Narita Airport is much further from the center of Tokyo – about 2-hours away – whereas Haneda is only 20-30 minutes away.
If you do end up flying into Narita, we recommend booking your transfer from Narita to central Tokyo and back in advance. We have put together all the best ways to transfer to Tokyo center from Narita Airport on our Tokyo travel guide here.
Here are our recommended airfare search engines for finding cheap flights to Japan:
3. Avoid visiting during the cherry blossom season (seriously).
While cherry blossoms are undeniably beautiful, it is humid and rainy and the cost of everything is high with it being a peak travel season as well.
October to December is an ideal time to visit. The weather might be cold and dry, but the skies are clear, and there’s little rain or snow. If you’re in Tokyo, the chances of seeing Mt. Fuji during these months are also quite high.
4. Hotel is a better option than Airbnb in Japan.
Airbnb is a popular option for travel, but we don’t recommend it for Japan. The prices may be cheaper but and they’re always located out of the way, far from a train station. If you’re a large family or traveling in a large group, then Airbnb can be a great way to save.
Here are our recommended booking sites for hotels in Japan:
While saving some money by staying further away from a station might seem tempting, the extra time and money it could cost you to get to the station usually outweighs the money saved. If you’re traveling with a JR Pass, be sure your hotel is near is a JR Line.
6. Leave your huge 4-wheeled spinner suitcase behind.
For maximum convenience (using lockers, taking a flight of stairs, etc.), bring a luggage bag that can either convert into a backpack or is narrower than the typical 4-wheeled spinner suitcase.
A towel is an immensely important tool in Japan as many restrooms don’t offer paper towels, and restaurants often don’t give out napkins.
9. Bring a collapsible water bottle.
Tap water in Japan is safe to drink and will save you a lot of money. Consider bringing a foldable water bottle to save space and with a built-in purifier to improve the taste.
10. Don’t forget to get an International Driver’s Permit (IDP) if you’re renting a car or riding a go-kart.
An IDP translates your driver’s license into multiple languages and allows you to rent a car in Japan. For American’s, be sure to get yours directly from either AAA or AATA. They are the only certified groups allowed to issue these permits. Any other company claiming to is simply middlemen and are likely scamming you.
11. Reserve a pocket WiFi or data SIM.
Navigation, period. Japan’s streets don’t have names, so navigating those streets and the train systems is nearly impossible without the aid of Google maps (or other map gps application). Finding free internet WiFi can be a real hassle, so renting a hotspot is basically a requirement.
12. Book or reserve attractions or restaurants in advance.
There are many quirky “attraction” restaurants in Japan. Kawaii Monster Cafe and Robot Restaurant in Tokyo are two famous examples (but we actually find them tourist traps).
Attractions like these are better experienced when you book in advance. You’re more likely to get preferred seating and can skip the long lines for tickets.
Here are our helpful articles when sightseeing in Tokyo:
13. Avoid exchanging your currency cash to Japanese yen at the airports.
Instead, withdraw Japanese yen from ATMs using your card. You’ll get better exchange rates this way.
TIP: Use a credit card that doesn’t have foreign transaction fees and a bank card that reimburses international ATM fees.
14. Avoid taxis whenever possible.
Taxis in Japan are expensive. Fares can range between ¥500-¥800 for the first 2km (just over a mile). Uber exists, but they’re far more expensive. Stick on using trains and buses, or walking to get around Japan.
15. Try to make use of a luggage forwarding service.
Luggage forwarding service in Japan is called Ta-Q-Bin. Just drop off your luggage at a Yamato Transport, 7-Eleven, or your hotel concierge. Delivery is usually next-day or days.
16. Lots of walking involved.
Wear some comfy slip-on shoes because, despite the incredible transportation system, you’ll be spending most of your day walking to and from train stations and tourist destinations. Be sure to soak your feet in a bath after a long day!
Essential tips when sightseeing in Japan
17. Expect some squat toilets.
You may still come across a few of these traditional Japanese squat toilets, particularly in rural areas or old shops.
18. Separate your garbage.
This is especially important if you stay in an Airbnb. The host will give you instructions on how to dispose of your garbage. Be courteous and do your part.
19. Carry a small trash bag with you.
Japan doesn’t have trash cans. Okay, that’s a bit hyperbolic, but they’re few and far between You’re most likely to find them at convenience stores, but you’ll seldom see them on the street. So bring something to take your garbage in.
20. Carry a coin purse.
All currency in Japan below 1000 yen ($10) is coin, and you’ll acquire a lot of it during your stay. Losing a few coins could equate to $10 or $20 easily. If you can’t find one before you arrive, you can find a cheap coin purse in any convenience store.
21. Japan is very family-friendly.
If you’re traveling with children, rest assured that many public spaces in Japan have appropriate and clean child facilities.
Department stores have diaper changing areas, nursing rooms, and clean drinking water.
Here are our helpful resources when traveling Japan with a baby:
22. If you see a long line at restaurants, don’t bother.
The line has more to do with marketing; sometimes because of a famous advertisement, and often because a TV personality or other celebrity ate there and suggested it.
23. Join a group of local tours if you’re traveling alone.
Japanese people are some of the most welcoming and friendly people in the world and will always be willing to help you. However, not all areas in Japan are safe to ask.
For instance, if you’re in a red-light district like Kabukicho, it isn’t wise to ask for directions. The good areas to ask for help are the train stations and police boxes (koban).
25. Get down to the basements of department stores.
There’s a world of culinary delights to explore in these underground sections, known in Japanese as depachika. You’ll find beautiful displays of delicious foods in stores like OIOI (pronounced ‘Marui’), Matsuya, and Takashimaya.
26. Wander into 100 yen stores.
These “dollar stores” are ubiquitous – from Daiso to Seria to CanDo. Unlike in some countries, products here are often of high quality and can be decidedly un-tacky. Be aware that with VAT, products are actually 110 yen (Japan tax has increased to 10% starting October 1, 2019).
27. Visit a Don Quijote Store.
I LOVE Don Quijote stores! Each time I step in I would spend hours inside. Don Quijote allows for tax-free shopping as long as you have your tourist passport.
Think of it as a labyrinth of any product youw could ever imagine — a crazy jungle of clothes, cosmetics, gadgets, food, drinks, toys, homeware, etc.
28. Don’t forget to look up!
Particularly in larger cities like Shinjuku in Tokyo or the Dotombori street in Osaka, restaurants and other stores are built skywards. You will often find delicious restaurants tucked away on higher floors.
29. Know the difference between a temple and a shrine.
Japan has two main religions: Buddhism and Shintoism. Buddhism is practiced at temples. Shintoism is practiced at shrines.
You can recognize a temple by Buddha statues, incense burning in metal pots, and a pagoda. While a shrine by the massive torii gate, stone shisha or lion-dogs that guard either side of the entrance, and a well or fountain for purification.
30. Experience Japanese bath culture.
Onsen (hot spring) is an ingrained part of Japanese bath culture. There is some etiquette to be aware of before partaking in this activity.
Before entering the bath, wash thoroughly with soap and shampoo in the shower area, and don’t let touch your hair fall into the bathwater. And unfortunately for many foreigners, many onsens don’t allow tattoos.
31. Have fun with the Japanese toilets.
In both private homes and public bathrooms, toilets often have very advanced technology. Lids that automatically open as you approach, heated seats, audio of running water (to cover up any sounds), and the all-important bidet! Japanese toilets are also dual flush. Choose either a large flush (大) or half flush (小).
32. Vending machines can be fun too.
Located in practically every conceivable nook and cranny, and even on top of remote mountains! Vending machines stock warm and cold drinks, soups, a myriad of coffee, energy and soft drinks, water… the list goes on. Some vending machines also have free Wi-Fi.
33. Convenience stores are not your average one-stop-shop.
Known in Japanese as kombini, these stores are everywhere and open 24/ The main stores include 7-11, Family Mart, Daily Yamazaki, and Lawson. They stock everything you could want, from hot and cold food, sushi, bentos, and desserts.
34. Eat Japanese street food!
Yakisoba, taiyaki, yakitori, okonomiyaki. They’re just delicious!
35. If you accidentally leave your belonging somewhere, don’t panic.
Japan is a very safe place and it’s most likely to be where you left it or chances are, it will be handed into the nearest koban (police station).
36. Smoke at designated areas.
Smoking in the main streets is prohibited in Japan. Some restaurants still allow smoking. Ask to be in the non-smoking area if this is what you prefer.
37. A tip when eating a restaurant with no English menu.
Restaurants with no English menu usually have a plastic food display outside or photos on the menu. Just point to either the food display outside or photo.
38. Slurp loudly when eating ramen.
Slurp loudly!
In Japan, it’s a way of enhancing the flavor of the noodle and a way of telling the restaurant that they have really good noodles.
39. Don’t eat while walking.
Food is meant to be enjoyed and savored, not scarfed down on your way to the subway. So this is considered rude in Japan, don’t do it. Burping in public is also bad manners.
40. Absolutely no tipping!
Tipping in Japan can even be considered rude. If you leave a tip, the staff might think you’ve forgotten your change and bring it back to you.
Japan steps their bathing game up substantially by making shower rooms actual rooms. So feel free to sit down and relax in the shower after a long day of sightseeing.
Enjoy your travel to Japan!
Japan is a beautiful country and gives you memories that will last a lifetime. If you have questions or anything you wish to add, feel free to leave your comments below!